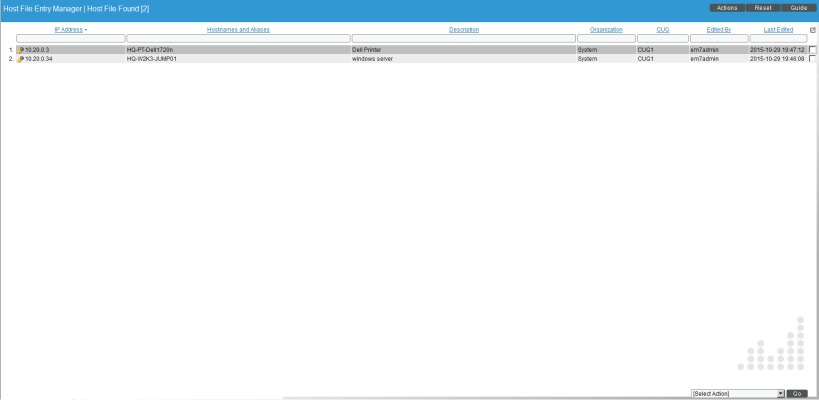
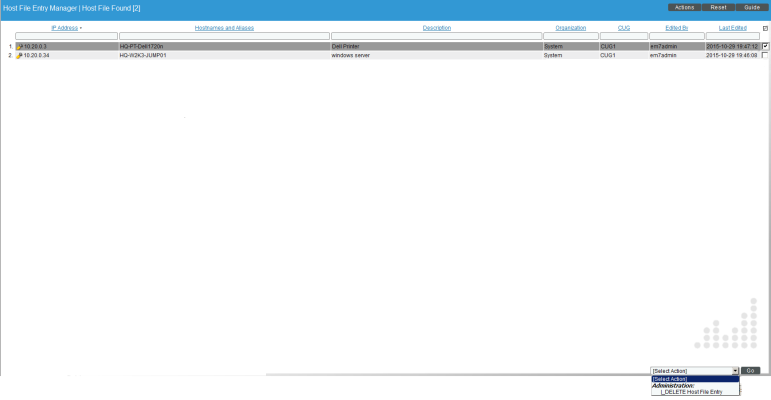
The Host File Entry Manager page allows you to edit and manage host files for all of the Data Collectors from a single page in the SL1 system. When you create or edit an entry in the Host File Entry Manager page, SL1 automatically sends an update to every Data Collector in the specified Collector Group.
The Host File Entry Manager page is helpful when:
- The SL1 system does not reside in the end-customer's domain
- The SL1 system does not have line-of-sight to an end-customer's DNS service
- A customer's DNS service cannot resolve a host name for a device that the SL1 system monitors
You can create host file entries for each device managed by the SL1 system. You can create duplicate host file entries, one for each Collection Group, to ensure that all Collection Groups can resolve all host names for monitored devices.
Use the following menu options to navigate the SL1 user interface:
- To view a pop-out list of menu options, click the menu icon (
).
- To view a page containing all the menu options, click the Advanced menu icon (
).
This
Viewing the List of Host Entries
To view the list of host entries, perform the following steps:
- Go to the Host File Entry Manager page (System > Customize > Host Files).
- The Host File Entry Manager page displays the following about each host entry:
- IP Address. The IP address to resolve with the host name.
- Hostnames and Aliases. The host name to align with the specified IP address. You can also include a space-delimited list of aliases for the host name.
- Description. Description of the host entry.
- Organization. Organization associated with the host.
- CUG. The Collector Group to which SL1 will send the host entry. The host entry will be added to the host file on each Data Collection Server in the Collector Group.
- Edited By . User who created or last edited the host entry.
- Last Edit. Date the host entry was created or last edited.
Creating a New Host Entry
To create a host file entry:
- Go to the Host File Entry Manager page (System > Customize > Host Files).
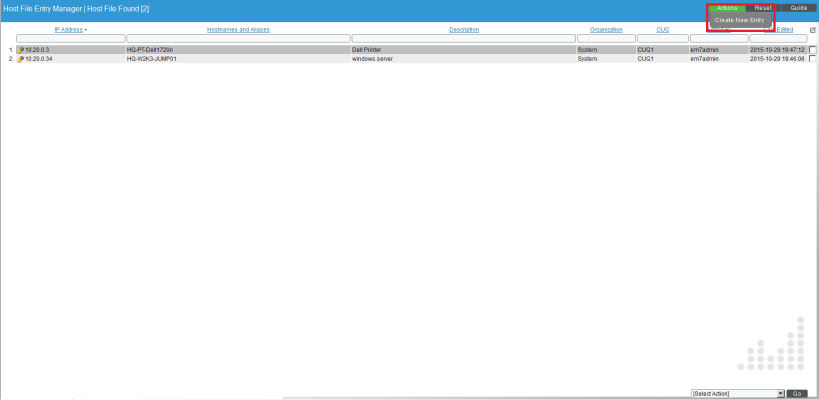
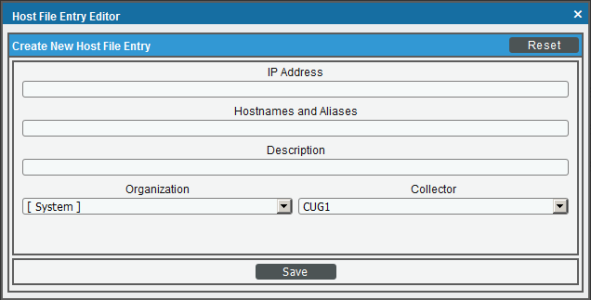
- Click the menu and choose Create New Entry. The Create New Host File Entry modal page appears.
- In the Create New Host File Entry modal page, supply values in the following fields:
- IP Address. The IP address to resolve with the hostname.
Server hostnames should be aligned to external IP addresses when supporting Network Address Translation (NAT) environments.
- Hostnames and Aliases. The hostname to align with the specified IP address. You can also include a space-delimited list of aliases for the host name.
- Description. Description of the host entry. This field is not written to the host file. This field is for administrators to use when managing host file entries.
- Organization. Organization associated with the host. You can select from a list of all existing organizations. This field is not written to the host file. This field is for administrators to use when managing host file entries. For example, a service provider could assign each customer its own organization and then use this field to manage host file entries for each customer.
- Click the button to save the new host entry.
Editing a Host Entry
To edit a host entry, perform the following steps:
- Go to the Host File Entry Manager page (System > Customize > Host Files).
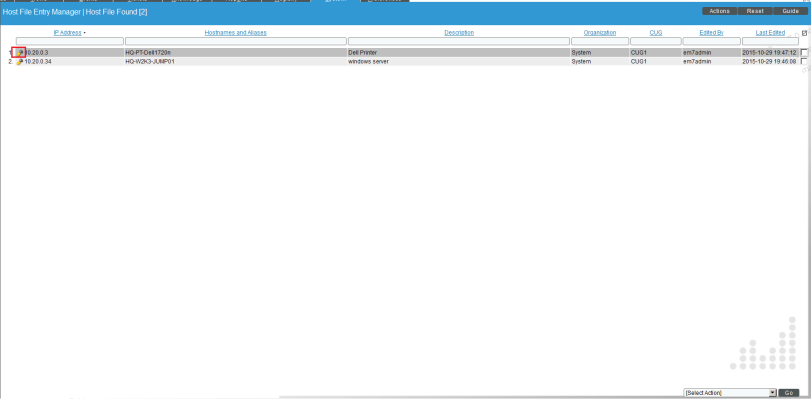
- Click the wrench icon (
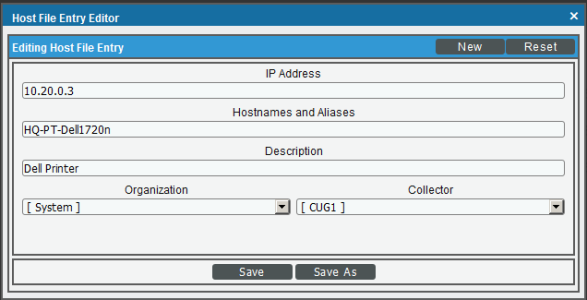
 ) for the host file entry you want to edit. The Editing Host File Entry modal page appears, populated with values from the selected host file entry.
- In the Editing Host File Entry modal page, you can edit one or more of the following fields:
- IP Address. The IP address to resolve with the host name.
- Hostnames and Aliases. The host name to align with the specified IP address. You can also include a space-delimited list of aliases for the host name.
- Description. Description of the host entry. This field is not written to the host file. This field is for administrators to use when managing host file entries.
- Organization. Organization associated with the host. You can select from a list of all existing organizations. This field is not written to the host file. This field is for administrators to use when managing host file entries. For example, a service provider could assign each customer its own organization and then use this field to manage host file entries for each customer.
- Click the button to save your changes.
Using an Existing Host File Entry to Create a New Host File Entry (Save As)
To create a new host entry, using an existing host entry as the template:
- Go to the Host File Entry Manager page (System > Customize > Host Files).
- Click the wrench icon (
 ) for the host file entry you want to edit. The Editing Host File Entry modal page appears, populated with values from the selected host file entry.
- In the Editing Host File Entry modal page , you can edit one or more of the following fields:
- IP Address. The IP address to resolve with the host name.
- Hostnames and Aliases. The host name to align with the specified IP address. You can also include a space-delimited list of aliases for the host name.
- Description. Description of the host entry. This field is not written to the host file. This field is for administrators to use when managing host file entries.
- Organization. Organization associated with the host. You can select from a list of all existing organizations. This field is not written to the host file. This field is for administrators to use when managing host file entries. For example, a service provider could assign each customer its own organization and then use this field to manage host file entries for each customer.
- Click the button to save your changes as a new host file entry. A pop-up message appears, asking if you want to save your edits as a new entry. Click the button.
Deleting One or More Host Entries
To delete one or more host entries, perform the following steps:
- Go to the Host File Entry Manager page (System > Customize > Host Files).
- Select the checkbox (
 ) for each host file entry you want to delete.
 - Click the Select Action field in the lower right, then select DELETE Host File Entry. Click the button.
