You can align a ticket with an event and with an element. You can also create parent-child relationships between tickets. Ticket alignment can be helpful if you have multiple tickets with the same issue, or have multiple events that can be handled with one ticket.
You can also align a ticket with a product or service and track the hours worked on a ticket.
Use the following menu options to navigate the SL1 user interface:
- To view a pop-out list of menu options, click the menu icon (
).
- To view a page containing all the menu options, click the Advanced menu icon (
).
This
Parent-Child Relationships
SL1 allows you to align tickets in parent-child relationships. You can create parent-child relationships when there are multiple tickets for a single issue, or if multiple tickets are related or interdependent. Keep in mind when creating parent-child relationships that:
- When the parent ticket is resolved, all children tickets might be automatically resolved as well if the parent ticket's queue is configured to do so.
- Moving the parent ticket to another queue has no effect upon the children tickets.
- Changing the severity of the parent ticket has no effect upon the children tickets.
- Except for "resolved", changing the status of the parent ticket has no effect upon the children tickets.
- Likewise, changing the queue, changing the severity, and changing the status of a child ticket have no effect upon the parent ticket.
To create a parent-child relationship between tickets, you must first decide which ticket will be the parent and which ticket(s) will be the child. After this is complete:
- Go to the Ticket Console page ( tab).
- In the Ticket Console page, find either the parent ticket or the child ticket. If you are going to assign multiple children to a single parent ticket, it is easiest to select the parent ticket.
- Click the wrench icon for that ticket (
 ). The Ticket Editor page appears.
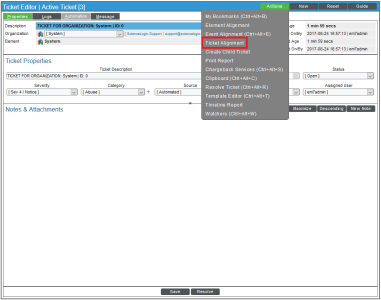
 - In the Ticket Editor page, click the menu and select Ticket Alignment.
- The Ticket Alignment modal page appears.
- The Ticket Alignment modal page features a list of tickets in the system. To define a ticket as the parent ticket of the current ticket, click the building blocks icon (
 ). The ticket will now appear in the Parent Ticket field. To remove a parent ticket from the current ticket field, click its bomb icon (
 ).
). - To assign single or multiple tickets as child tickets, select their checkbox(es). To remove a child ticket from the current ticket, deselect its checkbox.
- When you have finished aligning tickets, click the button. Repeat steps 1-7 for each ticket you want to designate as a parent or child ticket.
- When a ticket has a parent ticket, the Ticket Console page displays the building blocks icon (
 ) in the far right column. Clicking on the icon displays details about the parent ticket.
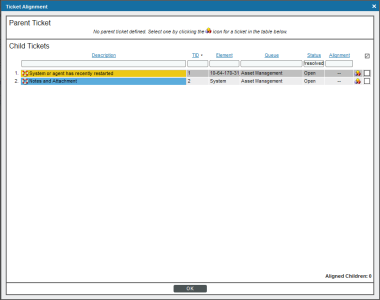
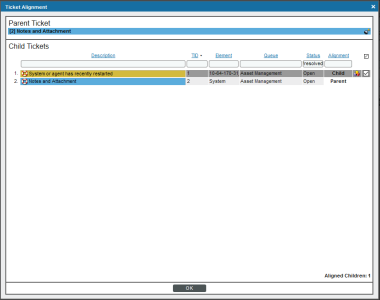
NOTE: The Element column displays the name of the entity (frequently a device) associated with this ticket. The Alignment column informs you of whether a ticket is a parent of the current ticket, a child of the current ticket, or does not have a parent-child relationship.
You can also create a new ticket as a child ticket to a currently opened ticket. To do so:
- Go to the Ticket Console.
- In the Ticket Console page, find the parent ticket. Select the wrench icon (
 ) for the ticket.
 - In the Ticket Editor page, select the [Actions] menu and choose Create Child Ticket.
- SL1 creates a new ticket:
- The read-only field Parent Ticket references the name of the parent ticket.
- By default, the Description field is set to New Ticket.
- By default, the Status field is set to Open.
- All remaining fields have the same values as the parent ticket.
- You can edit the values in each field of the child ticket.
Event Alignment
SL1 allows you to associate an existing ticket with an event, even if the ticket was not originally created from an event. This is helpful when you want to automatically clear an event when a ticket has been resolved. You can also change the event associated with an existing ticket.
If a ticket addresses multiple events, you might find it helpful to align the ticket with multiple events. When the ticket is resolved, SL1 can automatically clear the selected event(s).
To align a ticket with one or more events:
- Go to the Ticket Console page ( tab).
- In the Ticket Console page, find the ticket you want to align with an event. Select its wrench icon (
 ). The Ticket Editor page appears.
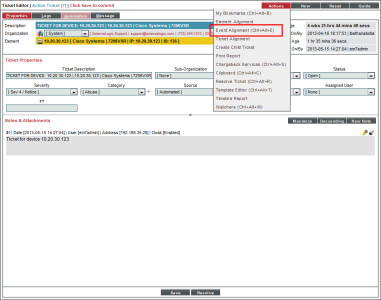
- In the Ticket Editor page, select the menu and choose Event Alignment.
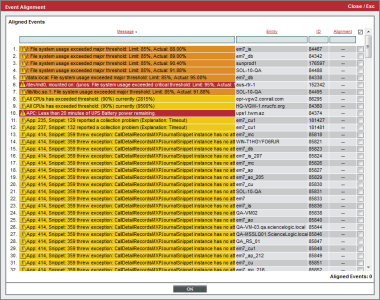
- The Event Alignment modal page appears.
- The Event Alignment page displays a list of all active events in SL1. From this list, you can select one or more events to align with the current ticket.
- Select the button to save your changes to the ticket.
- The Ticket Editor page will now display a value in the read-only field Aligned Events with an Event (
 ) icon. Selecting this icon will display details about the event(s) aligned with the ticket.
Element Alignment
SL1 allows you to align an existing ticket with an element, or change the current element aligned with a ticket. This can be helpful if, for example, a ticket is created on a device, but you also want to associate the interface with the ticket.
To align an existing ticket with an element:
- Go to the Ticket Console page ( tab).
- Find the ticket you want to align with an element. Select its wrench icon (
 ). The Ticket Editor page appears.
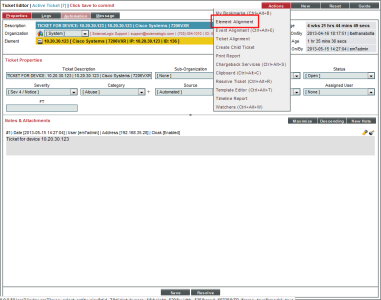
 - In the Ticket Editor page, select the menu and choose Element Alignment.
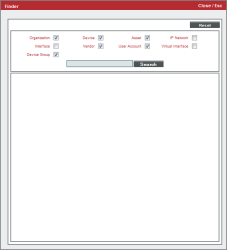
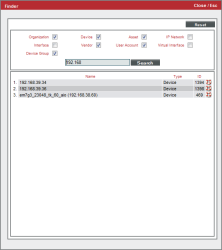
- The Finder modal page appears.
- The Finder modal page contains a list of all element types with checkboxes. To search for a specific type of element, select the checkbox for that element's type. You can select more than one element type to search for.
- In the Search field, enter a string to match against element names. Select the button to display the results.
- To align an element with the ticket, select the life ring icon (
 ).
). - The Ticket Editor page appears, with the new element displayed in the read-only Element field.
Chargeback Service
SL1 includes a tool that allows you to align a ticket with a product or service and then track the hours worked on a ticket. The combination of product or service plus the number of hours worked make up a chargeback service. Possible product or service offerings can be found in the Product Catalog page (Registry > Business Services > Product Catalog). When you align a chargeback service with a ticket, SL1 automatically adds a note to the Notes & Attachments pane. You can also generate a Quick Report on chargeback services for each organization (Reports > Create Reports > Quick Report > Ticket Billing). You can use this Quick Report to create a bill for each organization.
To add chargeback time to a ticket:
- Go to the Ticket Console page ( tab).
- Find the ticket for which you want to create a chargeback service. Select its wrench icon (
 ). The Ticket Editor page appears.
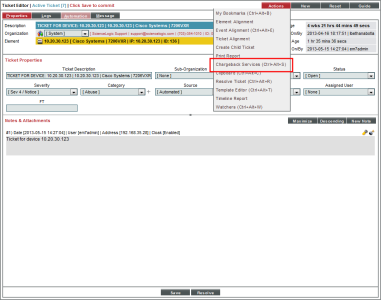
- In the Ticket Editor page, select the menu and choose Chargeback Services.
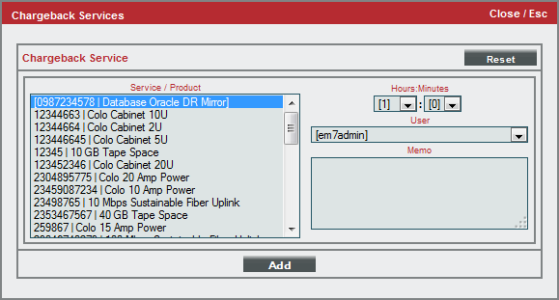
- The Chargeback Service modal page appears.
- The Chargeback Service modal page contains the following fields:
- Service/Product. This drop-down list contains a subset of the product SKUs defined in the Product Catalog page (Registry > Business Services > Product Catalog). To select a service/product, highlight it.
- Hours:Minutes. Designate the amount of billable time spent working on this ticket. This drop-down list contains units of billable hours. The entries in this drop-down list are defined in the Select Objects Editor page (System > Customize > Select Objects).
- User. The user that worked on the ticket. This drop-down list contains a list of all users in SL1. By default, the field is populated with the current user's login.
- Memo. You can provide a note on the work that you did, or anything else necessary for the customer to know. Can be up to 100 characters in length.
- To add the chargeback service to the ticket, select the button. To reset the fields in the Chargeback Service modal page without saving your changes, select the button.
