When actions are applied to tickets, such as a change in the ticket's status, a log message is generated. Users can create an Event Policy to have an event occur each time a log message is generated. This
Use the following menu options to navigate the SL1 user interface:
- To view a pop-out list of menu options, click the menu icon (
 ).
). - To view a page containing all of the menu options, click the Advanced menu icon (
 ).
).
Event Policies
Events are messages that are triggered when a specific condition is met. For example, an event can signal that a server has gone down, a device is exceeding CPU or disk-space thresholds, or communication with a device has failed, or it can simply display the status of a managed element.
SL1 generates log messages both from incoming trap and syslog data, and also when SL1 executes user-defined policies. SL1 then uses these log messages to generate events. SL1 examines each log message and compares it to each event definition. If a log message matches an event's definition, SL1 generates an event instance and displays the event in the Event Console page.
For more information about events, see
Event Policies from Tickets
In order to start receiving events from tickets, you need to create an Event Policy. There are six sources of events:
- Syslog. Message is generated by the syslog protocol. Syslogs can be sent by devices and proxy devices like MoMs. A syslog is an unsolicited message from a device to SL1. Syslog is a standard log format supported by most networking and UNIX-based devices and applications. Windows log files can be converted to syslog format using conversion tools.
- Internal. Message is generated by a ScienceLogic process.
- Trap. Message is generated by an SNMP trap. SNMP traps can be sent by devices and proxy devices like MoMs. An SNMP trap is an unsolicited message from a device to SL1. A trap indicates that an emergency condition or a condition that merits immediate attention has occurred on the device.
- Dynamic. Message is generated by a Dynamic Application alert.
- Email. Message is generated by an email message sent to SL1.
- API. Message is generated by inserting a message into the main ScienceLogic database. These messages can be inserted by a snippet automation action, a snippet Dynamic Application, or by an external system.
The source of the events generated from tickets will be Internal. To create an Event Policy for tickets:
- Go to the Event Policy Manager page (Registry > Events > Event Manager).
- Click the button. The Event Policy Editor page appears. The Event Policy Editor page contains three tabs:
- Policy. Allows you to define basic parameters for the event. This tab is described in the following section.
- Advanced. Allows you to define pattern-matching for the event and also define event roll-ups and suppressions.
- Suppressions. Allows you to suppress the event on selected devices. When you suppress an event, you are specifying that, in the future, if this event occurs again on a specific device, the event will not appear in the Event Console page or the Viewing Events page for the device.
- Under the Policy tab, enter values in the following fields:
- In the Event Source field, select Internal.
- In the Operational State field, select Enabled.
- In the Event Severity field, select Notice.
- In the Policy Name field, provide a name for your Event Policy.
- In the Event Message field, enter "%M". Click the button.
- Click the Advanced tab. In the Link-Message field, select the log message from which you want to create an event. The options are:
- Ticket Assigned
- Ticket Created
- Ticket Escalated
- Ticket Moved to Queue
- Ticket Resolved
- Ticket Resurrected
- Ticket State Changed
- Ticket Status Changed
- Ticket Updated
- When you have selected the log message for your Event Policy, click the button.
You will now need to create an Action Policy and an Automation Policy to define the automatic actions that you want to be executed in response to the ticket event. An Automation Policy defines the event conditions that will trigger the automatic action, while the Action Policy defines that action.
For more details on Automation Policies and Action Policies, and how to define them in SL1, see
Example Policy
This example will walk you through the creation of an Event Policy that will create an event when a ticket is resurrected.
Creating the Event Policy
To create the Event Policy:
- Go to the Event Policy Manager page (Registry > Events > Event Manager).
- Click the button. The Event Policy Editor page appears.
- Under the Policy tab, enter these values in the following fields:
- In the Event Source field, select Internal.
- In the Operational State field, select Enabled.
- In the Event Severity field, select Notice.
- In the Policy Name field, enter "Ticketing Event Policy".
- In the Event Message field, enter "%M". Click the button.
- Click the Advanced tab. In the Link-Message field, select the log message from which you want to create an event. We selected Ticket Resurrected.
- When you have selected the log message for your Event Policy, click the button.
Creating the Action Policy
To create an action policy, perform the following:
- Go to the Action Policy Manager page (Registry > Run Book > Actions).
- In the Action Policy Manager page, click the button.
- The Action Policy Editor modal page appears.
- In the Action Policy Editor page, supply a value in each field. For all types of action policies, the first four fields are the same. For this example:
- In the Action Name field, we entered the name "Ticket Policy: Email Bryan".
- In the Action State field, we selected Enabled.
- In the Description field, we entered "Email Bryan".
- In the Organization field, we selected System.
- In the Action Type field, we selected Send an Email Notification.
- In the Available Emails field, we selected banderton: banderton@sciencelogic.com, then clicked the button to move it to the Assigned Emails field.
- We left the rest of the fields at their default value and clicked the button to save the Action Policy.
Creating the Automation Policy
To create the automation policy:
- Go to the Automation Policy Manager page (Registry > Run Book > Automation).
- In the Automation Policy Manager page, click the button. The Automation Policy Editor page appears.
- In the Automation Policy Editor, supply values in the following fields:In the Automation Policy Editor, supply values in the following fields:
- In the Policy Name field, we entered "Example Ticket Resurrection".
- In the Policy Type field, we selected Active.
- In the Policy State field, we selected Enabled.
- In the Organization field, we selected the System organization.
- In the Criteria Logic fields, we entered the following values:
- In the Severity Operator field, we selected Severity >=.
- In the Severity field, we selected Healthy.
- In the Elapsed time field, we selected and 5 minutes has elapsed,.
- In the Status field, we selected and event is NOT cleared.
- The Match Logic field is optional, so we left it at its default value.
- The Match Syntax field is optional, so we left it blank.
- In the Repeat Time field, we selected Only Once.
- In the Align With field, we selected Devices. The Available Devices field will appear below, where you can select devices to associate with the automation policy.
- In the Trigger on Child Rollup field, we did not select the checkbox.
- In the Include events for entities other than devices (organizations, assets, etc.) field, we selected the checkbox.
- In the Aligned Devices field, we left the value as (All Devices).
- In the Available Events field, we selected Notice: Ticketing Event Policy and then clicked the button to move it to the Aligned Events field.
- In the Available Actions field, we selected Send Email: Ticket Policy: Email Bryan and then clicked the button to move it to the Aligned Actions field
- Click the button to save the Automation Policy.
Testing the Event Policy
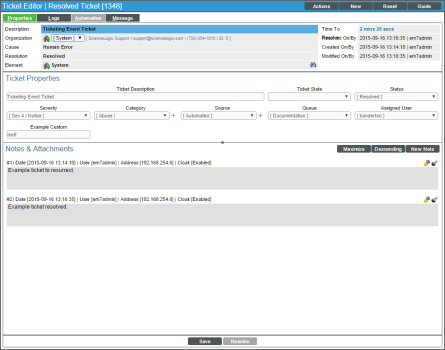
To test this Event Policy, we created a ticket that we resolved:
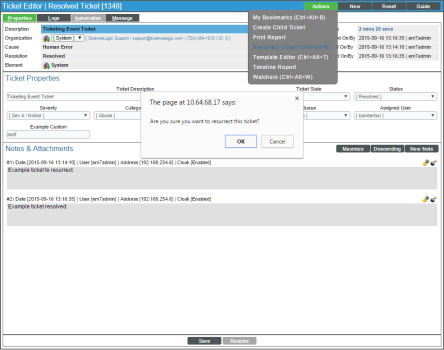
After resolving the ticket, we resurrected the ticket in order to create the event:
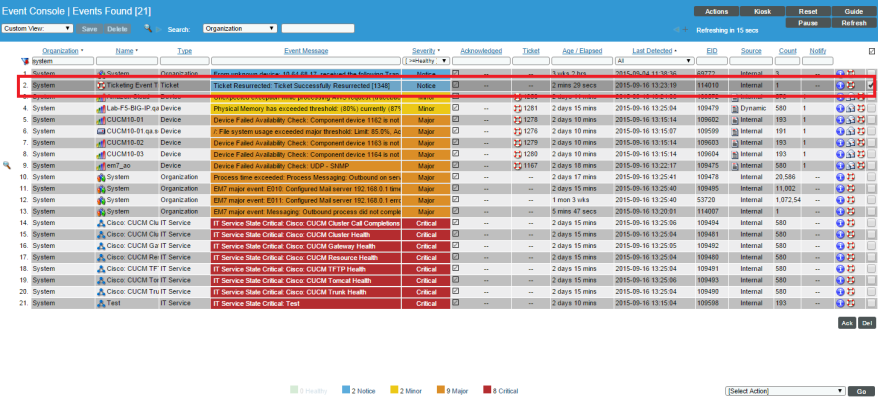
After Resurrecting the ticket, the Event appears in the Event console:
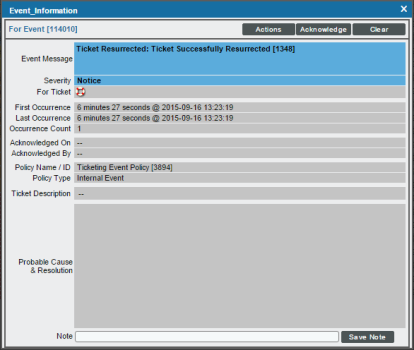
If you click on the information icon (![]() ) of the event, you can see the Event Information page:
) of the event, you can see the Event Information page:
The ticket is now resurrected, and an email will be sent to the associated address to notify the user of the resurrection.


