![]()
The following sections describe how to configure Windows Server 2022, 2019, 2016, 2012, or 2012 R2 for monitoring by SL1 using PowerShell:
Prerequisites
Before configuring PowerShell, ensure the following:
- Forward and Reverse DNS should be available for the target Windows server from the SL1 Data Collector. Port 53 to the domain's DNS server should thus be available.
- When using an Active Directory user account as the SL1 credential, port 88 on the Windows Domain Controller, for the Active Directory domain, should be open for Kerberos authentication.
- If encrypted communication between the SL1 Data Collector and monitored Windows servers is desired, port 5986 on the Windows server should be open for HTTPS traffic. If unencrypted communications is being used, then port 5985 on the Windows server should be opened for HTTP traffic
- If multiple domains are in use, ensure that they are mapped in the [domain_realm] section of the Kerberos krb5.conf file on the Linux operating system of the SL1 collector appliance.
Configuring PowerShell
To monitor a Windows Server using PowerShell Dynamic Applications, you must configure the Windows Server to allow remote access from SL1. To do so, you must perform the following general steps:
- Configure a user account that SL1 will use to connect to the Windows Server. The user account can either be a local account or an Active Directory account.
For ease of configuration, ScienceLogic recommends using an Active Directory account that is a member of the local Administrators group on the Windows Server.
- Configure a Server Authentication Certificate to encrypt communication between SL1 and the Windows Server.
- Configure Windows Remote Management.
- Optionally, configure a Windows server as a Windows Management Proxy.
If you are configuring multiple Windows servers for monitoring by SL1, you can apply these settings using a Group Policy.
- Optionally, you can increase the number of PowerShell Dynamic Applications that can run simultaneously against a single Windows server.
Step 1: Configuring the User Account for the ScienceLogic Platform
To enable SL1 to monitor Windows servers, you must first configure a user account on a Windows Server that SL1 can use to make PowerShell requests. You will include this user account information when
To configure the Windows Server user account that SL1 can use to make PowerShell requests, complete one of the following options:
- Option 1: Create an Active Directory Account with Administrator access
- Option 2: Create a local user account with Administrator access
- Option 3: Create a non-administrator user account
For ease-of-configuration, ScienceLogic recommends creating an Active Directory user account.
After creating your Windows Server user account, depending on your setup and the servers you want to monitor, you might also need to configure the user account for remote PowerShell access to the following server types:
Option 1: Creating an Active Directory Account with Administrator Access
For each Windows server that you want to monitor with PowerShell or WinRM, you can create an Active Directory account that is a member of the local Administrators group on each server. For instructions, consult Microsoft's documentation. On Windows Domain Controller servers, you can use a domain account that is not in the Domain Administrators group by following the configuration instructions for Option 3: Creating a Non-Administrator User Account.
After creating your Active Directory account:
- If you use SL1 to monitor Microsoft Exchange Servers, you must configure the user account for remote PowerShell access to Microsoft Exchange Server.
- If you use SL1 to monitor Hyper-V Servers, you must configure the user account for remote PowerShell access to the Hyper-V Servers.
- Otherwise, you can skip the remainder of this section and proceed to Step 3.
Option 2: Creating a Local User Account with Administrator Access
If you have local Administrator access to the servers you want to monitor and are monitoring Windows Server 2016 or Windows Server 2012, you can alternatively create a local user account with membership in the Administrators group instead of an Active Directory account. For instructions, consult Microsoft's documentation.
This method does not work for Windows Server 2008.
After creating your local user account with Local Administrator access:
- If you use SL1 to monitor Microsoft Exchange Servers, you must configure the user account for remote PowerShell access to Microsoft Exchange Server.
- If you use SL1 to monitor Hyper-V Servers, you must configure the user account for remote PowerShell access to the Hyper-V Servers.
- Otherwise, you can skip the remainder of this section and proceed to Step 2.
Option 3: Creating a Non-Administrator User Account
If you do not have Local Administrator access to the servers that you want to monitor with PowerShell or WinRM, or if the monitored Windows server is a Domain Controller that will not be in the local Administrators group, then you must first create a domain user account or create a local user account on the Windows Server. For instructions, consult Microsoft's documentation.
After creating your domain user account or local user account:
- You must configure the Windows servers to allow that non-administrator user access. To do so, follow the steps in this section.
- If you use SL1 to monitor Microsoft Exchange Servers, you must also configure the user account for remote PowerShell access to Microsoft Exchange Server.
- If you use SL1 to monitor Hyper-V Servers, you must also configure the user account for remote PowerShell access to the Hyper-V Servers.
To configure Windows Servers to allow access by your non-administrator user account:
- Start a Windows PowerShell shell with Run As Administrator and execute the following command:
winrm configsddl default
- On the Permissions for Default window, click the button, and then add the non-administrator user account.
- Select the Allow checkbox for the Read (Get, Enumerate, Subscribe) and Execute (Invoke) permissions for the user, and then click .
- Access the Management console. To do this:
- In Windows Server 2016 and 2012, right-click the Windows icon, click , and then expand .
- Right-click on and then select Properties.
- On the WMI Control Properties window, click the tab, and then click the button.
- Click the button, and then add the non-administrator user or group in the Select Users, Service Accounts, or Groups dialog, then click .
- On the Security for Root window, select the user o group just added, then in the Permissions section at the bottom of the window, select the Allow checkbox for the Execute Methods, Enable Account, and Remote Enable permissions.
- Under the Permissions section of the Security for Root window, click the button.
- In the Advanced Security Settings window, double-click on the user account or group you are modifying.
- On the Permission Entry window, in the Type field, select Allow.
- In the Applies to field, select This namespace and subnamespaces.
- Select the Execute Methods, Enable Account, and Remote Enable permission checkboxes, and then click several times to exit the windows opened for setting WMI permissions.
- Restart the WMI Service from services.msc.
To open services.msc, press the Windows + R keys, type "services.msc", and then press Enter.
- If this is a member server, go to the Management console, go to System Tools > Local Users and Groups > Groups. Right-click on Performance Monitor Users, then select Properties.
- If this is on a domain controller, go to the Server Manager, go to the Tools menu, and click Active Directory Users and Computers. Locate the Builtin folder. Inside the Builtin folder right-click Performance Monitor Users, and then select Properties.
- On the Performance Monitor Users Properties window, click the button.
- In the Enter the object names to select field, type the non-administrator domain user or group name, and then click .
- Select the user or group name from the list and then click .
- In the Performance Monitor Users Properties window, click .
- Perform steps 15-20 for the Event Log Readers user group and again for the Distributed COM Users user group, the Remote Management Users user group, and if it exists on the server, the WinRMRemoteWMIUsers__ user group.
- If you intend to use encrypted communications between the SL1 collector host and your monitored Windows servers, each Windows server must have a digital certificate installed that has "Server Authentication" as an Extended Key Usage property. You can create a self-signed certificate for WinRM by executing the following command:
$Cert = New-SelfSignedCertificate -CertstoreLocation Cert:\LocalMachine\My -DnsName "myHost"
- Add an HTTPS listener by executing the following command:
New-Item -Path WSMan:\LocalHost\Listener -Transport HTTPS -Address * -CertificateThumbPrint $Cert.Thumbprint –Force
This command should be entered on a single line.
- Ensure that your local firewall allows inbound TCP connections on port 5986 if you are going to use encrypted communications between the SL1 collector(s) and the Windows server, or port 5985 if you will be using unencrypted communications between the two. You may have to create a new rule on Windows Firewall if one does not already exist.
Optional: Configuring the User Account for Remote PowerShell Access to Microsoft Exchange Server
If you use SL1 to monitor Microsoft Exchange Servers:
- Follow the steps in the section Configuring the User Account for SL1.
- Add the new user account to the “Server Management” Exchange security group in Active Directory.
- The user account will then be able to connect to the relevant WinRM endpoint to use cmdlets installed with the Exchange Management Shell. For example, this will give the user account access to the cmdlet “Get-ExchangeServer”.
Optional: Configuring the User Account for Remote PowerShell Access to Hyper-V Servers
To use PowerShell Dynamic Applications to monitor a Hyper-V server, you must:
- Create a user group in Active Directory
- Add the user account you will use to monitor the Hyper-V server to the group
- Set the session configuration parameters on the Hyper-V Server
- Set the group permissions on the Hyper-V Server
- Create a PowerShell credential using the new user account
Creating a User Group and Adding a User in Active Directory
To create a group in Active Directory and add a user:
- In Active Directory, in the same DC as the Hyper-V host you want to monitor, in the OU called Users, create a group. For example, we called our group PSSession Creators.
- Add a user that meets the requirements for monitoring a Windows server via PowerShell to the group. This is the user that you will specify in the PowerShell credential.
For details on using Active Directory to perform these tasks, consult Microsoft's documentation.
Setting the Session Configuration Parameters and Group Permissions
To set the Session Configuration and the Group Permissions on the Hyper-V Server:
- Login to the Hyper-V server.
- Open a PowerShell session. Enter the following command:
Set-PSSessionConfiguration -ShowSecurityDescriptorUI -Name Microsoft.PowerShell
- When prompted, select A.
- The Permissions dialog appears.
- In the Permissions dialog, supply values in the following fields:
- Group or user names. Select the name of the group you created in Active Directory.
- Permissions for group. For Full Control (All Operations), select the Allow checkbox.
- Click the button.
Creating a PowerShell Credential
To create a PowerShell credential using the new user account, follow the instructions in the
Creating a PowerShell Credential
To create a PowerShell credential using the new user account, follow the instructions in the Creating a PowerShell Credential section.
Optional: Configuring the User Account for Access to Windows Failover Cluster
To configure Windows Servers to allow access to your Windows Failover Cluster:
- Start a Windows PowerShell shell with Run As Administrator and execute the following command:
'Grant-ClusterAccess -User <domain>\<user> -ReadOnly'
Step 2: Configuring a Server Authentication Certificate
ScienceLogic highly recommends that you encrypt communications between SL1 and the Windows Servers you want it to monitor.
If you have created a local account on the Windows Server that uses Basic Auth and that account will allow communication between SL1 and the Windows server, the best practice for security is to enable HTTPS to support encrypted data transfer and authentication. To do this, you must configure WinRM to listen for HTTPS requests. This is called configuring an HTTPS listener.
For details on configuring WinRM on your Windows servers to use HTTPS, see https://support.microsoft.com/en-us/help/2019527/how-to-configure-winrm-for-https.
The sections below describe how to configure a Server Authentication Certificate on the Windows Server. This is only one task included in configuring an HTTPS listener. However, not all users need to configure a Server Authentication Certificate. You can find out if your Windows computer has a digital certificate installed for Server Authentication by running 'Get-ChildItem -Path Cert:\LocalMachine\My -EKU "*Server Authentication*"' from a PowerShell command shell.
To support encrypted data transfer and authentication between SL1 and the servers, one of the following must be true:
- Your network includes a Microsoft Certificate server. In this scenario, you should work with your Microsoft administrator to get a certificate for your Windows Server instead of configuring a self-signed Server Authentication Certificate. You can skip this section and proceed to Step 3.
- Your network does not include a Microsoft Certificate server. In this scenario, you must configure a self-signed Server Authentication Certificate on the Windows Server that you want to monitor with SL1 using one of the following methods:
- Option 1: Use the Microsoft Management Console.
- Option 2: If your Windows Server includes Windows Software Development Kit (SDK), you can use the makecert tool.
- Option 3: If you are running PowerShell 4.0 or later, you can use the New-SelfSignedCertificate and Export-PfxCertificate commands.
If you have created an Active Directory user account on the Windows Server to allow communication between SL1 and the server, Active Directory will use Kerberos and AES-256 encryption to ensure secure authentication.
Option 1: Using the Microsoft Management Console to Create a Self-Signed Authentication Certificate
To use the Microsoft Management Console to create a self-signed certificate:
- Log in to the Windows Server that you want to monitor with SL1.
- In the Start menu search bar, enter "mmc" to open a Microsoft Management Console window.
- Select , then Add/Remove Snap-Ins. The Add or Remove Snap-ins window is displayed:

- In the Available snap-ins list, select Certificates.
- Click the button. The Certificates snap-in window is displayed:

- Select Computer account.
- Click the button.
- Click the button.
- In the Add or Remove Snap-ins window, click the button.
- In the left pane of the Microsoft Management Console window, navigate to Console Root > Certificates (Local Computer) > Personal.
- Right-click in the middle pane and select All Tasks > Request New Certificate.... The Certificate Enrollment window is displayed.
- Click the button. The Select Certificate Enrollment Policy page is displayed.
- Select Active Directory Enrollment Policy.
- Click the button. The Request Certificates page is displayed.
- Select the Computer checkbox.
- Click the button.
- After the certificate is installed, click the button.
Option 2: Using the MakeCert Tool to Create a Self-Signed Authentication Certificate
If your Windows system includes Windows Software Development Kit (SDK), you can use the MakeCert tool that is included in the kit to create a self-signed certificate. For information on the MakeCert tool, or for details about creating a self-signed certificate with MakeCert and installing the certificate in the Trusted Root Certificate Authorities store, see the Microsoft documentation.
Option 3: Using PowerShell Commands to Create a Self-Signed Authentication Certificate
If your Windows system includes PowerShell 4.0 or later, you can use the following PowerShell commands to create a self-signed certificate:
- You can use the New-SelfSignCertificate command to create a self-signed certificate. For information on New-SelfSignCertificate, see the Microsoft documentation.
- You can use the Export-PfxCertificate command to export the private certificate. For information on the Export-PfxCertificate, see the Microsoft documentation.
Step 3: Configuring Windows Remote Management
To provide SL1 remote access to the Windows Servers you want to monitor, you must configure Windows Remote Management.
This step is required regardless of the user account type that SL1 will use to connect to the Windows Server.
There are three ways to configure Windows Remote Management:
- Option 1: Use the script provided by ScienceLogic.
- Option 2: Manually perform the configuration.
- Option 3: Use a group policy.
Option 1: Using a Script to Configure Windows Remote Management
ScienceLogic provides a PowerShell script in a .zip file in the PowerPack download folder that automates configuration of Windows Remote Management and permissions required for the user account that will be used in the SL1 credential. The script configures all of the base Windows permissions required, except for opening up Windows Firewall ports for HTTP and/or HTTPS traffic. The configuration performed by the script is useful primarily for running collection with the Microsoft: Windows Server, Microsoft: Windows Server Event Logs, and Microsoft: SQL Server Enhanced PowerPacks. (Microsoft: SQL Server Enhanced requires further instance-specific permissions. See the
To use the PowerShell script, perform the following steps:
- When you download the Microsoft: Windows Server PowerPack from the ScienceLogic Support site, a .zip file for the WinRM Configuration Wizard Script (winrm_configuration_wizard_v3.4.ps1) will be in the folder with the PowerPack's EM7PP file.
- Unzip the downloaded file.
- Using the credentials for an account that is a member of the Administrator's group, log in to the Windows server you want to monitor. You can log in directly or use Remote Desktop to log in.
- Copy the PowerShell script named winrm_configuration_wizard_v3.4 to the Windows server that you want to monitor with SL1.
- Right-click on the PowerShell icon and select Run As Administrator.
- At the PowerShell prompt, navigate to the directory where you copied the PowerShell script named winrm_configuration_wizard_v3.4.
- At the PowerShell prompt, enter the following to enable execution of the script:
- After the warning text, select Y.
- To run the script with interactive dialogs, enter the following at the PowerShell prompt:
- If you start the script without using the -silent command-line argument, the WinRM Installation Wizard modal appears. Click .
- The Windows Account Type modal appears. Select the appropriate choice for your environment.
- The Set Encryption Policy modal appears. Select the appropriate choice for your environment.
- Click YES to us only encrypted data. Click Yes to configure an HTTPS listener for using encrypted communications between the SL1 collectors and the Windows server. Setting up an HTTPS listener requires a digital certificate with Server Authentication EKU to be available on the server. For information on creating a self-signed certificate, see Configuring a Server Authentication Certificate.
- Click NO to allow unencrypted data. For communication between SL1 collectors and the Windows server, if unencrypted traffic is allowed, an HTTP listener will be configured for communication.
- The Change Max Requests modal appears. Click .
- The Change IdleTimeout modal appears. If you would like to change the value of IdleTimeout, click . If you click , the Set WinRM IdleTimeout modal appears. Enter the new value in the field and click .
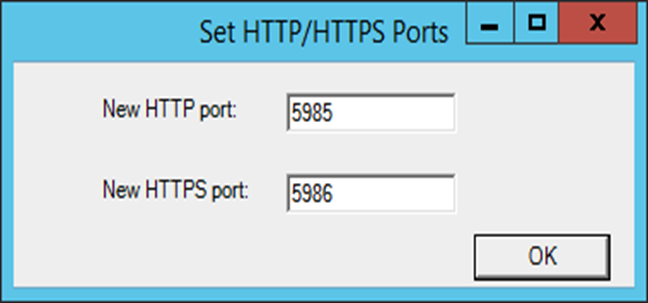
- The Set Ports for WinRM Traffic modal appears, and it shows the current settings for the HTTP and HTTPS ports. If you want to make a change to these, click ; otherwise, click to continue.
- Choose which port values you would like SL1 to use when communicating with the Windows server.
- The Set HTTPS Thumbprint modal appears. Enter the information for your certificate thumbprint, which is used to create an HTTPS listener, then click .
- The Confirm Settings modal appears. If the settings are as you specified, click .
- The Complete modal appears. If the settings are correct, click .
- Exit the PowerShell session.
Set-ExecutionPolicy -ExecutionPolicy Unrestricted -Scope Process -Force
NOTE: The execution policy setting persists only during the current PowerShell session.
NOTE: If your Windows configuration requires further steps to allow execution of the script, PowerShell will display prompts. Follow the prompts.
.\winrm_configuration_wizard_v3.4.ps1 -user <domain>\<username>
NOTE: If you have run the script previously and set HTTPS listeners, make sure you have deleted any previous HTTPS listeners with the following command: winrm delete winrm/config/Listener?Address=*+Transport=HTTPS
The user account you wish to use for SL1 collection must be specified with the -user command-line argument regardless of other arguments used. You can obtain the full help for the PowerShell configuration script by entering the following:
help .\winrm_configuration_wizard_v3.4.ps1 -full
The most common way to run the script is silently:
.\winrm_configuration_wizard_v3.4.ps1 -user <domain>\<username> -silent
NOTE: If you have multiple certificates installed on your server, running the script with the -silent flag will by default use the first certificate it encounters for your HTTP/HTTPS listeners. To set a specific certificate, run the script without the -silent flag and use the WinRM Installation Wizard.


If the certificate structure for your certificate thumbprint is incomplete or incorrect, an error message appears indicating that the WinRM client cannot process the request. If you think you made an error, click and try to correct it. Otherwise, contact a system administrator for help.


Option 2: Manually Configuring Windows Remote Management
To configure a Windows server for monitoring via PowerShell directly, perform the following steps:
- Log in to the server with an account that is a member of the local Administrators group, or a Domain Administrator's account if on a Windows server with the Domain Controller role installed.
- Ensure that your local firewall allows inbound TCP connections on port 5986 if you are going to use encrypted communications between the SL1 Data Collectors and the Windows server, or port 5985 if you will be using unencrypted communications between the two. You may have to create a new rule on Windows Firewall if one does not already exist.
- Right-click on the PowerShell icon in the taskbar or the Start menu, and select Run as Administrator.
- Execute the following command:
- If the output is "Restricted", execute the following command:
- Enter "Y" to accept.
- Execute the following command:
- Enter "Y" to accept.
- If you are configuring this Windows server for encrypted communication, execute the following command:
- Enter "Y" to accept.
- Execute the following command:
- In the Service section, if the parameter AllowRemoteAccess is set to false, execute the following command:
- In the Winrs section, if the parameter AllowRemoteShellAccess is set to false, execute the following command:
- If you are configuring this Windows server for unencrypted communication and the parameter AllowUnencrypted (in the Service section) is set to false, execute the following command:
- If you are configuring this Windows server for unencrypted communication, verify that "HTTP = 5985" appears in the DefaultPorts section.
- If you are configuring this Windows server for encrypted communication, verify that "HTTPS = 5986" appears in the DefaultPorts section.
Get-ExecutionPolicy
Set-ExecutionPolicy RemoteSigned
winrm quickconfig
winrm quickconfig -transport:https
winrm get winrm/config
The output should look like this (additional lines indicated by ellipsis):
Config
...
Client
...
Auth
Basic = true
...
Kerberos = true
...
...
Service
...
AllowUnencrypted = false
...
DefaultPorts
HTTP = 5985
HTTPS = 5986
...
AllowRemoteAccess = true
Winrs
AllowRemoteShellAccess = true
...
This setting does not appear for all versions of Windows. If this setting does not appear, no action is required.
Set-Item WSMan:\Localhost\Service\AllowRemoteAccess -value true
Set-Item WSMan:\Localhost\Winrs\AllowRemoteShellAccess -value true
Set-Item WSMan:\Localhost\Service\AllowUnencrypted -value true
ScienceLogic recommends using encrypted communication, particularly if you are also using an Active Directory account. Using an Active Directory account for encrypted authentication enables you to use Kerberos ticketing for authentication.
- If you are using an Active Directory account to communicate with this Windows server and in the Auth section, the parameter Kerberos is set to false, execute the following command:
Set-Item WSMan:\Localhost\Service\Auth\Kerberos -value true
ScienceLogic recommends using an Active Directory account.
- If you are using a local account to communicate with this Windows server and in the Auth section, the parameter Basic is set to false, execute the following command:
Set-Item WSMan:\Localhost\Service\Auth\Basic -value true
- IdleTimeout is set to 7200000 milliseconds (2 hours) by default. If an issue occurs with scheduled PowerShell monitoring and a process remains on a Windows device, it will therefore remain for up to 2 hours before being removed. To reduce the IdleTimeout and have Windows shut down idle WinRM processes after a shorter time period, execute the following command:
winrm s winrm/config/winrs '@{IdleTimeout="600000"}'
This command will change the timeout to 10 minutes (600000 ms).
NOTE: When changing IdleTimeout, ensure that no other applications or utilities need a higher timeout for WinRM sessions.
Option 3: Using a Group Policy to Configure Windows Remote Management
You can use a group policy object (GPO) to configure the following Windows Remote Management settings on Windows Server 2012 or Windows Server 2016:
- A registry key to enable Local Account access to Windows Remote Management
- Firewall rules
- Certificates
- HTTP and HTTPS listeners, including authentication and encryption settings
- Service start and recovery settings
To create the group policy object, perform the following steps:
- Log in to the CA server as an administrator.
- Right-click on the PowerShell icon in the taskbar and select Run as Administrator.
- At the PowerShell prompt, use the change directory (CD) command to navigate to a folder where you can create new files.
- Save the root Certification Authority certificate to the local directory by executing the following command:
- Exit the command prompt.
- Log in to a domain controller in your Active Directory forest and navigate to the System Manager dashboard.
- Click the Tools menu, then select Group Policy Management.
- On the Group Policy Management page, in the left panel, right-click the domain name where you want the new group policy to resideand then select Create a GPO in this domain and Link it here.
- In the left panel, right-click the new group policy and select Edit. The Group Policy Management Editor page for the new Windows Remote Management group policy appears.
- In the left panel, navigate to Computer Configuration > Policies > Windows Settings > Security Settings > System Services. In the right panel, locate the Windows Remote Management (WS-Management) service. Right-click the service, then select Properties.
- The Windows Remote Management (WS-Management) modal page appears. Select the Define this policy setting check box and the Automatic radio button, then click .
- In the left panel of the Group Policy Management Editor page, navigate to Computer Configuration > Policies > Windows Settings > Security Settings > Windows Firewall with Advanced Security > Windows Firewall with Advanced Security - LDAP > Inbound Rules. In the right panel, right-click and select New Rule.
- The New Inbound Rule Wizard modal page appears. Click the Predefined radio button, select Windows Firewall Remote Management from the list, and then click .
- Select the Windows Firewall Remote Management (RPC) and Windows Firewall Remote Management (RPC-EPMAP) check boxes, then click .
- Select the Allow the connection radio button, then click .
- In the left panel of the Group Policy Management Editor page, navigate to Computer Configuration > Policies > Windows Settings > Security Settings > Public Key Policies > Automatic Certificate Request Settings. In the right panel, right-click and select New > Automatic Certificate Request.
- The Automatic Certificate Request Setup Wizard modal page appears. Click .
- Select the Computer certificate template. Click , and then click .
- In the left panel of the Group Policy Management Editor page, navigate to Computer Configuration > Policies > Windows Settings > Security Settings > Public Key Policies > Trusted Root Certification Authorities. In the right panel, right-click and select Import.
- The Certificate Import Wizard modal page appears. Click .
- Browse to the Certification Authority certificate that you saved to your local directory in step 4, then click .
- Select the Place all certificates in the following store radio button, then select the Trusted Root Certification Authorities certificate store and click .
- Click to confirm that the certificate was successfully imported, and then click .
- In the left panel of the Group Policy Management Editor page, navigate to Computer Configuration > Policies > Administrative Templates > Network > Network Connections > Windows Firewall > Domain Profile. In the right panel, right-click Windows Firewall: Define inbound port exceptions and select Edit.
- The Windows Firewall: Define inbound port exceptions modal page appears. Under Options, click .
- The Show Contents modal page appears. Enter the following values:
- 5985:TCP:*:enabled:WSMan
- 5986:TCP:*:enabled:WSMan
- Click , then click again.
- In the left panel of the Group Policy Management Editor page, navigate to Computer Configuration > Policies > Administrative Templates > Windows Components > Windows Remote Management (WinRM) > WinRM Client. In the right panel, double-click the Allow Basic authentication setting.
- Select the Enabled radio button, then click .
- Repeat steps 28 and 29 for the Allow unencrypted traffic setting.
- Double-click the Trusted Hosts setting. Select the Enabled radio button, enter an asterisk (*) in the TrustedHostsList field (under Options), and then click .
- In the left panel of the Group Policy Management Editor page, navigate to Computer Configuration > Policies > Administrative Templates > Windows Components > Windows Remote Management (WinRM) > WinRM Service. In the right panel, double-click the Allow Basic authentication setting.
- Select the Enabled radio button, then click .
- Repeat steps 32 and 33 for the Allow unencrypted traffic setting.
- Double-click the Allow remote server management through WinRM setting. Select the Enabled radio button, enter an asterisk (*) in the Pv4 filter and Pv6 filter fields (under Options), and then click .
- In the left panel of the Group Policy Management Editor page, navigate to Computer Configuration > Policies > Administrative Templates: Policy Definitions > Windows Components > Windows Remote Shell. In the right panel, double-click on Specify Idle Timeout:
- In the Windows Remote Shell folder, in the right panel, double-click on MaxConcurrentUsers:
- You can skip this step if you already have a group policy in place for this setting. In the left panel of the Group Policy Management Editor page, navigate to Computer Configuration > Preferences > Windows Settings > Registry. In the right panel, right-click and select New > Registry Item. In the New Registry Properties modal page, edit the values in one or more of the following fields:
- Action. Select Create.
- Hive. Select HKEY_LOCAL_MACHINE.
- Key Path. Enter "SOFTWARE\Microsoft\Windows\CurrentVersion\policies\system".
- Value name. Enter "LocalAccountTokenFilterPolicy".
- Value type. Enter "REG_DWORD".
- Value data. Enter "1".
- Base. Select Decimal.
- In the left panel of the Group Policy Management Editor page, navigate to Computer Configuration > Preferences > Control Panel Settings > Services. In the right panel, right-click and select New > Service.
- In the New Service Properties modal page, edit the values in one or more of the following fields:
- Startup. Select No change.
- Service name. Enter "WinRM".
- Service action. Select Start service.
- Wait timeout if service is locked. Select 30 seconds.
- Log on as. Select No change.
- Click the tab, then edit the values in one or more of the following fields:
- First failure. Select Restart the Service.
- Second failure. Select Restart the Service.
- Subsequent failures. Select Restart the Service.
- Restart fail count after. Select 0 days.
- Restart service after. Select 1 minute.
- Click the button.
- To enforce your group policy, in the left panel of the Group Policy Management Editor page, navigate to Forest > Domains > [your local domain] > PowerShell Remote Management Policy. In the PowerShell Remote Management Policy panel on the right, right-click the local domain name under The following sites, domains, and OUs are linked to this GPO and select Enforced.
- To enable your group policy, in the left panel of the Group Policy Management Editor page, navigate to Forest > Domains > [your local domain] > Group Policy Objects > WinRM Policy. Right-click WinRM Policy, then select GPO Status > Enabled.
certutil.exe –ca.cert ca_name.cer

You will import this certificate into the new group policy in step 21.


Adjust the setting to meet your requirements. Using the value of 900000 in the image will set the timeout to 15 minutes. Once you have entered your timeout value in milliseconds, click the Enabled radio button and then click .
NOTE: When changing IdleTimeout, ensure that no other applications or utilities need a higher timeout for WinRM sessions.

Enter "40" in the MaxConcurentUsers field. Once you have entered your value, click the Enabled radio button and then click .
NOTE: This step is required only if the user account is not a domain account and not the built-in local administrator account.


Configuring an HTTPS Listener with GPO Configuration
If you are using an HTTPS listener, you cannot create the listener and start it on the monitored device within group policy object (GPO) configuration. This can be done by using a startup script or an immediate task in the group policy, or by running a command manually or on the remote management tool on the device to be monitored. This command needs to be run only once as the HTTPS listener will automatically start once configured.
To perform this configuration within the group policy, perform the following steps:
- Run the following command on the device you want to monitor:
winrm quickconfig -transport:https -force
This command will select the first available certificate enabled for server authentication. If you have multiple, valid server authentication certificates installed on your device, you will need to specify the thumbprint of the certificate and use the following command instead:
New-Item -Path WSMan:\LocalHost\Listener -Transport HTTPS -Address * -CertificateThumbPrint “<CertThumbprint>” –Force
NOTE: The thumbprint should not contain spaces.
Using Forward and Reverse DNS for Windows Remote Management
When using Active Directory accounts for PowerShell monitoring, Kerberos and Windows Remote Management (WinRM) are used to connect to Windows devices and execute PowerShell code on those devices. Kerberos is used to request a ticket for authentication to the Windows device, and WinRM is used to execute code on the Windows device.
In a Windows Active Directory configuration, Kerberos needs to be able to communicate with the target Windows device and the Active Directory Domain Controller to verify credentials and issue a ticket for authentication. Kerberos refers to a Windows Domain as a "realm" and an Active Directory Server as a "kdc" (Key Distribution Center).
For this process, it is important that forward and reverse lookup is working for all systems involved. Forward lookup translates a host to an IP address; reverse lookup translates an IP address to a host.
This can be managed through DNS, where a forward lookup is handled through an "A" record in a forward lookup zone, and reverse lookup through a "PTR" record in a reverse lookup zone. A utility such as "nslookup" will work correctly only if the DNS record (a PTR record, in this case) is present.
Where DNS is not available or reliable, it is possible to use the hosts file (/etc/hosts) instead. SL1 uses Python, which in turn can use the hosts file to provide both forward and reverse lookup. However, this approach means a higher level of server management because the hosts files on multiple Data Collector servers would need to be kept in sync. Additionally, where Concurrent PowerShell is used, the hosts files within the Docker containers would need to be updated.
Without a reliable forward and reverse lookup mechanism in place, Kerberos may not be able to validate credentials and issue a ticket for access to a Windows Device, which in turn would mean that access over WinRM to the device would be rejected.
Step 4: (Optional) Configuring a Windows Management Proxy
If SL1 cannot execute PowerShell requests directly on a Windows server, you can optionally configure an additional Windows server to act as a proxy for those PowerShell requests. To use a proxy, you must configure at least two Windows servers:
- A target server that SL1 cannot communicate with directly.
- A proxy server that SL1 will communicate with to execute PowerShell requests on the target server.
NOTE: When monitoring a Windows device using a proxy, the account specified in the credentials is used to access both the proxy server and the target device. This account must have the correct access rights to be used on both servers. If multiple Active Directory domains are used, a trust relationship must be in place that allows the specified account access to the servers in both domains.
To configure the target and proxy servers, perform the following steps:
- Configure a user account that SL1 will use to connect to the proxy server and the proxy server will use to connect to the target server. The user account can either be a local account or an Active Directory account; however, the user account must have the same credentials on the target and proxy servers and be in the Local Administrator's group on both servers.
- If you have created a local user account on the Windows Server instead of an Active Directory account, you must configure encrypted communication between SL1 and the Windows server. To do this, you must configure a Server Authentication certificate.
- Configure Windows Remote Management on the target server and the proxy server.
- Log in to the proxy server as an administrator.
- Open the PowerShell command window.
- Right-click on the PowerShell icon in the taskbar and select Run as Administrator.
- Execute one of the following commands on the proxy server to allow the proxy server to trust one or more target servers:
- To allow the proxy server to trust all servers (not recommended), execute the following command:
- To allow the proxy server to trust only specific target servers, execute the following command, inserting a list that includes the IP address for each target server. Separate the list of IP addresses with commas.
Set-Item WSMan:\Localhost\Client\TrustedHosts -value *
Set-Item WSMan:\Localhost\Client\TrustedHosts -value <comma-delimited-list-of-target-server-IPs>
NOTE: The following step is required only if the user account is not a domain account and not the built-in local administrator account.
- Execute the following command on the proxy server to configure the LocalAccountTokenFilterPolicy:
New-ItemProperty “HKLM:\SOFTWARE\Microsoft\Windows\CurrentVersion\Policies\System” -Name “LocalAccountTokenFilterPolicy” -Value 1 -PropertyType “DWORD"
NOTE: If the proxy server is in a different Windows domain (domain A) than the target servers (domain B), and the proxy server uses a user account from Active Directory, and Active Directory is in the same Windows domain as the target servers (domain B), you must perform the following to allow the proxy server to send PowerShell commands to the target servers:
- On the domain controller for each domain (domain A and domain B), create new forward-lookup zones and reverse-lookup zones that allow name resolution to work between the two domains.
- On the domain controller for each domain (domain A and domain B), create a non-transitive realm trust between the two domains.
- Login to the proxy server and add the Active Directory account (from domain A) to the Local Administrator's group for the proxy server. You should be able to select the account on the proxy server after you create the non-transitive realm trust between the two domains.
Step 5: (Optional) Increasing the Number of PowerShell Dynamic Applications That Can Run Simultaneously
You can optionally execute a series of commands that will allow SL1 to increase the default maximum number of PowerShell Dynamic Applications that can run simultaneously.
To do so:
- Determine the number of Dynamic Applications that will be used to monitor the Windows server. Multiply this number by three.
- Open a PowerShell command prompt. Log in as an Administrator.
- At the prompt, execute the following commands:
Set-Item WSMan:\Localhost\Shell\MaxShellsPerUser –value <number you calculated in step 1>
Set-Item WSMan:\Localhost\Service\MaxConcurrentOperationsPerUser –value <number you calculated in step 1>
Restart-Service WinRM
- Repeat these steps on each Windows server that will be monitored by SL1.
Optional PowerShell CLI Parameters
You can use the following parameters in PowerShell for the associated reasons:
- -NoProfile. Does not load the PowerShell profile.
- -NoLogo. Hides the copyright banner at start-up.
- -NonInteractive. Does not present an interactive prompt to the user.
To enable concurrent PowerShell collection to use one of these parameters:
- Go to the Database Tool page (System > Tools > DB Tool).
- If this row does not already exist in the master.system_custom_config table, enter the following in the SQL Query field:
The Database Tool page is available only in versions of SL1 prior to 12.2.1 and displays only for users that have sufficient permissions to access the page.
INSERT INTO master.system_custom_config ('field','field_value') VALUES ('powershell_prefix_setting', '<PREFIX>')
where <PREFIX> is an integer that represents one of the prefix values described above. The integers are as follows:
- 0. Disabled
- 1. -NoProfile
- 2. -NoLogo
- 3. -NoProfile and -NoLogo
- 4. -NonInteractive
- 7. -NoProfile, -NoLogo, and -NonInteractive
For example, if a user wanted to configure their PowerShell Data Collector to not load their PowerShell profile, they would enter the following into the SQL Query field:
INSERT INTO master.system_custom_config ('field','field_value') VALUES ('powershell_prefix_setting', '1')
- If this row already exists in the master.system_custom_config table, enter the following in the SQL Query field:
UPDATE master.system_custom_config SET field_value = 1 WHERE field = 'powershell_prefix_setting'
- After you have entered the command in the SQL Query field, click the button. Your changes will be picked up with the next batch of jobs that are processed.