![]()
For service providers, an SLA is a Service-Level Agreement. An SLA is a contract between a service provider and a customer. The contract specifies the service that the provider will deliver to the customer. Some SLAs include penalties for non-compliance.
For example, an Internet service provider might guarantee 99.99% uptime for all customers.
This
Use the following menu options to navigate the Skylar One user interface:
- To view a pop-out list of menu options, click the menu icon (
 ).
). - To view a page containing all of the menu options, click the Advanced menu icon (
 ).
).
What is an SLA Definition?
In Skylar One, you can create an SLA Definition. The SLA Definition is a threshold. The threshold is applied to the Availability Key Metric of an IT Service policy.
- Suppose we define an IT Service policy to monitor web servers.
- Suppose we define the Availability Key Metric for that IT Service policy to map to the metric that aggregates the average availability of all web servers.
- Suppose that the metric that aggregates the average availability of all web servers is set to "Critical = anything less than average availability of 99%".
- Suppose we create an SLA definition that says that the web servers must be available 99% of the time. 99% uptime allows for 432 minutes of downtime per month.
- If the IT Service policy has a polling frequency of 5 minutes, the web servers can be unavailable (average availability is less than 99%) no more than 86 polling periods per month (and still meet 99% uptime).
Creating an SLA Definition
To create an SLA Definition:
- Go to the Service Level Agreement Definitions page (Registry > IT Services > SLA Definitions).
- In the Service Level Agreement Definitions page, select the button.
- The SLA Definition Editor page is displayed.
- In the SLA Definition Editor page, supply values in the following fields:
- SLA Definition Name. The name of the SLA Definition. Can be any combination of numbers, letters, and symbols.
- SLA Availability. The threshold that will be evaluated using this SLA definition. You can select from six predefined percentage values or specify a custom value. If you select Custom in the drop-down list, enter a percentage value in the text field. You can evaluate an IT Service policy using this threshold; you can do this in a dashboard widget or in an SLA report.
- Click the button to save your new SLA Definition.
Viewing the List of SLA Definitions
The Service Level Agreement Definitions page displays the list of existing SLA definitions. To view the list of existing SLA definitions:
- Go to the Service Level Agreement Definitions page (Registry > IT Services > SLA Definitions).
- The Service Level Agreement Definitions page displays the following about each SLA Definition:
- SLA Definition Name. The name of the SLA Definition.
- Availability. The availability, in percent, specified in the service level agreement.
- ID. Unique numeric ID for the SLA Definition, generated by Skylar One.
- Edited By. Name of the user who created or last edited the SLA Definition.
- Last Edited. Date and time the SLA Definition was created or last edited.
Using an SLA Widget in a Dashboard
You can use a Dashboard Widget to evaluate an existing IT Service policy using an existing SLA Definition. The Dashboard Widget will then display the results. To do this, you must perform two steps:
- Create the Dashboard
- Configure the SLA Widget
The following sections describe how to perform these two tasks.
Create the Dashboard
To use the SLA widget in a dashboard:
- Select the tab.
- Select the button. The system will create a blank dashboard with a default name.
- Select the menu, then select Configure Dashboard... The Dashboard Settings modal page is displayed, where you can configure the basic settings for the dashboard:
- You can enter values in one or more of the following fields, or you can accept the default values:
- Dashboard Title. Enter a name for the dashboard. This name is displayed in the Select Dashboardfield in the top-left of the Dashboards tab page.
- Screen Width. Enter the minimum screen width required to view the whole dashboard at once. If a user views the dashboard at a resolution that has a smaller screen width than the value in this field, a horizontal scroll bar will be displayed. For convenience, the current size of the dashboard as viewed in your monitor is displayed in parentheses above the Screen Width and Screen Height fields.
- Screen Height. Enter the minimum screen height required to view the whole dashboard at once. If a user views the dashboard at a resolution that has a smaller screen height than the value in this field, a vertical scroll bar will be displayed. For convenience, the current size of the dashboard as viewed in your monitor is displayed in parentheses above the Screen Width and Screen Height fields.
- Lock Dashboard Layout. Select this checkbox to prevent the dashboard from being edited. When this checkbox is selected, a user viewing the dashboard cannot add, move, or modify widgets while viewing the dashboard. To edit a dashboard that has the Lock Dashboard Layout checkbox selected, a user must access the Dashboard Settings page and uncheck the Lock Dashboard Layout checkbox. This option is most useful for preventing users from accidentally modifying a dashboard.
- Merge Adjacent Borders. If the Lock Dashboard Layout checkbox is selected, this option is available. If you select this checkbox, widgets that appear next to each other will share a border.
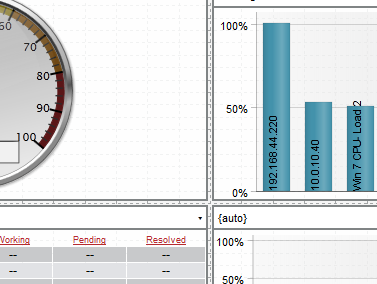
- If this checkbox is not selected, a gap appears between each widget:
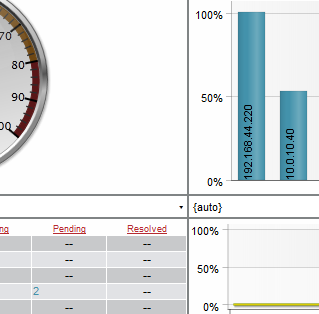
- If this checkbox is selected, the widget borders are merged:
- Access Control. Specifies whether the dashboard is viewable only by the creator or if the dashboard is viewable by other users. Choices are:
- Share with organizations. Allows other members of the creator's organizations to view the dashboard.
- Private dashboard. Only the dashboard's creator and administrators can view the dashboard.
- Access Keys. This field is applicable only if the dashboard is Shared. Specifies the Access Keys required to view the dashboard. If you don't select any Access Keys, no specific keys are required to view the dashboard.
If you select an Access Key in the Required Keys field, each user must meet the following criteria to use the dashboard:
- The user must have at least one of the Access Keys selected in the Required Keys field for the dashboard.
- The user must be granted an Access Key that includes the "Dash:View" and "Dash:View Shared" Access Hooks.
- The user and the creator of the dashboard must be members of the same organization.
If you do not select any Access Keys in the Required Keys field, any user meeting the following two requirements may access the dashboard:
- The user must be granted an Access Key that includes the "Dash:View" and "Dash:View Shared" Access Hooks.
- The user and the creator of the dashboard must be members of the same organization.
CAUTION: If a user meets the above requirements and also has been granted an Access Key that includes the "Dash:Edit Shared" Access Hook, that user will be able to edit the shared dashboard. If a user has been granted an Access Key that includes the "Dash:Add/Rem Shared" Access Hook, that user may delete shared dashboards.
- Category. Select one or more categories to associate with the dashboard. To select multiple categories, hold down the key (or on Apple computers) when you select the categories. Categories are used to arrange the dashboard selection drop-down list in the Dashboards tab page. If you do not select a category in this field, the dashboard will appear under the "Other" category in the drop-down list.
- Keywords (comma separated). Enter a comma-delimited list of keywords to associate with the dashboard.
- Select the button to save your changes to the dashboard settings.
Configure the SLA Widget
To add the SLA widget to your dashboard:
- In the Dashboards tab page ( tab), in the selection field in the upper left of the page, select the dashboard to which you want to add a widget.
- Select the button, and then select Add Widget.
Or:
- In the Dashboards tab page ( tab), in the selection field in the upper left of the page, select the dashboard to which you want to add a widget.
- In the Dashboards tab page, left-click and drag with your mouse to draw a rectangle. This shape will determine the initial size and position of the widget in your dashboard.
- The New Widget Configuration modal page is displayed.
- In the NavBar, expand the Single Point icon. Expand the SLA category. Select the (base) SLA Gauge.
- Enter the values in the following fields:
- Widget Name. Enter a title for the widget. This title is displayed in the header that appears at the top of the widget. If you leave the default value of "{auto}" in this field, Skylar One will automatically generate a title for the widget based on what is currently being displayed in the widget.
- Widget Refresh Rate. Specify how frequently the widget will be automatically updated with new data. The choices are:
- Widget Default. The widget will refresh at its default refresh rate, as defined by the widget developer. You can view and edit the default refresh rate in the Classic Dashboard Widgets page (System > Customize > Classic Dashboard Widgets) by selecting the wrench icon (
 ) for a widget.
 - Auto-refresh disabled. The widget will not automatically refresh.
- 1 minute. The widget will automatically refresh every minute.
- 5 minutes. The widget will automatically refresh every 5 minutes.
- 10 minutes. The widget will automatically refresh every 10 minutes.
- 15 minutes. The widget will automatically refresh every 15 minutes.
- 30 minutes. The widget will automatically refresh every 30 minutes.
- 45 minutes. The widget will automatically refresh every 45 minutes.
- 1 hour. The widget will automatically refresh once an hour.
- SLA Definition. Select the SLA you want to use as a threshold and monitor with this widget.
- Service. Select the IT Service you want to monitor with this widget.
- Compliance Period. Specify the time period you want to monitor with this widget. Choices are:
- Current.
- Last (most recently ended).
- Last (ending in context range).
- Display Type. Select how the metric will be displayed in the widget:
- Gauge
- Column
- Horizontal Bar
- Scoreboard
- Waterline Gauge
- You should see a report like the following:

Generating an SLA Report
You can use a Quick Report to evaluate an existing IT Service policy using an existing SLA Definition. The Quick Report will then display the results. To do this:
- Go the Run Quick Report page (Reports > Run Report).
- In the Run Quick Report drop-down list, select the report SLA Report.
- Enter a value in each of the following fields:
- Report Span. Specify a Daily, Weekly, or Monthly span to include in the report.
- Starting. This field allows you to choose a start date. Selecting a different Report Span will change the options in this drop-down list.
- Duration. This field allows you to specify the duration for the report. Selecting a different Report Span will change the options in this drop-down list.
- Timezone. Specify the time zone to display in the report.
- IT Service. Select the IT Service you want to monitor with this report.
- SLA. Select the SLA you want to use as a threshold and monitor with this report.
- Output Format. Specify an output format for the report.
- Select the button to generate the report.
- The generated SLA report displays the target threshold and the percentage of polls that were successful. The report displays the days violations occurred and the number of minutes each violation lasted.