The following sections describe how to configure Cisco Unified Contact Center Enterprise services for monitoring by SL1 using the "Cisco: Contact Center Enterprise" PowerPack:
Configuring Unified Contact Center Enterprise Monitoring Using SNMP
Before you can discover and monitor Cisco Unified Contact Center Enterprise (UCCE) devices in SL1, you must first configure SNMP community strings in each of the UCCE services that you will monitor with SL1. You can then create an SNMP credential in SL1 that enables it to collect data from the UCCE services. Finally, you must compile several Management Information Bases (MIBs) that are required for monitoring UCCE.
Enabling SNMP in Cisco Unified Contact Center Enterprise
To enable SNMP in Cisco Unified Contact Center Enterprise, perform the following steps:
- Log in to the Cisco Unified Contact Center Enterprise Server as an administrator.
- Open Microsoft Management Console (32-bit).
- Click , then select Add/Remove Snap-In. The Add or Remove Snap-ins page appears.
- In the Available snap-ins field, select Cisco SNMP Agent Management, then click to move it to the Selected snap-ins field.
- Click .
- In the left panel of the Microsoft Management Console, click Cisco SNMP Agent Management. Then, in the right panel, right-click Community Names (SNMP v1, v2c) and select Properties.
- In the Community Names (SNMP v1/v2c) Properties modal page, click the button to enable the fields on the page.
- Make entries in the following fields:
- Community Name. Enter a name for the new community string.
- SNMP Version. Select SNMP v2c.
- Access Rights. Select Read Only.
- Click , and then click .
- Close the Microsoft Management Console.
- Open the Microsoft Windows Services console.
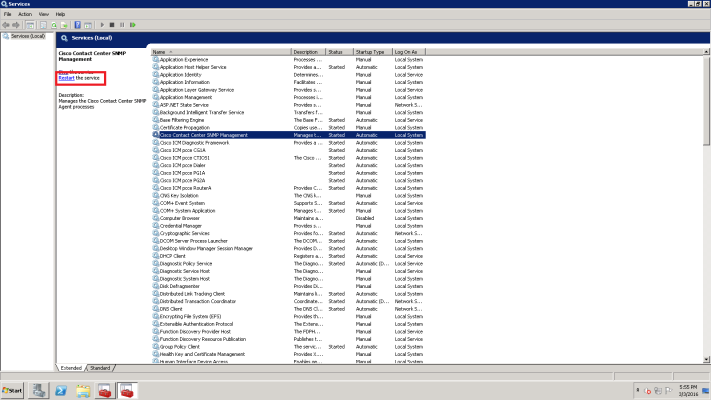
- In the Microsoft Windows Services console, select Cisco Contact Center SNMP Management from the list of local services, then click the Restart hyperlink to restart the service.
- Close the Microsoft Windows Services console.
- Click the Windows menu, then go to Control Panel > System and Security > Windows Firewall.
- In the left panel, click the Turn Windows Firewall on or off hyperlink. The Customize Settings page appears.
- Under Domain network location settings, select Turn off Windows Firewall, then click .
- To enable SNMP in Cisco Unified Contact Center Enterprise Data Server, log in to Cisco Unified Contact Center Enterprise Data Server as an administrator and repeat steps 2-16.
Enabling SNMP in Cisco Unified Customer Voice Portal (CVP)
To enable SNMP in Cisco Unified Customer Voice Portal, perform the following steps:
- Log in to Cisco Unified Customer Voice Portal as an administrator.
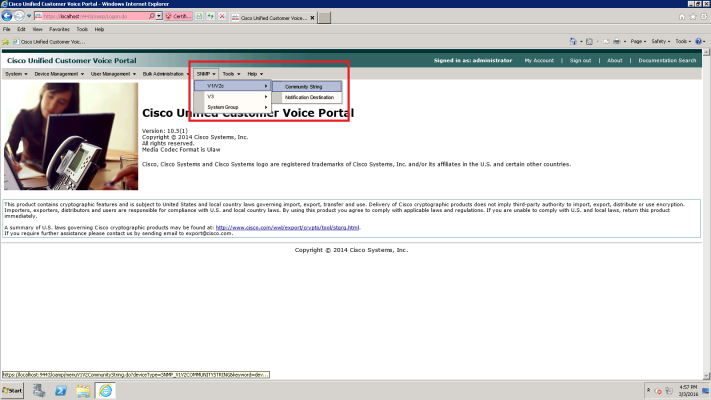
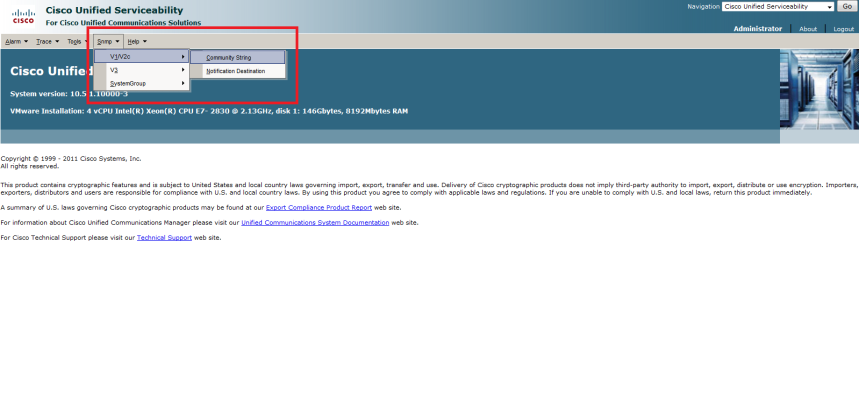
- Click the tab, then select V1/V2c > Community String.
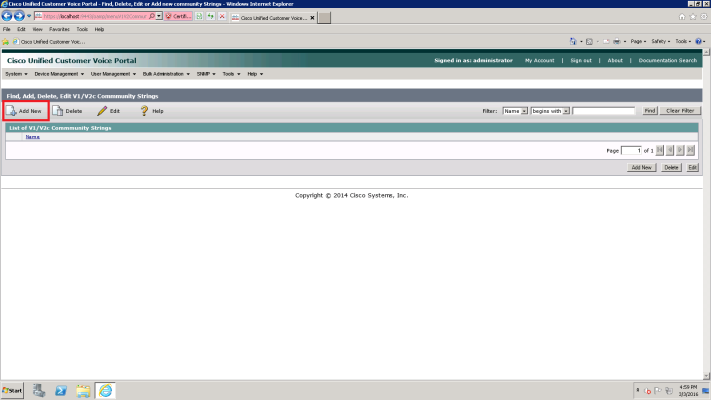
- On the Find, Add, Delete, Edit V1/V2c Community Strings page, click the button.
- The V1/V2c SNMP Community String Configuration page appears. Make entries in the following fields:
- Community String Name. Enter a name for the new community string.
- SNMP Version Information. Select V2C.
- For the other fields on the page, use the default values.
- Click the tab.
- Select one or more of the devices in the Available field, then click the right-arrow icon to move the selected device(s) to the Selected field.
- Click the button. A message confirms that the configuration of the SNMP community string was successfully applied to the selected device(s).
Enabling SNMP in Cisco Unified Intelligence Center (CUIC)
To enable SNMP in Cisco Unified Intelligence Center, perform the following steps:
- Log in to Cisco Unified Intelligence Center as an administrator.
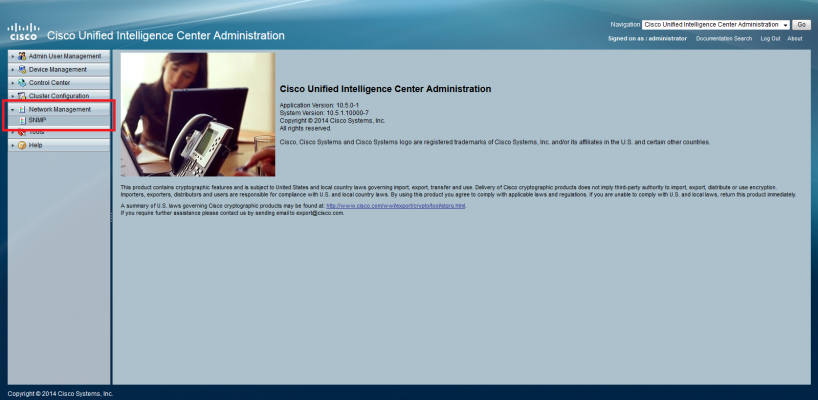
- In the left panel, click , then select SNMP.
- On the SNMP Community String Configuration page, under Search Options, click . The Search Results section appears.
- Under Search Results, click .
- Enter values in the following fields:
- Community String Name. Enter a name for the new community string.
- Access Privileges. Select ReadOnly.
- For the other fields on the page, use the default values.
- Click .
- Click to restart the SNMP master agent.
Enabling SNMP in Cisco Finesse Server
To enable SNMP in Cisco Finesse Server, perform the following steps:
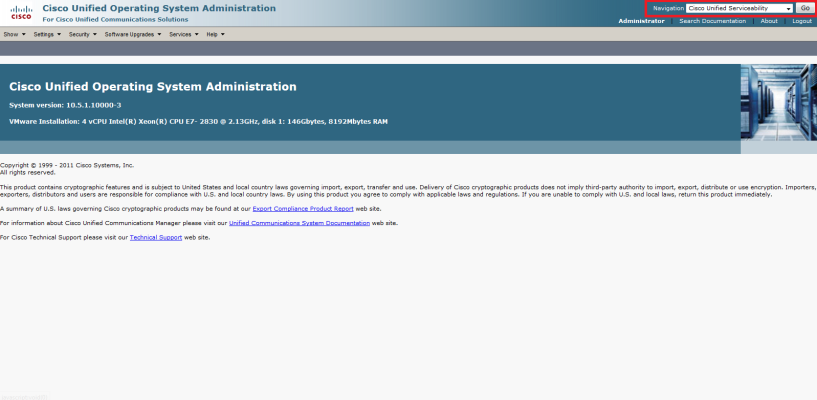
- Log in to Cisco Unified Operating System Administration as an administrator.
- In the top-right corner of the page, in the Navigation field, select Cisco Unified Serviceability and then click .
You might be required to enter your login credentials again before proceeding.
- Click the tab, then select V1/V2c > Community String.
- On the SNMP Community String Configuration page, under Search Options, click . The Search Results section appears.
- Under Search Results, click .
- Enter values in the following fields:
- Community String Name. Enter a name for the new community string.
- Access Privileges. Select ReadOnly.
- For the other fields on the page, use the default values.
- Click .
- Click to restart the SNMP master agent.
Creating an SNMP Credential for Unified Contact Center Enterprise
To configure SL1 to monitor Cisco Unified Contact Center Enterprise (UCCE), you must create an SNMP credential. This credential allows the Dynamic Applications in the "Cisco: Contact Center Enterprise" PowerPack to communicate with your UCCE account.
To configure an SNMP credential for UCCE:
- Go to the Credential Management page (System > Manage > Credentials).
- Click the button.
- In the drop-down list that appears, select SNMP Credential. The Credential Editor page appears.
- In the Profile Name field, enter a name for the credential.
- In the SNMP Version field, select SNMP V2.
- In the SNMP Community (Read Only) field, enter the community string for the UCCE services.
- Optionally, supply values in the other fields in this page. In most cases, you can use the default values for the other fields.
- Click the button.
Compiling SNMP MIBs for Unified Contact Center Enterprise
You must manually compile some of the Management Information Base (MIB) files that are required for monitoring Cisco Unified Contact Center Enterprise in SL1. To compile these MIBs, perform the following steps:
- Go to the MIB Compiler page (System > Tools > MIB Compiler).
- Locate the CISCO-CONTACT-CENTER-APPS-MIB and then click its lightning bolt icon (
 ).
). - Repeat step 2 for the CISCO-CUICAPPS-MIB and the CISCO-CVP-MIB.
The MIB Compiler page displays "Yes" in the Compiled column for the MIBs before these steps are completed. However, you must still compile the MIBs manually using the lightning bolt icon (![]() ).
).
If the message "MIB File Missing" appears when you click the lightning bolt icon (![]() ), you must download and import the MIB(s) before compiling them. To do so:
), you must download and import the MIB(s) before compiling them. To do so:
- Download the MIB(s) you need:
- CISCO-CONTACT-CENTER-APPS-MIB: ftp://ftp.cisco.com/pub/mibs/v2/CISCO-CONTACT-CENTER-APPS-MIB.my
- CISCO-CUICAPPS-MIB: ftp://ftp.cisco.com/pub/mibs/v2/CISCO-CUICAPPS-MIB.my
- CISCO-CVP-MIB: ftp://ftp.cisco.com/pub/mibs/v2/CISCO-CVP-MIB.my
- Go to the MIB Compiler page (System > Tools > MIB Compiler).
- Click the button.
- Click the button to locate the downloaded MIB. Select the MIB, and then click the button.
- Click to confirm.
- On the MIB Compiler page, locate the imported MIB and click its lightning bolt icon (
 ) to compile it.
 - If you downloaded more than one MIB, repeat steps 2-6 for the additional MIB(s) that need to be imported and compiled.
Configuring Unified Contact Center Enterprise Monitoring Using REST API
Some Dynamic Applications in the "Cisco: Contact Center Enterprise" PowerPack collect data from Cisco Unified Contact Center Enterprise (UCCE) using the UCCE REST API. The following Dynamic Applications require a Cisco Unified Contact Center Enterpreise universal credential to enable SL1 to communicate with your UCCE account:
- Cisco: CCE Administration and Data Server Enhanced Performance
- Cisco: CCE Call Router Enhanced Performance
- Cisco: CCE Campaign Manager Enhanced Performance
- Cisco: CCE CTI Gateway Enhanced Performance
- Cisco: CCE CTI Object Server Enhanced Performance
- Cisco: CCE Dialer Enhanced Performance
- Cisco: CCE Enhanced Performance Caching
- Cisco: CCE ICM Distributor Enhanced Performance
- Cisco: CCE Logger Enhanced Performance
- Cisco: CCE PG OPC Enhanced Performance
- Cisco: CCE PG PIM Enhanced Performance
- Cisco: CCE PG VRU PIM Enhanced Performance
To use these Dynamic Applications, you will need credentials for a UCCE user with either a local account in the Windows security group "ICMDiagnosticFrameworkUsers" or a domain user in the "CONFIG" domain security group of the UCCE instance.
An example universal credential that you can edit for your own use is included in the "Cisco: Contact Center Enterprise" PowerPack. To create a universal credential to monitor UCCE:
- Go to the Credentials page (Manage > Credentials).
- Click and select Cisco: cce Credential. The Create Credential modal page appears.
- Supply values in the following fields:
- Name. Type a name for your credential.
- All Organizations. Toggle on (blue) to align the credential to all organizations, or toggle off (gray) and then select one or more specific organizations from the from the What organization manages this service? drop-down field to align the credential with those specific organizations.
- Timeout (ms). Keep the default value of 1500.
- Authentication type. Keep the default value (Basic Authentication).
- Username. Type the Cisco: Contact Center Enterprise account username.
- Password. Type the Cisco: Contact Center Enterprise account password.
- URL. Type the URL and port for the Cisco: Contact Center Enterprise system, using the following format: https://Host:Port/Path.
Proxy Settings
Toggle on this field if you are using a proxy server to communicate with your Cisco: Contact Center Enterprise account, enter the values in the fields listed below:
- Proxy scheme type. Select http or https from the drop-down field.
- Proxy Hostname/IP. Enter the hostname or the IP address associated with your device.
- Proxy Port. Enter the port number for the proxy server.
- Proxy User. Enter the username for the proxy server.
- Proxy Password. Enter the password for the proxy server.
- Click .
