![]()
The following sections describe how to configure and discover a Cisco Unified Computing System (UCS) Manager and component devices for monitoring by Skylar One using the "Cisco: UCS" PowerPack.
Prerequisites for Monitoring Cisco UCS Manager
To use the Dynamic Component Mapping Dynamic Applications included in the "Cisco: UCS" PowerPack, you must log in to the UCS Manager user interface and create a user account that Skylar One can use to access the UCS web service.
When the Dynamic Component Mapping Dynamic Applications are aligned to the UCS Manager, Skylar One will collect information about all the components in the UCS system, such as UCS Chassis and Blades. Skylar One will then create a device record for each component and automatically align other Dynamic Applications from the "Cisco: UCS" PowerPack to each component device.
Each component device created by Skylar One is included in the calculations for collector group capacity. You should check that the collector group you will use to monitor the UCS Manager has enough capacity for all components in the UCS system. For more information about collector capacity, see
Configuring the UCS System
To configure a UCS system for monitoring by Skylar One, you must:
- Create a user account in UCS that Skylar One can use to access the UCS web service
- Enable the CIM XML service
Perform the following steps to complete these tasks:
- Log in to the UCS Manager user interface as an administrator.
- At the top of the left pane, click the tab.
- In the left pane, go to All > User Management > User Services > Locally Authenticated Users. The Locally Authenticated Users page appears in the right pane:

- Click the green plus icon on the right side of the Locally Authenticated Users page. The Create User window appears:

- Supply values in the following fields:
- Login ID. Enter a username for the user.
- Password. Enter a password for the user.
- Confirm Password. Re-enter the password you entered in the Password field.
- Account Status. Select active.
- Account Expires. Make sure that this checkbox is not selected.
- Roles. To create a read-only user, do not select any checkboxes.
- Click the button, and then click the button in the confirmation pop-up window.
- In the left pane of the UCS Manager GUI, go to All > Communication Management > Communication Services. The Communication Services page appears in the right pane.
- In the Admin State field in the CIM XML section, select Enabled.
Older versions of the UCS software do not include the option to disable the CIM XML service. If the option to enable/disable the CIM XML service does not appear, the service is already enabled.
- Click the button.
When blade servers are replaced in a UCS chassis, and the old blade servers are not properly decommissioned, UCS Manager does not assign new Internal IDs to the new blade servers when they are inserted in the chassis. Instead, UCS Manager assigns an Internal ID of "none" to the new blade servers. This does not cause an error in Skylar One if it occurs with only a single blade; however, if more than one blade that you are monitoring is replaced without being decommissioned, multiple blades will have the same Internal ID of "none", which in turn can cause blades to appear under the incorrect chassis or not appear at all in Skylar One. If this occurs, decommission the affected blades and then reinsert them. For more information, see the section on "Guidelines for Removing and Decommissioning Blade Servers" in the Cisco UCS documentation.
Creating a SOAP/XML Credential
To configure Skylar One to monitor Cisco UCS Manager, you must first create a SOAP/XML credential. This credential allows the Dynamic Applications in the "Cisco: UCS Manager" PowerPack to communicate with Skylar One. An example SOAP/XML credential that you can edit for your own use is included in the PowerPack.
To create a SOAP/XML credential:
- Go to the Credentials page (Manage > Credentials).
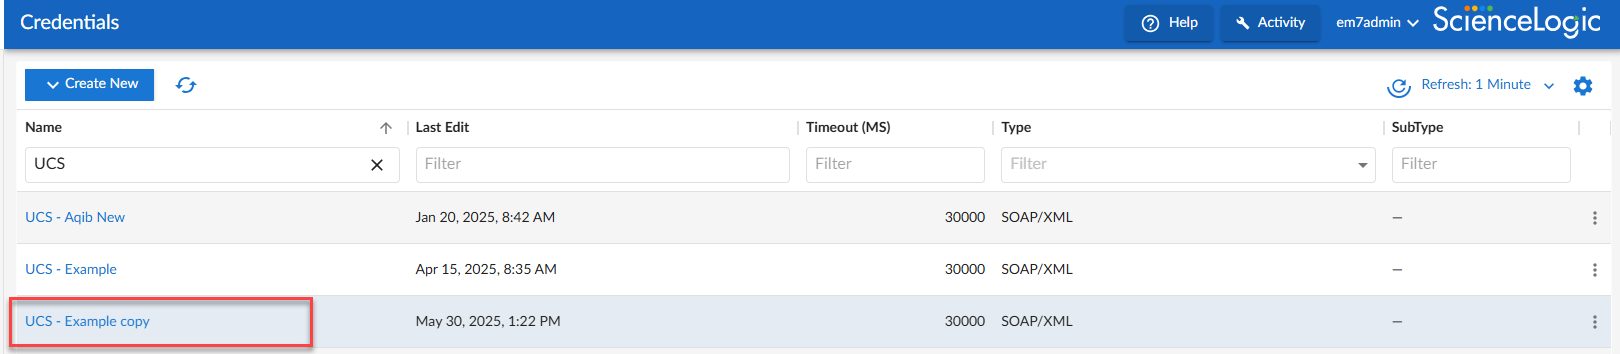
- Locate the "UCS - Example" credential, then click its icon (
 ) and select Duplicate from the drop-down field. The "UCS - Example copy" credential appears.
 - Click the icon () for the "UCS - Example copy" credential and then select Edit. The Edit Credential page appears.
- Enter values in the following fields:

- Name. Type a new name for the credential.
- All Organizations. Toggle on (blue) to align the credential to all organizations, or toggle off (gray) and then select one or more specific organizations from the Select the organizations the credential belongs to drop-down field to align the credential with those specific organizations.
- Timeout. Keep the default.
- URL. Keep the default value of https://%D/nuova.
- Embed Value [%1]. Type the username for the user account that you configured in the UCS Manager.
- Embed Password [%P]. Type the password for the user account that you configured in the UCS Manager.
- Click to update your credential.
Creating a SOAP/XML Credential in the Skylar One Classic User Interface
To use the Dynamic Applications in the "Cisco: UCS" PowerPack, you must configure a SOAP/XML credential for the UCS Manager web service. The "Cisco: UCS" PowerPack includes a template for a SOAP/XML credential that you can edit for use with your UCS system.
To create a new UCS credential using the example credential:
- Go to the Credential Management page (System > Manage > Credentials).
- Click the wrench icon (
 ) for the "UCS - Example" credential. The Credential Editor modal window appears.
 - Supply values in the following fields:
- Profile Name. Type a new name for the credential.
- URL. Keep the default value: https://%D/nuova
- Embed Value [%1]. Type the username for the user account that you configured in the UCS Manager.
If your user account does not use the default UCS Manager authentication realm, then you must prefix the username entered in this field with the authentication realm name for that user. In this scenario, the username should be in the following format: ucs-[realm name]\[username].
For example, if your UCS Manager username is "EM7admin" and it is authenticated in the "Local" realm (i.e., "Local" is the realm in which the user "EM7admin" is authenticated), you would enter the following value in this field:
ucs-Local\EM7admin
UCS Manager authentication realm names are case-sensitive.
- Embedded Password [%P]. Type the password for the user account that you configured in the UCS Manager.
- Click the button.
Discovering a UCS Manager
To create and run a discovery session that will discover a UCS Manager:
- Go to the Devices page (
 ) or the Discovery Session page (Devices > Discovery Sessions) and click the button.
 - Click the button. Additional information about that requirements for discovery appears in the General Information pane to the right.
- Click . The Add Devices page appears.
- Complete the following fields:

- Discovery Session Name. Type a unique name for this discovery session. This name is displayed in the list of discovery sessions on the tab.
- Description.Optional. Type a short description of the discovery session. You can use the test in this description to search for the discovery session on the tab.
- Select the organization to add discovered devices to. Select the name of the organization to which you want to add the discovered devices.
- Click . The Credentials page of the Add Devices wizard appears.
- On the Credentials page, locate and select the SOAP/XML credential you created for UCS Manager appliances.
- Click . The Discovery Sessionpage of the Add Devices wizard appears.
- Complete the following fields:
- List of IP/Hostnames. Type the IP address for the UCS Manager appliance.
- Which collector will monitor these devices?. Required. Select an existing collector to monitor the discovered devices.
- Run after save. Select this option to run this discovery session as soon as you save the session.
- Advanced options. Click the down arrow (
 ) to complete the following fields:
- Discover Non-SNMP. Enable this setting.
- Model Devices. Enable this setting.
- Select Device Template. If you configured a UCS Manager device template, select it here. Otherwise, leave the default selection.
- If you enabled the Run after save option, click the button. The discovery session will run and the Discovery Logs page will display any relevant log messages. If the discovery session locates and adds any devices, the Discovery Logs page will include a link to the Device Investigator page for the discovered device.
- If you did not enable the Run after save option, click the button. The Discovery Session page (Devices > Discovery Sessions) will display the new discovery session.
To create and run a discovery session that will discover a UCS Manager in the Skylar One classic user interface:
- Go to the Discovery Control Panel page (System > Manage > Classic Discovery or System > Manage > Discovery in the classic user interface).
- Click the button to create a new discovery session. The Discovery Session Editor window appears.
- Enter values in the following fields:
- IP Address Discovery List. Enter the IP address for the UCS Manager.
- SNMP Credentials. UCS Manager does not support SNMP. Do not select any credentials in this field.
- Other Credentials. Select the Cisco UCS credential you created.
- Initial Scan Level. Select 5. Deep Discovery. The Cisco: UCS PowerPack includes a "UCS Manager" device class. The "UCS Manager" device class is a Non-SNMP device class that is aligned only during deep discovery. If you do not select 5. Deep Discovery in this field, the UCS Manager will be discovered and assigned a device class for a Linux pingable device.
- Detection Method & Port. Select 443 - HTTPS. You can select additional ports, but must include port 443 - HTTPS.
- Discover Non-SNMP. Because UCS Manager does not support SNMP, you must select this checkbox.
- Optionally, you can enter values in the other fields on this page. For more information about the other fields on this page,
- Click the button and then close the Discovery Session Editor window.
- The discovery session you created will display at the top of the Discovery Control Panel page. Click its lightning-bolt icon (
 ) to run the discovery session.
 - The Discovery Session window appears.
After the discovery session completes, ScienceLogic recommends running the discovery session a second time to ensure that the "Cisco: UCS Cluster Information" Dynamic Application aligns with the UCS Manager root device.
- When the UCS Manager is discovered, click its device icon (
 ) to view the Device Properties page for the UCS Manager server.
To verify that Skylar One has automatically aligned the correct Dynamic Applications during discovery:
It can take several minutes after discovery for Dynamic Applications to display on the Dynamic Application Collections page. If the listed Dynamic Applications do not display on this page, try clicking the button.
- From the Device Properties page for the UCS Manager, click the tab. The Dynamic Application Collections page appears.
- The following Dynamic Applications should display in the list of Dynamic Applications aligned to the UCS Manager:
- "Cisco: UCS Chassis Discovery"
- "Cisco: UCS Compute Rack Unit Discovery"
- "Cisco: UCS Fabric Discovery"
- "Cisco: UCS FEX Discovery"
- "Cisco: UCS Root Cache"
- "Cisco: UCS Cluster Information"
If the listed Dynamic Applications have not been automatically aligned, you can align them manually. To do so:
- For the "Cisco: UCS Root Cache" Dynamic Application, click the button in the Dynamic Application Collections page of the device and then select Add Dynamic Application from the menu. The Dynamic Application Alignment page appears.
- In the Dynamic Applications field, select Cisco: UCS Root Cache.
- In the Credentials field, select the SOAP/XML credential you configured for the UCS Manager.
- Click the button.
- Repeat steps 1–4 for each of the following Dynamic Applications:
- Cisco: UCS Chassis Discovery
- Cisco: UCS Compute Rack Unit Discovery
- Cisco: UCS Fabric Discovery
- Cisco: UCS FEX Discovery
- Cisco: UCS Cluster Information
- After aligning the Dynamic Applications, click the button and then click the plus icon (+) for the Dynamic Application. If collection for the Dynamic Application was successful, the graph icons (
 ) for the Dynamic Application are enabled.
 - Click a graph icon () to view the collected data. The Configuration Report page will display the number of components of each type and the total number of components managed by the device.
In addition to the Dynamic Applications that might need to be manually aligned to the UCS Manager, you can also opt to manually align the "Cisco: UCS Fault Configuration" Dynamic Application to UCS C-Series Rack Mount Server component devices. Doing so allows fault alerts to appear in the device log for those rack units.
Viewing Component Devices
When Skylar One performs collection for the "UCS Chassis Discovery" and "UCS Fabric Discovery" Dynamic Applications, Skylar One will create component devices for the components in the UCS system and align other Dynamic Applications to those component devices. Some of the Dynamic Applications aligned to the component devices will also be used to create additional component devices. All component devices display on the Device Manager page just like devices discovered using the ScienceLogic discovery process.
It can take several minutes after initial collection of the "UCS Chassis Discovery" and "UCS Fabric Discovery" Dynamic Applications for all component devices to be discovered.
In addition to the Device Manager page, you can view the UCS Manager and all associated component devices in the following places in Skylar One:
- The Device Components page (Devices > Device Components) displays a list of all root devices and component devices discovered by Skylar One. The Device Components page displays all root devices and component devices in an indented view, so you can easily view the hierarchy and relationships between child devices, parent devices, and root devices. To view the component devices associated with a UCS Manager, find the UCS Manager and select its plus icon (+):
- The Component Map page (Classic Maps > Device Maps > Components) allows you to view devices by root node and view the relationships between root nodes, parent components, and child components in a map. This makes it easy to visualize and manage root nodes and their components. Skylar One automatically updates the Component Map as new component devices are discovered. Skylar One also updates each map with the latest status and event information. To view the map for a UCS Manager, go to Classic Maps > Device Maps > Components and select the map from the list in the left NavBar. To learn more about the Component Map page, see


Availability for Component Devices
The Dynamic Applications that discover the component devices in a UCS system include collection objects that define the availability status of those component devices.
The following types of component devices are considered unavailable if the UCS system does not include information about those components in the appropriate response:
- Blade
- Chassis
- Compute Rack Unit
- Fabric Extender
- Fabric Interconnect
- IO Module
- Service Profile
Relationships with Other Types of Component Devices
In addition to the parent/child relationships between component devices, the Dynamic Applications in the "Cisco: UCS" PowerPack automatically create relationships between the following Cisco UCS component devices:
- UCS Blades and UCS IO Modules
- UCS Compute Rack Units and UCS Fabric Extenders
- UCS Fabric Interconnects and UCS Fabric Extenders
- UCS Fabric Interconnects and UCS IO Modules
Additionally, Skylar One can automatically build relationships between Cisco UCS component devices and other associated devices. If you discover one or more of the following:
- A Cisco Hyperflex cluster using the Dynamic Applications in the "Cisco: Hyperflex" PowerPack
- A Cisco Nexus switch using the Dynamic Applications in the "Cisco Base Pack" PowerPack
- An EMC VNX LUN using the Dynamic Applications in the "EMC: VNX "PowerPack
- An EMC XtremIO LUN using the Dynamic Applications in the "Dell EMC: XtremIO" PowerPack
- A NetApp device using the Dynamic Applications in the "NetApp Base Pack" PowerPack
- A vCenter device using the Dynamic Applications in the "VMware: vSphere Base Pack" PowerPack
Skylar One will automatically create relationships between the following types of component devices, where appropriate:
- Cisco Hyperflex clusters and UCS Rack Servers
- Cisco Nexus switches and UCS Fabric Interconnects
- EMC VNX LUNs and UCS Service Profiles
- EMC XtremIO LUNs and UCS Service Profiles
- NetApp LUNs and UCS Service Profiles
- NetApp Volumes and UCS Service Profiles
- VMware Hosts and UCS Service Profiles