![]()
The following sections describe the prerequisites and how to configure the credential for monitoring Dell EMC Unity storage arrays by Skylar One using the "Dell EMC: Unity" PowerPack:
Prerequisites for Monitoring Dell EMC Unity
Before you can monitor Dell EMC Unity systems using the "Dell EMC: Unity" PowerPack, you must have the following information about the Unisphere REST API:
- Username and password for a user with access to the Unisphere REST API
- IP address for the Unisphere REST API
Creating a SOAP/XML Credential for Dell EMC: Unity
To configure Skylar One to monitor Dell EMC Unity storage arrays, you must first create a SOAP/XML credential. This credential allows the Dynamic Applications in the "Dell EMC: Unity" PowerPack to use the Unisphere REST API.
To configure the SOAP/XML credential to access the Unisphere REST API:
- Go to the Credentials page (Manage > Credentials).
- Locate the "Dell EMC: Unity Example" credential, click its icon (
 ), and select Duplicate. A copy of the credential, called "Dell EMC: Unity Example copy" appears.
 - Click the icon () for the "Dell EMC: Unity Example copy", and select Edit. The Edit Credential page appears.

- Enter values for the following fields:
- Name. Type a name for the credential.
- All Organizations. Toggle on (blue) to align the credential to all organizations, or toggle off (gray) and then select one or more specific organizations from the What organization manages this service? drop-down field to align the credential with those specific organizations. This field is required.
- Timeout. Keep the default value.
- URL. Type the URL, replacing <%D> with the IP address of the Unisphere REST API. The %D format is still supported.
- HTTP Auth User. Type the username for a user with access to the Unisphere REST API.
- HTTP Auth Password. Type the password for the user you specified in the HTTP Auth User field.
NOTE: The HTTP Headers that are included in the example credential are required to receive a response from the Unisphere REST API. Do not delete or edit them.
- For all remaining fields, use the default values.
- Click .
Creating a SOAP/XML Credential in the Classic User Interface
To configure Skylar One to monitor Dell EMC: Unity storage arrays, you must first create a SOAP/XML credential. This credential allows the Dynamic Applications in the "Dell EMC: Unity" PowerPack to use the Unisphere REST API.
To configure the SOAP/XML credential to access the Unisphere REST API:
- Go to the Credential Management page (System > Manage > Credentials).
- Locate the "Dell EMC: Unity Example" credential, and then click its wrench icon (
 ). The Edit SOAP/XML Credential page appears:
 - Complete the following fields:
- Profile Name. Type a new name for the credential.
- URL. Type the URL, replacing <%D> with the IP address of the Unisphere REST API. The %D format is still supported.
- HTTP Auth User. Type the username for a user with access to the Unisphere REST API.
- HTTP Auth Password. Type the password for the user you specified in the HTTP Auth User field.
NOTE: The HTTP Headers that are included in the example credential are required to receive a response from the Unisphere REST API. Do not delete or edit them.
- Click .
- When the confirmation message appears, click .
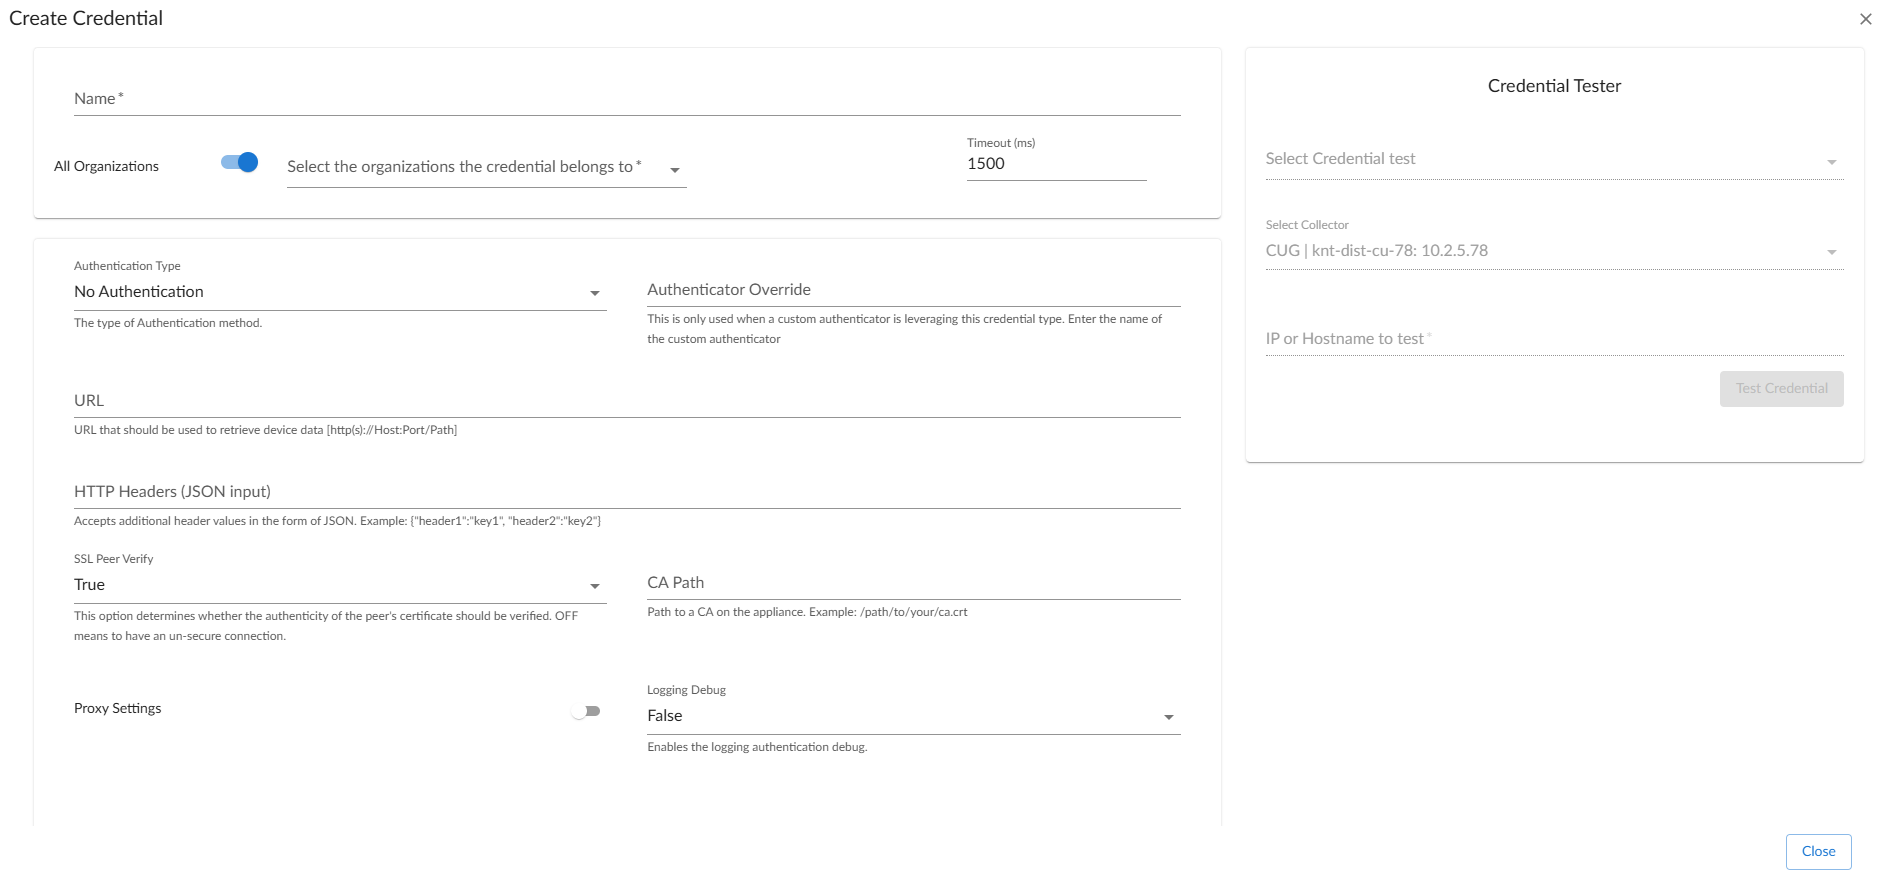
Creating a Universal Credential
To configure Skylar One to monitor Dell EMC Unity storage arrays, you can also use a Universal credential. This credential allows the Dynamic Applications in the "Dell EMC: Unity" PowerPack to use the Unisphere REST API.
To define a Universal credential:
- Go to the Credentials page (Manage > Credentials).
- Locate the Dell EMC: Unity Example SF credential, click its icon (), and select Duplicate. A copy of the credential, called Dell EMC: Unity Example SF copy appears.
- Click the icon () for the Dell EMC: Unity Example SF copy and select Edit. The Edit Credential page appears.
- Enter values for the following fields:
- Name. Type a name for the credential.
- All Organizations. Toggle on (blue) to align the credential to all organizations, or toggle off (gray) and then select one or more specific organizations from the What organization manages this service? drop-down field to align the credential with those specific organizations. This field is required.
- Authentication Type. This field supports different authentication mechanisms. For more information, see REST Authentication. Select Basic Authentication, as it is the simplest form of authentication, using only a username and password and is built into the HTTP protocol.
- URL. Type the URL, replacing <%D> with the IP address of the Unisphere REST API. The %D format is still supported.
- Username. Type the username for a user with access to the Unisphere REST API.
- Password. Type the password for the user you specified in the HTTP Auth User field.
NOTE: The HTTP Headers that are included in the example credential are required to receive a response from the Unisphere REST API. Do not delete or edit them.
- Click .

An alternate method for creating a Universal credential is available. You can use the Create Dell emc unity rest v100 Credential credential template.
To create a Universal credential using the Dell emc unity rest v100 Credential template:
- Go to the Credentials page (Manage > Credentials).
- Click the button and select Create Dell emc unitiy rest v100 Credential from the list.
- Enter values for the following fields:
- Name. Type a name for the credential.
- All Organizations. Toggle on (blue) to align the credential to all organizations, or toggle off (gray) and then select one or more specific organizations from the What organization manages this service? drop-down field to align the credential with those specific organizations. This field is required.
- Authentication Type. This field supports different authentication mechanisms. For more information, see REST Authentication. Select Basic Authentication, as it is the simplest form of authentication, using only a username and password and is built into the HTTP protocol.
- URL. Type the URL, replacing <%D> with the IP address of the Unisphere REST API. The %D format is still supported.
- HTTP Headers (JSON Input. You must include the {"X-EMC-REST-CLIENT": "true"} header in this field.
- SSL Peer Verify. Keep the default value.
- Click .