![]()
Restorepoint is available as a hardware appliance or a VMware virtual appliance. This section describes how to perform the initial configuration of your Restorepoint appliance and configure it to communicate with other devices on your network.
Before You Begin
Before you install your Restorepoint appliance, ensure you meet the following requirements:
-
For hardware installations, 1U of rack space available to install the appliance, with a standard 240V power socket
-
For hardware installations, allocate a port on your Ethernet switch for the appliance
-
The appliance has an allocated static IP address
-
You have configured your firewall to allow traffic between the appliance, and the network devices and servers that Restorepoint will control
-
For virtual deployments, verify that you are running VMware ESX vSphere 6.7U2 or later
-
For virtual deployments, verify your ESX host has 4 GB RAM available and the datastore where the virtual machine will be deployed has 256 GB available
-
Configure your firewall to allow outbound traffic from Restorepoint to the Internet. If you have a firewall between any of your devices and Restorepoint, you may need to open additional ports. For more information, see device-specific details in the Plugin Guide (Help > Plugin Guide).
-
Configure your mail server to allow Restorepoint to relay email
Firewall Requirements
This section lists the ports used to by clients connecting to Restorepoint and the ports used by Restorepoint to connect to network devices and other servers.
Your firewall policy might need to be modified for Restorepoint to function correctly.
Traffic from Clients to Restorepoint
The following table lists traffic from Restorepoint to network devices:
|
Port |
Purpose |
|---|---|
|
443/tcp |
Restorepoint user interface |
|
22/tcp |
Restorepoint shell access |
|
161/udp |
(optional) SNMP monitoring |
Traffic from Restorepoint to Network Devices
Restorepoint connects to network devices in a variety of ways, depending on the vendor. Sometimes, devices use back-connections to transfer their configuration to Restorepoint. See the device-specific details in the Plugin Guide (Help > Plugin Guide).
Other Traffic Originating from Restorepoint
The following table lists outbound firewall requirements:
|
Port |
Purpose |
|---|---|
|
443/tcp |
Download updates from Restorepoint update servers, and HA database sync |
|
53/udp |
Lookup to DNS servers |
|
25/tcp |
Send notification emails using SMTP |
|
123/udp |
Time synchronization with NTP servers (optional) |
|
22/tcp |
Initiate remote support requests (jmp1.restorepoint.com and jmp2.restorepoint.com), or communicate with an Agent’s master (optional) |
Browser requirements
Restorepoint requires a modern browser with JavaScript enabled. Restorepoint has been tested with the following:
- Chrome (v35)
- Firefox (v25)
- Internet Explorer 10
- Safari (v6)
- Opera (v12.10)
Restorepoint Virtual Appliance
The Restorepoint Virtual Appliance can be downloaded as a ZIP archive from the Restorepoint website. The following steps refer to VMware ESX vSphere 6.7U2 or later.
- Expand the Restorepoint ZIP file in a suitable location on your PC.
- Launch the vSphere Client.
- Right-click on the desired destination in the left-hand column and choose Deploy OVF Template, select Deploy from file and browse to the OVF file inside the extracted folder.
- Select all the files in the folder. There should be a mf file, an ovf file, and 2 vmdk files.
- Click Next.
- Click Next.
- Use the default name or enter a name for the virtual machine and the inventory location, then click Next.
- Choose the host or cluster, then click Next.
- Select which datastore should be used, then click Next.
- Choose Network Mapping, then click Next.
- Check the summary information, then click Finish.
- The virtual machine will now deploy. After completion, click Close in the completion dialog box.
IP Address Setup
To set up Restorepoint, you must configure the network parameters, which include the static IP address you have allocated to the appliance, and the DNS and gateway settings for your network. Follow these steps:
-
Connect a monitor and keyboard to suitable ports on the rear panel of the appliance, or open the virtual machine console in the Virtual Infrastructure client.
-
At the login prompt, typed the default user name (admin) and password (admin) for the device and then choose option 1 on the console menu:


-
Type the IP address, Netmask, default gateway, and primary DNS server as prompted. The DNS server must be able to resolve public names (for example, support.restorepoint.com), otherwise the appliance cannot retrieve software updates.
-
Enter y to confirm the settings. If the settings are applied successfully, the console menu will be redisplayed. You can exit now.
You can disconnect your monitor and keyboard. To continue the initial setup, open a browser window on a network connected PC and enter the IP address you set for the appliance in the URL bar.
Alternative Method for Setting the IP Address
You can also connect to the Restorepoint appliance for initial setup over a network using the factory-configured default IP address/netmask (192.168.1.1/255.255.255.0), if these settings do not conflict with any devices already on your network. Use a browser to connect to https://192.168.1.1 and set the IP address as shown above.
If these settings are in use on your network, you may connect the device directly to a PC using an Ethernet cross-over cable. Configure your PC to use an address in the 192.168.1.2 - 254 range, then use a browser to connect to https://192.168.1.1.
Connecting to Restorepoint for the First Time
After you set the IP address for Restorepoint, use a browser on a network-connected PC to connect to the IP address and complete the initial configuration.
Restorepoint initially uses a self-signed certificate. Because of this, your web browser will warn you of an invalid (untrusted) certificate. This is normal behavior because the appliance certificate is not signed by a Trusted Certificate Authority. The session will still be encrypted. Refer to your browser instructions on how to proceed and accept the unsigned certificate. A valid (signed) certificate can be uploaded to Restorepoint after the initial configuration is completed.
To connect to Restorepoint for the first time:
- Log in with the default username (admin) and default password (admin).
- Restorepoint displays the End-User License Agreement. Read the terms of the Agreement, then click to signify that you accept the Agreement. You will not be able to use Restorepoint if you do not accept the Agreement.
- The next Installation Wizard page appears. You can use this page to configure your network settings.
- Supply values in the following fields:

Interfaces
- Interface. Select an interface from the drop down list.
- Use DHCP. Select this checkbox if you want to use a DHCP server for your interface and other options will be disabled.
- IP Address. Type your Restorepoint IP address.
- Subnet Mask. Type your subnet mask associated with the IP address
- Speed/Duplex. Select the link speed and duplex from the drop down list.
IP Configuration
- DNS Server 1. Type the DNS Server address for your network. Click to check connectivity.
- DNS Server 2. Type the second DNS Server address from your network. This field is optional. Click to check connectivity.
- Gateway. Type the default gateway for your network. Click to check connectivity.
- Domain Name. Type the default domain name.
Network Access
- Use Proxy. Select this checkbox if proxy is required for internet access.
- NAT Address. Type the NAT address if connection is required by your firewall.
Additonal Static Routes
If the devices that you want to add to Restorepoint are located on different networks, you may need to define additional static routes. If required, type the network IP address and the destination gateway IP address and click .
Bandwidth Management
- Throttle SCP/SFTP. Select this checkbox to limit the amount of network bandwidth Restorepoint uses.
- Click and the SMTP page appears. You can use this page to configure credentials for system notifications. Supply values in the following fields:
- Host. Type the IP address of your mail server. Click to check connectivity.
- Port. Click the arrows in the right of the field to navigate to the correct port number for your mail server. Click to test the connection.
- Username. Type the username for your mail server.
- Domain Name. Type the password for your mail server.
- From. Type an email address to use in the "From" field for notifications.
- To. Type a default email address to send email alerts to.
- Click and the Admin User page appears. You can use this page to configure the account for an admin level user. Supply values in the following fields:
- Username. Type a Restorepoint username.
- Email. Type an email for the admin user.
- Password. Type a password for the admin user. Click Show to display the password.
- Encryption Password. Type an encryption password for the admin user. Click Show to display the password.
- Recovery Question. Type a recovery question to be used if the user forgets their password.
- Recovery Answer. Type the answer to the recovery question.
- Click and the Activation page appears. You can use this page to configure contacts and other settings to activate Restorepoint. Supply values in the following fields:
- Company Name. Type the name of the company that is using the Restorepoint system.
- Contact Name. Type a name for a point of contact regarding the Restorepoint system.
- Email. Type an email for a point of contact regarding the Restorepoint system.
- Phone. Type a phone number for a point of contact regarding the Restorepoint system.
- Address. Type an address for a point of contact regarding the Restorepoint system.
- Reseller. Type the company name of the reseller, if applicable.
- Activation Code. Type the activation code if you are connected to the internet.
- Offline?. Select this checkbox if you are using Restorepoint offline.
- Click .
- If you entered an activation code, you will be redirected to the Restorepoint login page once installation is complete.
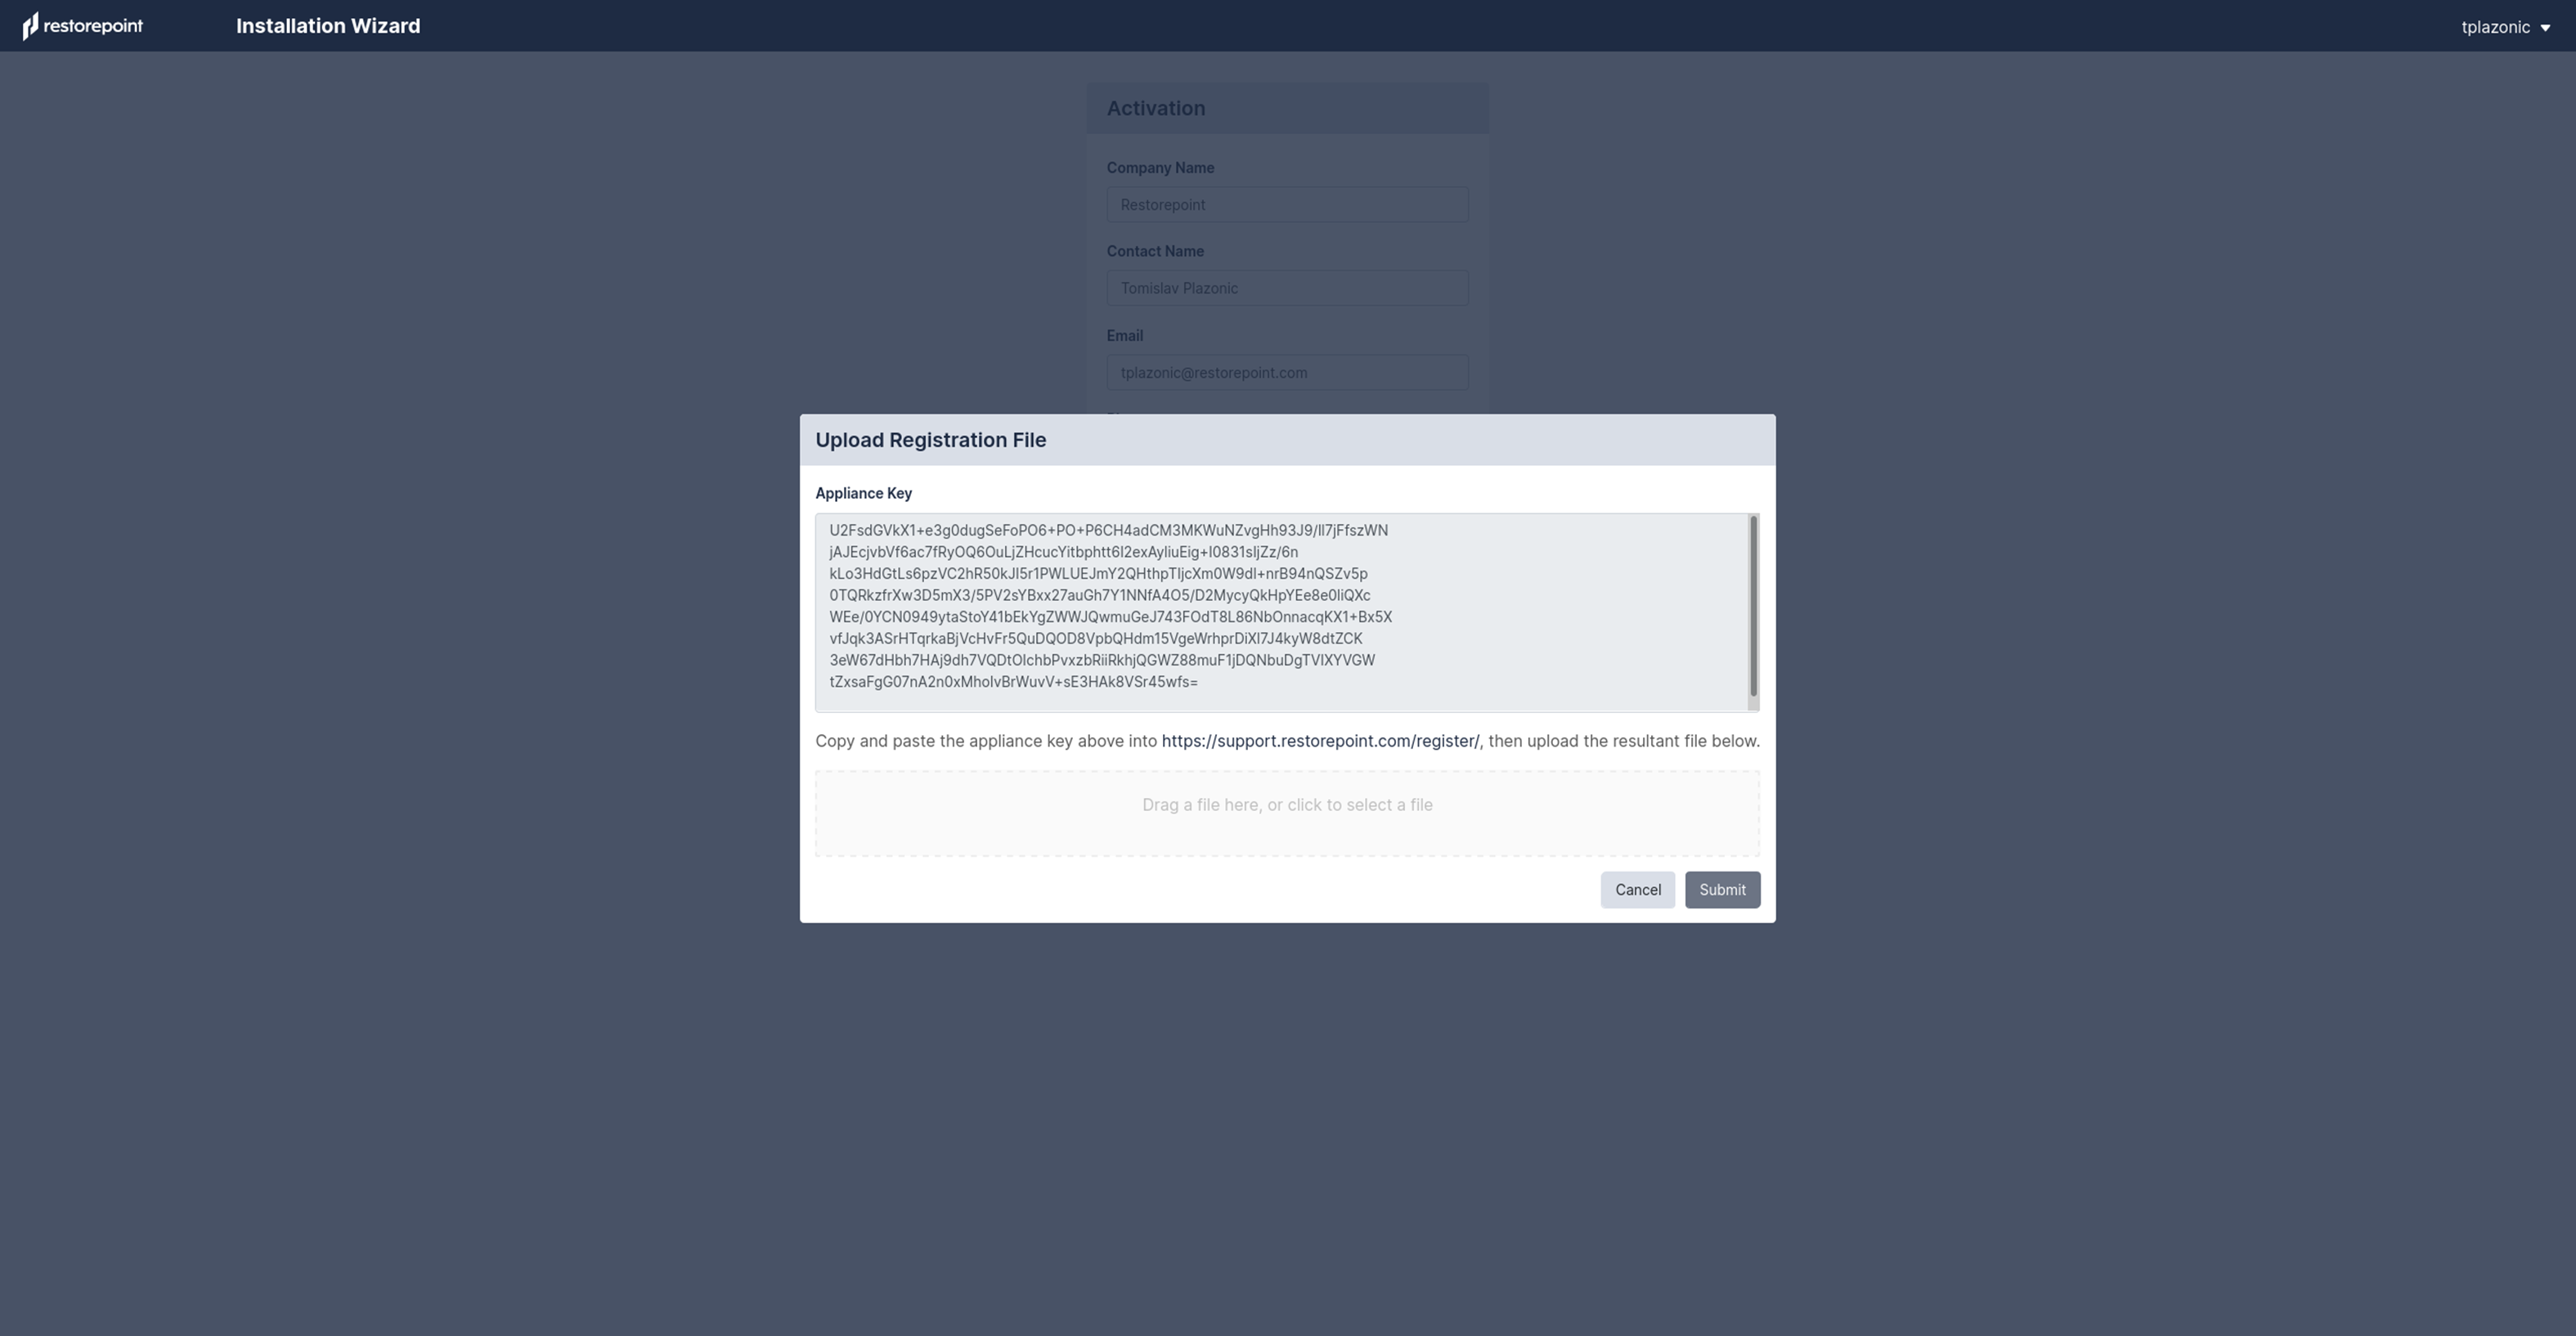
- If you selected the Offline? checkbox, the Upload Registration File pane appears.
- Copy the Appliance Key provided in the pane and click the Restorepoint support link provided in the middle of the pane.
- On the Restorepoint Support page, paste the Appliance Key that you copied above and click Register.
- Restorepoint provides a file to download. Click .
- Navigate back to your Restorepoint system and drag the file to the Upload Registration File pane to upload it or click inside the pane to select the file.
- Click and you will be redirected to the Restorepoint login page once installation is complete.
Connecting to Restorepoint After a Reboot
When Restorepoint is rebooted, it will start in a locked state. It is not able to perform any operations until the encryption password is entered, and only admin-level operators can log in to the appliance.
To enter the encryption password, use a browser to connect to the appliance and provide your administrator credentials and the encryption password:

The appliance will then transition to the normal operation mode, and subsequent administrator logins will not require an encryption password.