
This
Creating and Aligning a Configuration Object
A configuration object supplies the login credentials and other required information needed to execute the steps for an application in Skylar Automation. The Configurations page ( ) of the Skylar Automation user interface lists all available configuration objects for that system.
You can create as many configuration objects as you need. A Skylar Automation application can only use one configuration object at a time, but you can use (or "align") the same configuration object with multiple applications.
To use this SyncPack, you will need to create one or more configuration objects in the Skylar Automation user interface and align that configuration object to the applications that let you sync data between Skylar One and Skylar Automation.
Each unique stack that includes a Skylar One and Skylar Automation instance requires an individual configuration object with a unique region.
Creating a Configuration Object
For this SyncPack, you can make a copy of the "Skylar One Base Config" configuration object, which is the sample configuration file that was installed with the "Skylar One Base" SyncPack.
The "Skylar One Base Config" configuration object contains all of the required variables. Make a copy of the configuration object and update the variables from that object to match your Skylar One settings.
To create a configuration object based on the "Skylar One Base Config" configuration object:
- In the Skylar Automation user interface, go to the Configurations page ().
-
For the "Skylar One Base Config" configuration object, click the button (
 ) and select Edit. The Configuration pane appears.
Click to show the JSON code. Click the button again to see the fields.
-
Click . The Create Configuration pane appears.
This step is required. Do not use the original configuration object to run Skylar Automation applications.
-
Complete the following fields:
- Friendly Name. Name of the configuration object that will display on the Configurations page.
- Description. A brief description of the configuration object.
- Author. User or organization that created the configuration object.
- Version. Version of the configuration object.
-
In the Configuration Data field, include the required block of code to ensure that the applications aligned to this configuration object do not fail:
  {
    "encrypted": false,
    "name": "sl1_db_host",
    "value": "${config.sl1_host}"
  },
For example:
  {
    "encrypted": false,
    "name": "sl1_db_host",
    "value": "10.2.11.42"
  },
-
In the Configuration Data Values field, update the default variable definitions to match your Skylar Automation configuration.
The region value is a user-defined variable that identifies your Skylar One instance.
- To create a configuration variable in the JSON Editor, define the following keys:
- encrypted. Specifies whether the value will appear in plain text or encrypted in this JSON file. If you set this to "true", when the value is uploaded, Skylar Automation encrypts the value of the variable. The plain text value cannot be retrieved again by an end user. The encryption key is unique to each Skylar Automation system. The value is followed by a comma.
- name. Specifies the name of the configuration file, without the JSON suffix. This value appears in the user interface. The value is surrounded by double-quotes and followed by a comma.
- value. Specifies the value to assign to the variable. The value is surrounded by double-quotes and followed by a comma.
- Click . You can now align this configuration object with one or more applications.
Aligning a Configuration Object
Before you can run the applications in this SyncPack, you must first "align" a configuration object with the application you want to use.
To align a configuration object with an application:
- From the Applications page of the Skylar Automation user interface, open the relevant application and click . The Configurations pane for that application appears.
- From the Configurations drop-down, select the configuration object you want to use.
- Click to align that configuration with the application.
- Repeat this process for every other application you want to use.
The values for the parameters that display in the Configuration pane with a padlock icon ( ) are populated by the values in the configuration object.
Syncing Skylar One Organization Data
The "Fetch Skylar One Organizations" application retrieves organization data from the Skylar One API, serializes it, and stores all organization records in the cache. The cache uses the region name as a unique identifier to ensure region-specific data isolation. The cached organization data serves as a shared source for all other SyncPacks, allowing them to retrieve and utilize the appropriate organization information based on the specified region.
If you want to use the domain-level filtering and routing added in version 3.2.0 of the "Skylar Compliance" SyncPack to allow multiple Skylar One instances to connect to a single Skylar Compliance instance, you must configure and run the "Fetch Skylar One Organizations" application first.
To sync Skylar One organization data:
-
In the Skylar Automation user interface, go to the Applications page and select the "Fetch Skylar One Organizations" application. The Application page for that application appears.
-
Click . The Configuration pane appears.
-
Complete the following fields, as needed:
-
Configuration. Select the configuration object with the relevant Skylar One and credentials to align with this application. You cannot edit fields that are populated by the configuration object. Required.
The region field in the configuration object is linked to this application. It serves as a unique identifier for the Skylar Compliance, Skylar Automation, and the Skylar One stack.
-
sl1_chunk_size. Specify the number of organizations to include in each chunk pulled from Skylar One.
-
read_timeout. Specify the maximum amount of time in seconds that the application should wait for a response before timing out.
-
Click . The Configuration pane automatically closes after this message appears.
-
Click to run the application.
-
When the application completes, open the Step Log and review the Outgoing Data to view the organization data collected from Skylar One. As needed, select the other steps to review the logs on the Step Log for those steps.
Scheduling Skylar Automation Applications
Using the Skylar Automation user interface, you can configure Skylar Automation applications to run on a schedule instead of manually running the applications. As a best practice, if you use any of these applications, ScienceLogic recommends that you schedule those applications, in the following order:
ScienceLogic recommends that you schedule the "Fetch Skylar One Organizations" application to run at least every 23 hours.
You can create one or more schedules for a single application in the Skylar Automation user interface. When creating each schedule, you can specify the queue and the configuration file for that application.
To schedule an application:
-
On the Applications page (
 ), click the button for the application you want to schedule. The Schedule window appears, displaying any existing schedules for that application: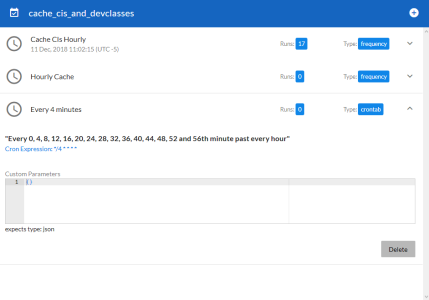
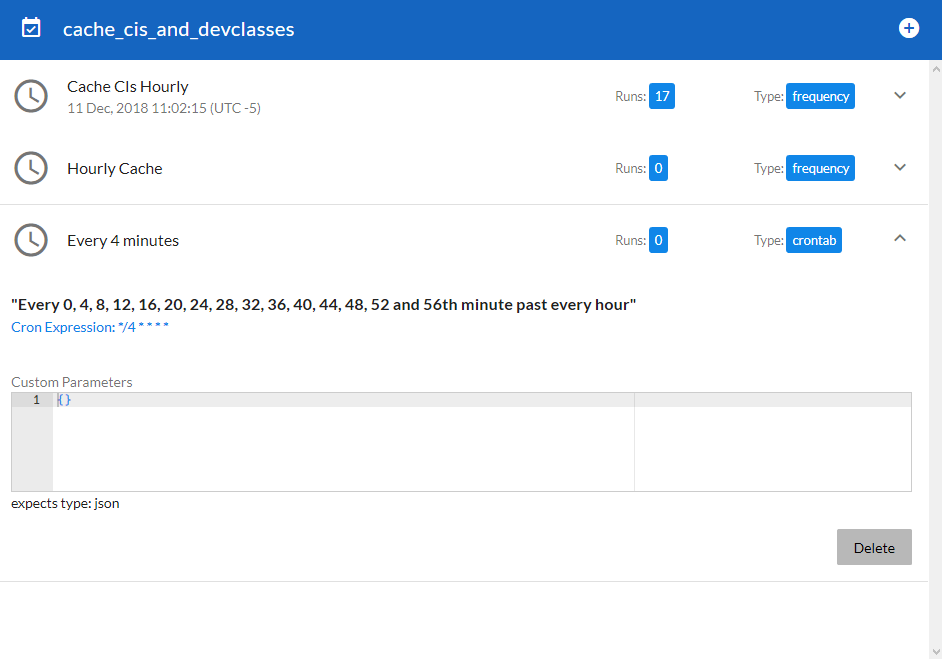
If you set up a schedule using a cron expression, the details of that schedule display in a more readable format in this list. For example, if you set up a cron expression of */4 * * * *, the schedule on this window includes the cron expression along with an explanation of that expression: "Every 0, 4, 8, 12, 16, 20, 24, 28, 32, 36, 40, 44, 48, 52, and 56th minute past every hour".
-
Select a schedule from the list to view the details for that schedule.
-
Click the + icon to create a schedule. A blank Schedule window appears:
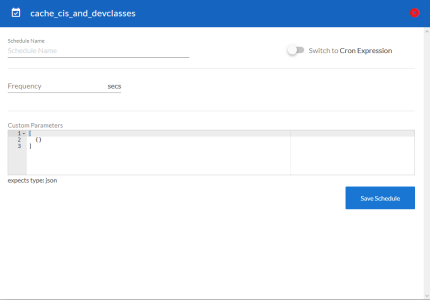
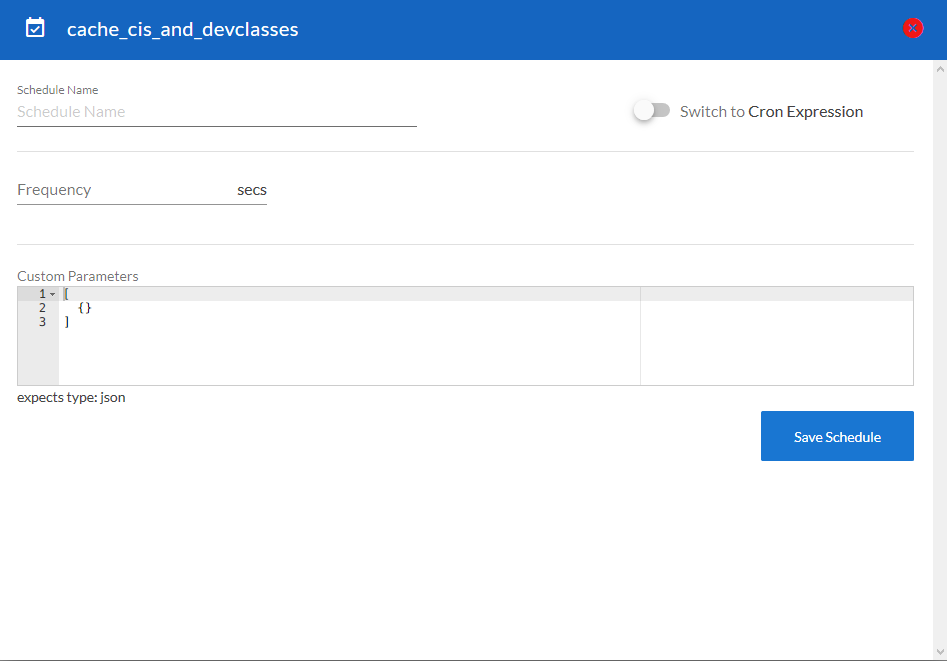
- In the Schedule window, complete the following fields:
- Schedule Name. Type a name for the schedule.
- Switch to. Use this toggle to switch between a cron expression and setting the frequency in seconds.
- Cron expression. Select this option to schedule the application using a cron expression. If you select this option, you can create complicated schedules based on minutes, hours, the day of the month, the month, and the day of the week. As you update the cron expression, the Schedule window displays the results of the expression in more readable language, such as Expression: "Every 0 and 30th minute past every hour on the 1 and 31st of every month", based on */30 * * /30 * *.
- Frequency in seconds. Type the number of seconds per interval that you want to run the application.
- Custom Parameters. Type any JSON parameters you want to use for this schedule, such as information about a configuration file or mappings. The values in this field will override any application variables that exist in the PowerFlow application you are scheduling.
-
Click . The schedule is added to the list of schedules on the initial Schedule window. Also, on the Applications page, the word "Scheduled" appears in the Scheduled column for this application, and the button contains a check mark:

After you create a schedule, it continues to run until you delete it. Also, you cannot edit an existing schedule, but you can delete it and create a similar schedule if needed.
To view or delete an existing schedule:
-
On the Applications page, click the button for the application that contains a schedule you want to delete. The Schedule window appears.
-
Click the down arrow icon (
 ) to view the details of an existing schedule:
- To delete the selected schedule, click .