![]()
This
Use the following menu options to navigate the SL1 user interface:
- To view a pop-out list of menu options, click the menu icon (
 ).
). - To view a page containing all of the menu options, click the Advanced menu icon (
 ).
).
Device Classes
Device classes determine:
- How devices are represented in the user interface
- Whether the device is a physical device or a virtual device
- How managed devices are discovered with the discovery tool
Administrators can define new or legacy device classes and customize properties of existing device classes on the Device Classes page (Devices > Device Classes), or on the Device Class Editor page (System > Customize > Device Classes) in the classic SL1 user interface.
Most TCP/IP-compliant devices have an internally-defined class ID, called the System Object ID and abbreviated to SysObjectID. This SysObjectID is an SNMP OID defined by the manufacturer. Each manufacturer specifies a SysObjectID for each different hardware model. In SL1, each SNMP device class is associated with a SysObjectID. During initial discovery, SL1 searches each device for the SysObjectID and assigns each device to the appropriate device class.
SL1 also includes device classes for devices that do not support SNMP. These device classes are associated with values returned by nmap. SL1 runs nmap against each device during discovery.
The following sections describe the types of device classes used in SL1.
Generic | SNMP Device Class
SL1 includes a default device class for devices that include a SysObjectID but for which SL1 does not have an aligned device class. This device class is Generic | SNMP.
For each device with a device class of Generic | SNMP, you can use SL1 to view the SysObjectID for the device and then define a new device class using that SysObjectID.
Non-SNMP Device Classes
SL1 also includes device classes for devices that do not support SNMP. Devices that do not support SNMP are sometimes referred to as "pingable". Devices that have a device category of "pingable" are devices that meet one of the following criteria:
- The device does not support SNMP.
- SNMP has been disabled on the device.
- The incorrect credential was provided during discovery and "Discover Non-SNMP" was enabled for the discovery session.
SL1 can use nmap to match a "pingable" device to an appropriate "pingable" device class.
Component Device Classes
SL1 includes device classes for component devices. SL1 discovers management systems and the component devices they manage. SL1 uses Dynamic Applications to retrieve data from a management system and discover each component device managed by that management system. Device classes for components are aligned with the Dynamic Applications that discover component devices.
Agent-Only Device Classes
SL1 includes device classes for devices that are monitored by the SL1 agent and are not monitored via SNMP.
During initial discovery, the agent returns operating system type and version information to SL1.
Based on this information, SL1 assigns the corresponding device classes to a device monitored only by an agent.
If a device is monitored by an agent and via SNMP, the device class assigned by SNMP discovery will take precedence.
Legacy ICMP Device Classes
SL1 includes legacy device classes of type SNMP Enabled for "pingable" devices (that is for devices that don't support SNMP). SL1 includes the following legacy, SNMP Enabled device classes for "pingable" devices:
- Cisco Systems | ICMP
- FreeBSD | ICMP
- Linux | ICMP
- Microsoft | ICMP
- Novell | ICMP
- Ping | ICMP
- Sun Microsystems | ICMP
- Tektronix, Inc. | ICMP
NOTE: Best practice is to define "pingable" devices as those that do not support SNMP. For "pingable" devices that do not support SNMP, ScienceLogic recommends you use the new "deep discovery" feature and then create device classes of type "pingable".
Viewing the List of Device Classes
On the Device Classes page (Devices > Device Classes), you can view a list of existing device classes in SL1.

If you are looking for a very specific set of device classes, click the gear icon (![]() ) to the right of the Search field and select Advanced. In this mode you can create an advanced search using "AND" or "OR" for multiple search criteria. For more information, see Performing an Advanced Search.
) to the right of the Search field and select Advanced. In this mode you can create an advanced search using "AND" or "OR" for multiple search criteria. For more information, see Performing an Advanced Search.
You can adjust the size of the rows and the size of the row text on this inventory page. For more information, see the section on
For each device class, the Device Classes page displays the following information:
- Device Class. The name of the device class.
- Type. The device type. Can be "physical", "virtual", or "component".
- Device Category. The device category. A device category is a way to categorize devices by primary function. SL1 uses device categories to group related devices in reports and views. The list of device categories is defined in the Device Category Editor page (System > Customize > Device Categories).
- Model. The device model.
- Vendor. The device manufacturer.
To rearrange the columns in the list, click and drag the column name to a new location. You can adjust the width of a column by clicking and dragging the right edge of the column. For more information about editing and adding columns, see
Viewing the List of Device Classes in the Classic SL1 User Interface
The Device Class page displays a list of existing device classes in the Device Class Register pane.
To view the list of device classes:
- Go to the Device Class page (System > Customize > Device Classes).
To sort the list of device classes, click on a column heading. The list will be sorted by the column value, in ascending order. To sort by descending order, click the column heading again.
- For each device class, the Device Class Register pane displays:
- Device Class Name. Name of the device class.
- Description. Description of the device class. If the device class is for an entire manufacturer, rather than for a specific product, the description will contain the value "OEM".
NOTE: If you see a device class of Ping | ICMP or a device with a device category of pingable, this means that the device does not support SNMP, that SNMP has been disabled on the device, or that the wrong SNMP credential was provided during discovery.
NOTE: If you see a device class of Generic | SNMP, this means that SL1 discovered a SysObjectID for the device, but SL1 does not include a device class that aligns with that SysObjectID.
- Device Category. The device category. A device category is a way to categorize devices by primary function. SL1 uses device categories to group related devices in reports and views.The list of device categories is defined in the Device Category Editor page (System > Customize > Device Categories).
- Device Class Tier. This field is no longer used for Subscription Billing. For information regarding billing, see Viewing and Managing Subscription Data.
NOTE: If you create a custom device class, please contact ScienceLogic Customer Support to define the Device Class Tier for the new device class. Failure to contact will result in the device remaining in the default bucket and being billed at the full rate. ScienceLogic recommends to include the PowerPack name that should include the new devices. For more information, see Custom Device Class Process.
- Class ID. Unique numeric ID, automatically assigned to the device class by SL1.
- Collection Type. Device type. Can be "physical", "virtual", or "component".
- Process Collection. Specifies the application that maintains process information for the device. SL1 will poll this application for information on the system processes. Choices are:
- n/a. Do not monitor processes.
- Host Resource. MIB that provides information on processes.
- HP/UX. Specifies that HP agents will provide information on processes.
- Solaris (prior to Solaris 10). Specifies that Solaris agents will provide information on processes.
- Extended User Information. Specifies that ScienceLogic's custom extension to net-SNMP will provide process information. Users must have installed the extension before selecting this option.
- Device Dashboard. This field displays the device dashboard associated with the device class.
- PowerPack. This field specifies whether or not this device class is included in a PowerPack.
- Device Icon. The icon associated with the device class. To view the icon, select the picture icon (
 ).
). - Discovery Identifier. An SNMP OID defined by the manufacturer. Usually, a hardware manufacturer specifies a SysObjectID for each different hardware model.
- Subs. Specifies if one or more devices are aligned with the device class. If so, the devices icon (
 ) appears in this column. Selecting the devices column leads to the Subscribers modal page, where you can view a list of devices that are aligned with the device class.
Filtering the List of Device Classes
You can filter the list on the Device Class Editor page by one or more parameters. Only device classes that meet all the filter criteria will be displayed in the Device Class Editor page.
For each filter except Collection Type, enter text into the desired filter-while-you-type field. The Device Class Editor page searches for device classes that match the text, including partial matches. By default, the cursor is placed in the left-most filter-while-you-type field. You can use the <Tab> key or your mouse to move your cursor through the fields. The list is dynamically updated as you type. Text matches are not case-sensitive.
You can also use special characters to filter each parameter.
Filter by one or more of the following parameters:
- Device Class. You can enter text to match, including special characters, and the Device Class Editor page will display only devices that have a matching device class name.
- Description. You can enter text to match, including special characters, and the Device Class Editor page will display only devices that have a matching description name.
- Device Category. You can enter text to match, including special characters, and the Device Class Editor page will display only devices that have a matching device category name.
- Device Class Tier. You can enter text to match, including special characters, and the Device Class Editor page will display only devices that have a matching device class tier.
- Class ID. You can enter text to match, including special characters, and the Device Class Editor page will display only devices that have a matching class ID.
- Collection Type Specifies the device class's collection type. Only those devices that match all the previously selected fields and have the specified collection type will be displayed. The choices are:
- All. Include device classes that have a Collection Type of physical and virtual.
- Physical. Include only device classes that have a Collection Type of physical.
- Virtual. Include only device classes that have a Collection Type of virtual.
- Device Dashboard. You can enter text to match, including special characters, and the Device Class Editor page will display only devices that have a matching device dashboard.
- Process Collection. You can enter text to match, including special characters, and the Device Class Editor page will display only devices that have a matching process collection type.
- PowerPack. You can enter text to match, including special characters, and the Device Class Editor page will display only devices that have a matching PowerPack value.
- Device Icon. You can enter text to match, including special characters, and the Device Class Editor page will display only devices that have a matching device icon name.
- Discovery Identifier. You can enter text to match, including special characters, and the Device Class Editor page will display only devices that have a matching discovery identifier.
- Subs. You can enter text to match, including special characters, and the Device Class Editor page will display only devices that have a matching subs value.
Special Characters
When filtering a list in a registry page, you can include the following special characters to search each field except those that display date and time:
NOTE: When searching for a string, SL1 will match substrings by default, even if you do not include any special characters. For example, searching for "hel" will match both "hello" and "helicopter". When searching for a numeric value, SL1 will not match a substring unless you use a special character.
| Special Character | Description | Example |
|---|---|---|
| , (comma) | (For strings or numeric values) Specifies an OR operation. | "dell,micro" would match all values that contain the string "dell" OR the string "micro". |
| & (ampersand | (For strings or numeric values) Specifies an AND operation. | "dellµ" would match all values that contain both the string "dell" AND the string "micro", in any order. |
| ! (exclamation point) |
(For strings or numeric values) Specifies a NOT operation. You can also use the "!" character in combination with the arithmetic special characters (min-max, >, <, >=, <=, =) described below. |
"!dell" would match all values that do not contain the string "dell". |
| * (asterisk) |
(For strings or numeric values) Specifies a "match-zero-or-more" operation. For a string, matches any string that matches the text before and after the asterisk. For a numeral, matches any numeral that contains the text. |
|
| ? (question mark) | (For strings or numeric values) Specifies a "match any one character" operation. |
|
| ^ (caret) | (For strings only) Specifies a "match the beginning" operation. Matches any string that begins with the specified string. | "^sci" would match "scientific" and "sciencelogic", but not "conscious". |
| $ (dollar) |
(For strings only) Specifies "match the ending". Matches any string that ends with the specified string. You can use both ^ and $ if you want to match an entire string. For example, "^tern$" would match the strings "tern" or "Tern" or "TERN"; it would not match the strings "terne" or "cistern". |
"ter$" would match the string "renter" but not the string "terrific". |
| min-max | (For numeric values only) Matches any value between the specified minimum value and the maximum value, including the minimum and the maximum. | "1-5 "would match 1, 2, 3, 4, and 5. |
| - (dash) | (For numeric values only) A "half open" range. Matches values including the specified minimum and greater, or including the specified maximum and lesser. |
|
| > (greater than) | (For numeric values only) Matches any value greater than the specified value. | ">7" would match all values greater than 7. |
| < (less than) | (For numeric values only) Matches any value less than the specified value. | "<12" would match all values less than 12. |
| >= (greater than or equal to) | (For numeric values only) Matches any value that is equal to or greater than the specified value. | ">=7" would match all values 7 and greater. |
| <= (less than or equal to) | (For numeric values only) Matches any value that is equal to or less than the specified value. | "<=12" would match all values 12 and less. |
| = (equal) |
(For numeric values only) Matches a value that is equal to the the specified value. You can also use this special character to match a negative value, as demonstrated in the example. |
"=-5 " would match "-5" instead of being evaluated as the "half open range" as described above. |
Creating Device Classes
The following sections describe how to create new device classes for:
- Devices that support SNMP
- Devices with Device Class "Generic | SNMP"
- Devices that do not support SNMP
- Devices with a Device Class of "Component"
Creating a New SNMP-Enabled Device Class
In the Device Class Editor page, you can define a new device class. SL1 can then use this device class during discovery and users can assign this device class to devices.
You can use an existing device class as a template when defining a new device class. To do this, follow the steps in the Editing an SNMP-Enabled Device Class section, but supply a new name in the Device Class field and click to save your changes.
The Device Class Tier is no longer used for Subscription Billing. For information regarding billing, see Viewing and Managing Subscription Data. If you create a custom device class, please contact ScienceLogic Customer Support to define the Device Class Tier for the new device class. For more information, see Custom Device Class Process.
When you create a new device class of type SNMP Enabled, you are defining a device class that uses the SNMP SysObjectID to identify member device.
To create a new device class of type SNMP Enabled:
- Go to the Device Class Editor page (System > Customize > Device Classes).
- Click to clear the fields in the Device Class Editor pane.
- Select SNMP Enabled in the Device Type drop-down list. You can now define the value in the following fields:
- Root Device. If selected, this checkbox specifies that this device can have children devices. Ensures that root devices are included in nightly re-discovery.
- Weight. If two device-class definitions are similar, a device might meet the criteria for both device classes. In this case, the Weight field tells SL1 which device class to align with the device. The Weight field allows you to define both detailed, non-SNMP device-class definitions, as well as less detailed, catch-all device classes.
- Device Class. The name of the manufacturer who created the device and/or agent. Can be any combination of alphanumeric characters, up to 48 characters in length.
- Discovery Identifier (SysObjectID). The SNMP OID, in numeric form, that is returned when querying the device's sysObjectID. Can be up to 64 characters in length. Refer to the appropriate MIB file to determine this value. To view a list of OIDs associated with companies, organizations, and manufacturers, see http://www.iana.org/assignments/enterprise-numbers/
- Discovery Qualifier (SNMP OID). Optional field. Secondary SNMP OID, in numeric form, used to further qualify device types. Can be up to 255 characters in length. If a device matches both the Discovery Identifier and responds to the Discovery Qualifier, the device will be assigned to the device class.
- Tabular. If you want to use a tabular value in the Discovery Qualifier field, select this checkbox. When you select this checkbox, SL1 will perform an SNMP walk of the Discovery Qualifier (as opposed to an SNMP "get" request) and then search for the value that matches the Qualifier Match field.
- Qualifier Match. Optional field. String that must be present in returned value for the Discovery Qualifier OID. If a device matches the Discovery Identifier, responds to the Discovery Qualifier, and the response matches the Qualifier Match, the device will be assigned to the device class. Can be up to 64 characters in length.
- Description. The model name of the device. Can be any combination of alphanumeric characters, up to 48 characters in length. For ease-of-use, ScienceLogic recommends that you follow this convention: If you are creating a device class for an entire manufacturer, rather than for a specific product, enter "OEM" as the device description.
- Device Icon. The icon used to display the device in the graphical interface. To view the available icons, click . Select an icon from the drop-down list.
- All in class. Selecting this checkbox updates the device icon for all existing members of the device class.
- Device Category. A logical categorization of device by primary function. This field allows SL1 to group related devices in reports and views. Select a value from the drop-down list.
- All in class. Selecting this checkbox updates the device category for all existing members of the device class.
- System Uptime OID. Specifies the OID to monitor to determine system uptime. Choices are:
SL1 will align the device with the device-class definition with the lowest weight. If a device matches two device-class definitions, and both device classes have the same weight, SL1 will align the device with the device class that appears first in the alphabetical list of device classes.
For example, you could define a detailed device class with a weight of "1" and a similar but less detailed device class with a weight of "10". SL1 will first try to assign a discovered device to the device class with a weight of "1". If the device does not meet the criteria for that device class, SL1 will then try to assign the discovered device to the device class with a weight of "10".
- sysUpTime (.1.3.6.1.2.1.1.3.0). EM7 Default. From the System group of MIB RFC 1213. Returns uptime of the device's SNMP Agent. The time (in hundredths of a second) since the network management portion of the system was last re-initialized.
- hrSystemUptime (.1.3.6.1.2.1.25.1.1.0). From the HR-MIB. The amount of time since this host was last initialized.
- Any additional OIDs defined in the System Uptime OIDs page (System > Customize > Uptime OIDs).
- Correlation Method. Used for special topological correlation. Allows SL1 to support event correlation and mapping for VMware and Microsoft hypervisors.
- Collection Type. Specifies whether the device is a hardware-based device (physical) or a virtual device.
- PDU Packing. If your managed network includes a large number SNMP elements such as interfaces that you want to monitor, select this checkbox. PDU packing enables quicker collection of voluminous SNMP data. For more information, see the section on Additional Configuration for Concurrent Network Interface Collection in the Monitoring Device Infrastructure Health manual.
- Process Collection. Specifies how SL1 will retrieve process information for the device. SL1 will use this method to gather information on the system processes. Choices are:
- n/a. Don't monitor processes.
- Host Resource. Specifies that the Host Resources MIB will be used to collect information on processes.
- HP/UX. Specifies that HP agents will provide information on processes.
- Solaris (prior to Solaris 10). Specifies that Solaris agents will provide information on processes.
- Extended User Information. Specifies that ScienceLogic's custom extension to net-SNMP will provide process information. Users must have installed the extension before selecting this option.
- Service Collection. Specifies how to collect information on Windows services. Choices are:
- n/a. This is not a Windows device class.
- Windows Basic. Use the Windows MIB to gather information about Windows services.
- WMI Informant. Use the WMI Informant MIB to gather information about Windows services.
- Agent Identifier 1 and Agent Identifier 2: These fields are used to align device classes to devices using the SL1 agent. Device classes exist for every possible combination of values returned by the agent; you do not need to enter or change values in these fields when creating or editing a device class.
- Device Dashboard. Select a device dashboard from a list of all device dashboards in SL1. For devices with this device class, the selected device dashboard will appear as an option in the Device Summary page. This field is optional.
- L3 Topology. If selected, SL1 includes devices in this device class in the Layer-3 Maps page (Classic Maps > Topology Maps > Layer-3). SL1 uses traceroute from each Data Collector to each managed device to create Layer-3 maps.
- Interface Index Change Detection. On some devices, the SNMP index of an interface can change when the interface goes down and then comes back up. If you select this checkbox, SL1 will use the combination of interface ID and ifPhysAddress to monitor interfaces on devices that use this device class and to align events with those interfaces.
- Click to save the new device class or click to save your changes under a new device class name.
Editing an SNMP-Enabled Device Class
In the Device Class Editor page, you can edit a device class for a device that supports SNMP.
When you select SNMP Enabled, you are defining a device class that uses the SNMP SysObjectID to identify member devices.
To edit an existing device class:
- Go to theDevice Class Editor page (System > Customize > Device Classes), or from the Device Properties page, select the pencil icon (
 ).
). - In the Device Class Register pane at the bottom of the page, find the device class you want to edit. Select its wrench icon (
 ).
). - The fields in the top pane will be populated with values from the selected device class. You can edit one or more of the fields described in the section Creating a New SNMP-Enabled Device Class.
- Select the button to save your changes to the device class or select the button to save your changes under a new device class name.
Creating a New Device Class for a Device with Device Class "Generic | SNMP"
After discovery, SL1 might discover devices and assign those devices to the device class Generic | SNMP. This means that SL1 was able to retrieve a SysObjectID value from the device, but SL1 does not include a Device Class for that SysObjectID.
The Device Class Tier is no longer used for Subscription Billing. For information regarding billing, see Viewing and Managing Subscription Data. If you create a custom device class, please contact ScienceLogic Customer Support to define the Device Class Tier for the new device class. For more information, see Custom Device Class Process.
To create a new device class for a device with device class Generic | SNMP:
- Go to the Device Manager page (Devices > Classic Devices, or Registry > Devices > Device Manager in the classic SL1 user interface).
- In the Device Manager page, find the device with the device class Generic | SNMP. Select the wrench icon () for the device.
- In the Device Administration panel, select the tab.
- In the Device Toolbox page, select the icon for SNMP Walker.
- In the SNMP Walker modal page, go to the drop-down menu in the upper left and select System MIB. Then select the button.
- The second entry in the Returned Value column is the SysObjectID. In the example above, that value is 1.3.6.1.4.1.303.3.3.7.3. Copy this value and save it in a document or write down this value. You will need it to create a new device class.
- Follow the directions in the section Creating a New SNMP-Enabled Device Class. In the Discovery Identifier field, enter the value of the SysObjectID from the SNMP Walker. Make sure there are no blank spaces before or after the SysObjectID value.
- To assign the new device class to a device, follow the instructions in the section Manually Changing the Device Class for a Device.
- Alternately, you can re-discover the device with the device class "Generic | SNMP". To re-discover the device, go to the Device Manager page (Devices > Classic Devices, or Registry > Devices > Device Manager in the classic SL1 user interface). Find the device you want to rediscover. Select its wrench icon (). In the Device Properties page for the device, select the magnifying glass icon (
 ).
). - After the device is re-discovered, it should now be aligned with the new device class.
Creating a New Device Class for Devices That Do Not Support SNMP
SL1 includes device classes for devices that are "pingable". By default, these devices are aligned with the device category of "pingable" and are placed in the device class "Ping | ICMP". To discover devices that have a device category of "pingable", you must select Discover Non-SNMP in the Discovery Session Editor page.
Devices with the device category of "pingable" are devices that meet one of the following criteria:
- Device does not support SNMP.
- SNMP has been disabled on the device.
- Either no SNMP credential was provided in the discovery session or an incorrect SNMP credential was provided in the discovery session.
In some cases, you might want to discover a "pingable" device and use XML requests, XSLT requests, WMI requests, SOAP transactions, Python snippets, or SQL queries to gather information from the device. You can do this through Dynamic Applications.
You might also want to create a more descriptive device class for these types of devices and assign a device category other than "pingable". SL1 can use the values returned by nmap (run during discovery) to match a "pingable" device to a descriptive device class.
You can use an existing device class as a template when defining a new device class. To do this, follow the steps in the Editing a Device Class That is Not SNMP-Enabled section, but supply a new name in the Device Class field and click to save your changes.
The Device Class Tier is no longer used for Subscription Billing. For information regarding billing, see Viewing and Managing Subscription Data. If you create a custom device class, please contact ScienceLogic Customer Support to define the Device Class Tier for the new device class. For more information, see Custom Device Class Process.
When you create a new device class of type Pingable, you are defining a device class that uses the XML values returned by nmap to identify member devices.
To create a new device class with a device category of "pingable":
- To discover details about devices that do not support SNMP, during discovery (System > Manage > Classic Discovery), you should select an Initial Scan Level of 5. Deep Discovery and select the checkbox for Discover Non-SNMP. SL1 will run the following nmap command on each device during discovery:
nmap -sS -O --host-timeout=12000ms "-p 21,22,23,25,80" -A --version-all -oX full pathname of file in which to store XML outputIP address of device
Depending on your selections in the Discovery Session Editor page, SL1 might use the -sU or -sT option instead of -sS. The value supplied to the host-timeout option will vary depending upon the list of ports specified in the Discovery Session Editorpage. The list of ports supplied with the -p option will vary depending upon the list of ports specified in the Discovery Session Editor page. For more details on the nmap command, see the webpage http://nmap.org/book/man.html.
- SL1 stores the output from the nmap command in an XML file. In the NMAP Report XPATH field (described later in this section), you specify a path in that XML file. That path will specify the location of a value in the XML file. SL1 will then examine the specified value and use the regular expression defined in the XPATH Match Regex field (described later in this section) to match devices to this device class.
- To begin gathering information to include in the device class, find a device for which you want to create a "pingable" device class. If you have already discovered this device, it might currently have a device class of "Ping | ICMP".
- You must now run nmap on the device. You can either log in directly to the device or log in to another device that can communicate with the device on which you want to run nmap. At the command prompt, enter the following:
nmap -sS -O -oX full pathname of file in which to XML output-sV --version-all -A IP address of device
- Navigate to the XML file where you stored the output from the nmap command. Examine the output and find an XML element or attribute that you can use to uniquely identify a device class for the device. Note the XPATH to the element or attribute. For more information on XPATH syntax, see http://www.w3schools.com/xpath/xpath_syntax.asp.
- The device data in the XML report generally uses the following element structure:
- Information about nmap, including scan level and debugging level.
- Information about each discovered host, including start-time and end-time for the nmap and the IP address, MAC address, and hardware vendor.
- Specific information about each port, including the service running on the port, some stored as attributes of the Port element, some stored as child elements of the Port element
- Specific information about the operating system, include vendor and version number, stored as attributes of the OSClass element
- Information about uptime for the device.
- Information about traceroute to the discovered device and round-trip time to the discovered device.
- Performance data for this session of nmap.
- For example, suppose we want to create a device class for each device that runs an Apache web server. After running nmap on a device that is running Apache, we might see the following elements and attributes under Host/Ports:
<port protocol="tcp" portid="80">
<state state="open" reason="syn-ack" reason_ttl="64"/>
<service name="http" product="Apache httpd" version -"2.2.3", extraninfo="(CentOS)" method="probed" conf="10" />
<script id="html-title" output="Apache HTTP Server Test Page powered by CentOS" />
<script id="http-favicon" output="" />
</port>
The XPATH would be /nmaprun/host/ports/port/service/@product
- Go to the Device Class Editor page (System > Customize > Device Classes) to create a new device class. Click the button to clear any values from the Device Class Editor page. Supply a value in the following fields:
- Device Type. Select Pingable.
- Root Device. Specifies that this device can have children devices. Ensures that root devices are included in nightly re-discovery. Leave this box unchecked.
- Weight. If two device-class definitions are similar, a device might meet the criteria for both device classes. In this case, the Weight field tells SL1 which device class to align with the device. The Weight field allows you to define both detailed, non-SNMP device-class definitions, as well as less detailed, catch-all device classes.
- Device Class. The name of the manufacturer who created the device and/or agent. Can be any combination of alphanumeric characters, up to 48 characters in length.
SL1 will align the device with the device-class definition with the lowest weight. If a device matches two device-class definitions, and both device classes have the same weight, SL1 will align the device with the device class that appears first in the alphabetical list of device classes.
For example, you could define a detailed device class with a weight of "1" and a similar but less detailed device class with a weight of "10". SL1 will first try to assign a discovered device to the device class with a weight of "1". If the device does not meet the criteria for that device class, SL1 will then try to assign the discovered device to the device class with a weight of "10".
- NMAP Report XPATH. Specifies how should parse the results of an nmap request (run during discovery) to determine whether the device should be aligned to this device class. If you select an Initial Scan Level of 5. Deep Discovery for a discovery session, SL1 will run the following nmap command on each device during discovery. SL1 will include the -A option, to retrieve as much information as possible and match pingable devices with custom device classes.
- In the NMAP Report Path field, enter the XPATH for the element or attribute you want to use to identify member devices. That path will specify the location of a value in the XML file. SL1 will then examine the specified value and use the regular expression defined in the XPATH Match Regex field to match devices to this device class.
In SL1, the XPATH must always begin with /nmaprun/host. Using our example from step #7 above, we would provide an XPATh of:
/nmaprun/host/ports/port/service/@product
NOTE: In the NMAP Report Path field, we included the entire path to the attribute we want to match, but intentionally did not filter on the attribute value. That is, we specified /nmaprun/host/ports/port/service/@product instead of /nmaprun/host/ports/port/service/@product='Apache httpd'. When you include the value of the attribute in the XPATH, XPATH does not return the attribute value, but instead returns the entire element that includes the attribute. Because the element is not a text string, SL1 cannot search the element using a regex.
- XPATH Match Regex. In this field, specify a regular expression you want to use when examining the value returned by nmap. The location of the value returned by nmap is defined in the NMAP Report XPATH field. SL1 will align a device to a device class if the nmap response includes a value at the path specified in the NMAP Report XPATH and the value at that location matches the regular expression in the XPATH Match Regex field.
Using our example in step #7, we would provide the value Apache httpd.
- Description. The model name of the device. Can be any combination of alpha-numeric characters, up to 48-characters in length. For ease-of-use, ScienceLogic recommends that you follow this convention: If you are creating a device class for an entire manufacturer, rather than for a specific product, enter "OEM" as the device description.
- Device Icon. The icon used to display the device in the graphical interface. To view the available icons, click . Select an icon from the drop-down list.
- All in class. Selecting this checkbox updates the device icon for all existing members of the device class.
- Device Category. A logical categorization of device by primary function. This field allows to group related devices in reports and views. Select a value from drop-down list.
- All in class. Selecting this checkbox updates the device category for all existing members of the device class.
- Collection Type. Specifies whether the device is a hardware-based device (physical) or a virtual device.
- Weight. If two device-class definitions are very similar, a device might meet the criteria for both device classes. In this case, the Weight field tells which device class to align with the device. SL1 will align the device with the device-class definition with the lowest weight. If a device matches two device-class definitions, and both device classes have the same weight, SL1 will align the device with the device-class that appears first in the alphabetical list of device classes.
The Weight field allows you to define detailed non-SNMP device-class definitions and still have catch-all device-classes with less-specific criteria.
For example, you could define a detailed device class with a weight of "1" and a similar but less detailed catch-all device class with a weight of "10". SL1 will first try to assign a discovered device to the device class with a weight of "1". If the device does not meet the criteria for that device class, SL1 will then try to assign the discovered device to the device class with a weight of "10".
- Device Dashboard. Select a device dashboard from a list of all device dashboards in SL1. For devices with this device class, the selected device dashboard will appear as an option in the Device Class Editor page. This field is optional.
- Click the button to save your changes to the device class or click the button to save your changes under a new device-class name.
Applying the New Device Class
To apply a new "pingable" device class during discovery:
- Go to the Discovery Control Panel page (System > Manage > Classic Discovery). If you are creating a new discovery session, click the button. If you are editing an existing discovery session, click its wrench icon ().
- In the Discovery Session Editorpage:
- In the Initial Discovery Scan Level field, select 5. Deep Discovery.
NOTE: You can also define Initial Discovery Scan Level in the Behavior Settings page (System > Settings > Behavior). Because this discovery level is very compute-intensive, you might want to avoid setting this discovery level globally and instead choose this discovery level only for specific discovery sessions.
- Select the Discover Non-SNMP checkbox.
- Select the Model Device checkbox.
- Click the button.
- When you run the discovery session, SL1 will apply the new device class to discovered or re-discovered devices.
NOTE: You can also apply a new "pingable" device class during nightly auto-discovery. You can define (nightly) Rediscovery Scan Level in the Behavior Settingspage (System > Settings > Behavior) and select 5. Deep Discovery. However, because this auto-discovery level is very compute-intensive, you might not want to use this setting for global auto-discovery.
Maintaining the New Device Class During Auto-Discovery
If you have applied a new "pingable" device class to a device, you should do the following to make sure that doesn't reset the device's device-class to "Ping | ICMP" during nightly auto-discovery.
NOTE:SL1 will reset a pingable device's device class to "Ping | ICMP" if Deep Discovery is not enabled for nightly auto-discovery. You can enable Deep Discovery for nightly auto-discovery in the Behavior Settingspage (System > Settings > Behavior). Go to the field Rediscovery Scan Level, and select 5. Deep Discovery. However, because this auto-discovery level is very compute-intensive, you might not want to use this setting for global auto-discovery.
You can disable auto-discovery for each device that uses Deep Discovery. Instead of using nightly auto-discovery, you can create a scheduled discovery session that will update the device class. To do this:
- Go to the Device Properties page (Devices > Classic Devices > wrench icon).
- Unselect the checkbox for Auto-Update.
- Click the button.
- Go to the Discovery Control Panel page (System > Manage > Classic Discovery) and create a discovery session for this device (and each device that uses Deep Discovery and which you want to update regularly). When creating this discovery session:
- In the Initial Discovery Scan Level field, select 5. Deep Discovery.
- Select the Discover Non-SNMP checkbox.
- Select the Model Device checkbox.
- Define the new discovery session as a scheduled discovery session, so you can periodically update the device's data.
Editing a Device Class That is Not SNMP-Enabled
In the Device Class Editor page, you can edit the parameters of an existing device class.
When you do not select SNMP Enabled, you are defining a device class that does not use SNMP to identify member devices. Instead, the device class will use a value returned by nmap (run during discovery) to identify member devices.
NOTE: You can use an existing device class as a template for a new device class. To do this, follow the steps in this section, but supply a new name in the Device Class field and select the button to save your changes.
To edit an existing Device Class:
- Go to the Device Class Editor page (System > Customize > Device Classes), or from the Device Properties page, select the pencil icon ().
- In the Device Class Register pane at the bottom of the page, find the device class you want to edit. Select its wrench icon ().
- The fields in the top pane will be populated with values from the selected device class.
- In the Device Class Editor page, you can edit the parameters of an existing device class. If you do not select SNMP Enabled in the Device Type drop-down list, you can edit the value in one or more of the fields described in the section Creating a New Device Class for Devices That Do Not Support SNMP.
- Select the button to save you changes to the device class or select the button to save your changes as a new device class. The newly selected device class is now associated with the device.
Creating a New Component Device Class
A device of type "component" is an entity that runs under the control of a management system running on a physical device. For example, SL1 can discover a VMware ESX Server (management system) and then discover the virtual machines (component devices) running on that VMware ESX Server.
SL1 uses Dynamic Applications to retrieve data from a management system and discover each component device managed by that system. SL1 then uses that retrieved data to create a device record for each component device.
Device classes for components are aligned with the Dynamic Applications that discover component devices. For example, we could have a device class of type Component for "Cisco Systems | UCS Chassis". We could align the Dynamic Application for "UCS Chassis Discovery" with this device class. When SL1 runs the "UCS Chassis Discovery" Dynamic Application and discovers a component device, SL1 assigns each discovered component device to the device class "Cisco Systems | UCS Chassis".
When you create a new device class of type Component, you are defining a device class that uses an aligned Dynamic Application to identify the member devices.
NOTE: The Device Class Tier is no longer used for Subscription Billing. For information regarding billing, see Viewing and Managing Subscription Data. If you create a custom device class, please contact ScienceLogic Customer Support to define the Device Class Tier for the new device class. For more information, see Custom Device Class Process.
To create a new device class of type Component:
- Go to the Device Class Editor page (System > Customize > Device Classes).
- Click [Reset] to clear the fields in the Device Class Editor pane.
- Configure the device class as follows:
- Device Type. Select "Component".
- Device Class. Enter "ScienceLogic".
- Device Category. Select "Servers" from the drop-down list. This field specifies a logical categorization of devices by primary function, which allows SL1 to group related devices in reports and views.
- Root Device. Select this checkbox if you will have additional tiers under this component device.
- Description. Enter a description for the device.
- Device Icon. Select an icon that you created or select a generic icon.
-
Click to save your changes to the device class.
Editing a Component Device Class
To edit an existing Device Class of Type "Component":
- Go to System > Customize > Device Classes, or from the Device Properties page, select the pencil icon ().
- In the Device Class Register pane at the bottom of the page, find the device class you want to edit. Select its wrench icon ().
- The fields in the top pane will be populated with values from the selected device class.
- You can edit the value in one or more of the fields. For details on each field, see the section on Creating a New Device Class of Type "Component".
- Select the button to save you changes to the device class or select the button to save your changes under a new device-class name.
Managing Device Classes
The following sections describe how to manually assign a device class to a device and how to change the icon for a device class in SL1.
Manually Assigning a Device Class to a Device
To manually assign a device class to a device:
-
Go to the Devices page and select the device to which you want to assign a device class.
-
On the Device Investigator page, click .
-
Click the Info drop-down and click the Device Class field. The Select a Device Class window appears:


-
The Select a Device Class window displays a searchable list of available device classes, and the category and type for each class.
To use an advanced search to find a specific device class, click the gear icon (
 ) to the right of the Search field and select Advanced. For more information, see Performing an Advanced Search.
 -
Select the device class you want to assign and click the button.
-
Click the button on the Device Investigator page to save your changes.
Changing the Icon for a Device Class
You can customize the look and feel of the devices that appear on the Devices page by assigning an icon a device, device class, or device category.
To assign an icon to a device, device class, or device category:
-
On the Devices page, Device Classes page (Devices > Device Classes), or Device Categories page (Devices > Device Categories), locate the device, class, or category for which you want to add an icon.
-
Click the Actions button (
 ) for that item and select Assign Icon. The Select an Icon window appears.
To assign an icon to more than one device, device class, or device category, select the checkboxes to the left of those items and click the button.
-
In the Select an Icon window, do one of the following:
-
To use an existing icon, proceed to step 7.
-
To upload a new icon from your local drive, make sure that the image file meets the following criteria, then proceed to step 4:
- The image file should be in .SVG format.
- The file should not be larger than 40 KB.
- The file should not be animated.
- The file should not contain bitmaps.
-
- To start the upload process, click the button. The Add an Icon window appears.
- Complete the following fields in the Add an Icon window:
- In the Icon name field, type a name for the icon you want to upload.
- In the Add Tags field, type a short descriptor for the icon, without spaces. You can use this tag for searching later.
- You can click the Browse or Drop area to browse for and select the icon, or you can drag and drop the icon file onto the Add an Icon window.
- Click the button. The icon is added to the Select an Icon window.
- Select the icon from the list of icons and click the button. The icon is assigned to the device, device class, or device category.
You can use the Search field to search for a specific icon or narrow down the list of icons.
Managing Device Classes in the Classic SL1 User Interface
The following sections describe:
- Manually changing the device class for a device
- Changing the icon for a device class
- Deleting one or more device classes
Manually Changing the Device Class for a Device in the Classic SL1 User Interface
During discovery, SL1 automatically assigns a device class to each discovered device. For example, SL1 assigns the device class "Ping" to devices that do not support SNMP. You might want to manually change the device class for such a device after discovery.
In the Device Properties page, you can assign a different device class to the device.
To assign a different device class to the device:
- Go to the Device Manager page (Devices > Classic Devices, or Registry > Devices > Device Manager in the classic SL1 user interface).
- Find the device you want to edit. Select its wrench icon ().
- In the Device Properties page, find the Device Class field. Select the toolbox icon (
 ).
). - In the Select New Device Class modal page, select a device class.
- There are two other ways to align devices with the devices class:
- You can re-run discovery for a single device. To re-discover a device, go to Devices > Classic Devices, or Registry > Devices > Device Manager in the classic SL1 user interface. Find the device you want to re-discover. Select its wrench icon (). In the Device Properties page for the device, select the magnifying glass icon (). After the device is re-discovered, it will be aligned with the appropriate device class. You can repeat this process for each device you want to align with the new or edited device class.
- If you re-run one or more discovery sessions (System > Manage > Classic Discovery), SL1 will automatically apply the new or edited device class to those devices that match the criteria. Remember that to discover details about device of type "pingable", you must select the checkbox Discovery Non-SNMP. Optionally, to retrieve details about "pingable" devices, in the field Initial Scan Level, you can also select 5. Deep Discovery.
Changing the Icon for a Device Class in the Classic SL1 User Interface
You can select a new icon for a device class or import your own image as an icon. To do this:
- Go to the Device Class Editor page (System > Customize > Device Classes), or from the Device Properties page, select the pencil icon ().
- In the Device Class Register pane at the bottom of the page, find the device class you want to edit. Select its wrench icon ().
- The fields in the top pane will be populated with values from the selected device class. To edit the icon associated with the selected device class, edit the value of the Device Icon field. The icon you select will be associated with the device class.
- To view the list of icon names and icon images, select the button in the upper right of the page.
- The Device Icon Browser modal page displays a list of all icons for device class.
- To import an image to use as an icon, select the button. In the Device Icon Browser modal page, you can import a .png image for use as an icon in SL1.
- Select the button to save the changes to the device class.
Aligning One or More Device Classes with a Device Dashboard
From the Device Class Editor page, you can align one or more device classes with a device dashboard. You can manually align a device dashboard with a device class. For devices that do not have a device dashboard defined in the Device Properties page, the device dashboard associated with the device class will appear as the default view in the Device Summary page.
NOTE: From the Device Summary page, the user can select and view any device dashboards that are associated with the device, the device's device class, the device's device category, the device's Dynamic Applications, and the Global Default.
- To align a device dashboard with one or more device classes:
- Go to the Device Class Editor page (System > Customize > Device Classes).
- In the Device Class Register pane at the bottom of the page, find the device class(es) you want to align. Select its checkbox.
- In the Select Action drop-down in the lower right, select a device dashboard in the Align Device Dashboard section. Select the button.
- Each selected device class is now aligned with the selected device dashboard. For devices that do not have a device dashboard defined in the Device Properties page, the device dashboard associated with the device class will appear as the default view in the Device Summary page.
Deleting One or More Device Classes
From the Device Class Editor page, you can delete one or more device classes.
NOTE: You cannot delete a device class if it is aligned to a device. To delete a device class that has devices aligned to it, you should first realign any member devices to a different device class.
To delete one or more device classes:
- Go to the Device Class Editor page (System > Customize > Device Classes), or from the Device Properties page, select the pencil icon ().
- In the Device Class Register pane at the bottom of the page, find the device class(es) you want to delete. Select its checkbox.
- In the Select Action drop-down in the lower right, select DELETE Device Classes. Select the button.
- Each selected device class is deleted from SL1.
Device Categories
A device category is a logical categorization of a device by primary function, such as "server", "switch", or "router". SL1 uses device categories to group related devices in reports and views.
Device categories are paired with device classes to organize and describe discovered devices. Device class usually describes the manufacturer. Device category describes the function of the hardware. Each device class can include a device category.
NOTE: "Reserved" device categories are those device categories required by SL1. These device categories cannot be edited or deleted. If a device category does not display the delete icon (![]() ), the device category is a reserved device category and cannot be deleted.
), the device category is a reserved device category and cannot be deleted.
"Pingable" Device Category
Devices that have a device category of "pingable" are devices that meet one of the following:
- Device does not support SNMP.
- SNMP has been disabled on the device.
- Wrong credential was provided during discovery and "Discover Non-SNMP" was enabled for the discovery session.
Viewing the List of Device Categories
On the Device Categories page (Devices > Device Categories), if you have the proper permissions, you can view a list of existing device categories, create and edit device categories, and duplicate device categories.
You can also assign an icon to a specific device category, and those icons will appear on the Device Categories page. The icons also appear on Maps as well as Device Investigator and Service Investigator pages.

If you are looking for a very specific set of device categories, click the gear icon (![]() ) to the right of the Search field and select Advanced. In this mode you can create an advanced search using "AND" or "OR" for multiple search criteria. For more information, see Performing an Advanced Search.
) to the right of the Search field and select Advanced. In this mode you can create an advanced search using "AND" or "OR" for multiple search criteria. For more information, see Performing an Advanced Search.
You can adjust the size of the rows and the size of the row text on this inventory page. For more information, see the section on
For each device category, the Device Categories page displays the following information:
- Category Name. The name of the device category.
- Last Edited By. The name of the user who created or last edited the device category.
- Last Edited. The date and time at which the device category was created or last edited.
To rearrange the columns in the list, click and drag the column name to a new location. You can adjust the width of a column by clicking and dragging the right edge of the column. For more information about editing and adding columns, see
Creating a New Device Category
To create a new device category:
- On the Device Categories page (Devices > Device Categories), click the button. The Add New Category window appears:
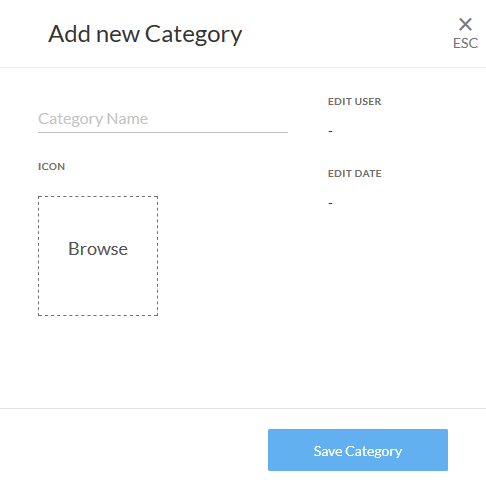
- In the Category Name field, type a name for the new device category.
- To add an icon for the new category, click the Browse area to select an existing icon from the Select an Icon window.
If an icon includes a tag, you can search for that icon by typing some or all of the tag text in the Search field.
- On the Add New Category window, click the button. The category is added to the Device Categories page.
Editing a Device Category
To edit a device category:
- On the Device Categories page, locate the device category that you want to edit.
- Click the name of the device category to open the category details page.
- You can edit the Category Name and Icon. When you are finished making changes, click the button.
Duplicating a Device Category
To duplicate a device category:
- On the Device Categories page, locate the device category that you want to duplicate.
- Click the Actions button (
 ) for that device category and select Duplicate.
 - A duplicate of that device category will appear with the word "copy" appended to the original name. Click on the name of the device category to edit the category name.
Assigning an Icon to a Device Category
You can customize the look and feel of the devices that appear on the Devices page by assigning an icon a device, device class, or device category.
To assign an icon to a device, device class, or device category:
-
On the Devices page, Device Classes page (Devices > Device Classes), or Device Categories page (Devices > Device Categories), locate the device, class, or category for which you want to add an icon.
-
Click the Actions button (
) for that item and select Assign Icon. The Select an Icon window appears.To assign an icon to more than one device, device class, or device category, select the checkboxes to the left of those items and click the button.
-
In the Select an Icon window, do one of the following:
-
To use an existing icon, proceed to step 7.
-
To upload a new icon from your local drive, make sure that the image file meets the following criteria, then proceed to step 4:
- The image file should be in .SVG format.
- The file should not be larger than 40 KB.
- The file should not be animated.
- The file should not contain bitmaps.
-
- To start the upload process, click the button. The Add an Icon window appears.
- Complete the following fields in the Add an Icon window:
- In the Icon name field, type a name for the icon you want to upload.
- In the Add Tags field, type a short descriptor for the icon, without spaces. You can use this tag for searching later.
- You can click the Browse or Drop area to browse for and select the icon, or you can drag and drop the icon file onto the Add an Icon window.
- Click the button. The icon is added to the Select an Icon window.
- Select the icon from the list of icons and click the button. The icon is assigned to the device, device class, or device category.
You can use the Search field to search for a specific icon or narrow down the list of icons.
Managing Device Categories in the Classic SL1 User Interface
This section describes how to view, define, and manage device categories using the Device Category Editor in the classic SL1 user interface.
Viewing the List of Device Categories in the Classic SL1 User Interface
The Device Category Editor page displays a list of all existing device categories. To view this page:
- Go to the Device Category Editor page (System > Customize > Device Categories).
- For each device category, the Device Category Editor page displays the following:
- Category Name. The name of the device category.
- Map Icon. Pathname of the image used as an icon for the device category.
- Device Dashboard. This field displays the device dashboard associated with the device category.
- ID. A unique numeric identifier for the device category, automatically assigned by SL1.
- Edit User. User who created or last edited the device category.
- Edit Date. Date and time the device category was created or last edited.
To sort the list of device categories, click on a column heading. The list will be sorted by the column value, in ascending order. To sort by descending order, click the column heading again. The Edit Date column sorts by descending order on the first click; to sort by ascending order, click the column heading again.
Creating a New Device Category in the Classic SL1 User Interface
From the Device Category Editor page, you can create a new device category. To do this:
- Go to the Device Category Editor page (System > Customize > Device Categories).
- Click the button to clear any values from the fields in the editor pane.
- In the editor pane at the top of the page, supply values in each of the following fields:
- Category Name. Enter a name for the new device category. This name can be any combination of alphanumeric characters, up to 32 characters in length. SL1 naming convention is to create names using the following prefixes:
- Environmental for environmental-monitoring devices.
- Network for networking hardware like routers, switches, and firewalls.
- Office for office equipment.
- Server for server hardware.
- System for networked hardware like servers and network stores.
- Telephony for telephone hardware.
- Wireless for wireless network hardware.
However, you are not required to follow this convention.
- Map Icon. Select an icon to be associated with this device category. You can select from a list of all possible icons for device categories. The selected icon will be used to represent members of the device category in the network maps in Views and maps.
- Device Dashboard. Select a device dashboard from a list of all device dashboards in SL1. For devices with this device category, the selected device dashboard will appear as an option in the Device Summary page. This field is optional.
- Click the button.
- The new device category should now appear in the list of device categories in this page and appear in the Device Category drop-down list in the Device Class Editor page.
Editing a Device Category in the Classic SL1 User Interface
In the Device Category Editor page, you can edit the parameters of an existing device category. To do this:
- Go to the Device Category Editor page (System > Customize > Device Categories).
- In the register pane at the bottom of the page, find the device category you want to edit. Click its wrench icon ().
- The fields in the top pane will be populated with values from the selected device category. You can edit the value in one or more of the fields.
- For a description of each field, see the previous section on Creating a New Device Category.
Deleting a Device Category
From the Device Category Editor page, you can delete an existing device category.
Do not delete device categories that are being used by managed devices. If you delete a device category to which devices have been assigned, you risk losing data from the device.
To delete a device category:
- Go to the Device Category Editor page (System > Customize > Device Categories).
- Find the device category you want to delete. Click its delete icon (
 ).
). - The device category is deleted from SL1.
Aligning One or More Device Categories with a Device Dashboard
From the Device Category Editor page, you can align one or more device categories with a device dashboard. For devices that do not have a device dashboard defined in the Device Properties page or in the Device Class Editor page, the device dashboard associated with the device category will appear as the default view in the Device Summary page.
NOTE: From the Device Summary page, the user can select and view any device dashboards that are associated with the device, the device's device class, the device's device category, the device's Dynamic Applications, and the Global Default.
To align a device dashboard with one or more device categories:
- Go to the Device Category Editor page (System > Customize > Device Categories ).
- Find the device categories you want to align. Select their checkboxes (
 ).
). - In the Select Action drop-down list in the lower right, select a device dashboard under the Align Device Dashboard section. Click the button.
- Each selected device category is now aligned with the selected device dashboard. For devices that do not have a device dashboard defined in the Device Properties page or in the Device Class Editor page, the device dashboard associated with the device category will appear as the default view in the Device Summary page.