
This
Dynamic Applications are customizable monitoring policies that define what data Skylar One collects from a device or system, how that data is collected, and how it is presented. Each Dynamic Application targets a specific vendor and device type, and uses one of several collection protocols — including SNMP, WMI, PowerShell, database queries, XML/SOAP/XSLT, and Python-based snippet code — to gather performance metrics, configuration data, and other operational information. This guide covers all Dynamic Application types and their respective development workflows, including raw snippet development and development using the Snippet Framework.
What Is A Dynamic Application?
Dynamic Applications are customizable policies, created for a specific vendor and a specific type of device or system, that tell Skylar One:
- What data to collect from devices
- How to present the data that has been collected
- When to generate alerts and events based on the data that has been collected
Skylar One includes Dynamic Applications for the most common hardware and software. You can customize these default Dynamic Applications to best work in your environment. You can also create custom Dynamic Applications.
For example, a Dynamic Application that is designed to collect information about file system usage on a device might define that:
- Skylar One should collect the total size of each file system and amount of space used for each file system.
- Skylar One should use the two collected values to present a graph of "percentage used" values for each file system.
- Skylar One should generate an alert when the amount of space used on a file system exceeds a specified percentage of the total size of that file system.
Types of Dynamic Applications
There are many different types of Dynamic Applications that can be created and used in Skylar One. The Dynamic Application type defines:
- The protocol Skylar One should use to collect the data.
- An archetype, which defines generally what type of data is being collected.
All Dynamic Application types use one of the following protocols:
- Bulk Snippet. Skylar One will collect data by executing custom code written in the Python programming language. A single instance of the Dynamic Application uses custom-written Python code to collect data from multiple devices. For a standard Snippet Dynamic Application, Skylar One spawns a separate instance of the Dynamic Application for each device or component device. The Bulk Snippet is useful for systems that include a large number of component devices.
- Database. Skylar One will collect data by connecting to a database and executing a query.
- Internal Collection. Skylar One will collect data by performing an "Extended Internal Collection". Basic hardware and system data that was previously collected by Skylar One using an internal SNMP process can now be collected with Internal Collection Dynamic Applications (ICDAs). ICDAs do not use SNMP to provide a way to collect basic hardware and system data from devices that do not support SNMP.
- PowerShell. Skylar One will collect data from a Windows device by performing PowerShell commands.
- Snippet. Skylar One will collect data by executing custom code written in the Python programming language.
- SNMP. Skylar One will collect data by performing SNMP requests.
- SOAP. Skylar One will collect data by sending HTTP POST requests to a SOAP web service.
- WMI. Skylar One will collect data by sending requests to a Windows Management Instrumentation service running on an external Windows device.
- XML. Skylar One will collect data by sending an HTTP GET request for an XML document.
- XSLT. Similar to the SOAP protocol, Skylar One will collect data by sending HTTP POST requests to a SOAP web service. Skylar One will also perform XSLT transformations to generate the requests and parse the responses.
All Dynamic Application types use one of the following archetypes:
- Performance. Skylar One will display the collected data in a historical graph. Skylar One will also automatically calculate daily normalized data for each graph.
- Configuration. Skylar One will display the current values of the collected data in tabular format. Skylar One will store tables of previously collected data to show when the values have changed.
- Journal. Skylar One will display collected data in log format. Each log entry can contain multiple collected values and can change over time. The Journal archetype is available only when using the Snippet protocol.
Each Dynamic Application type has unique configuration options.
Core Elements of a Dynamic Application
All Dynamic Applications, regardless of protocol, include the following core elements:
-
Archetypes that define what type of data is being collected and how it will be displayed in Skylar One. All Dynamic Applications use one of three archetypes: Performance (displays collected data in historical graphs with daily normalized data), Configuration (displays current values in tabular format with change tracking), or Journal (displays collected data in log format; Snippet only).
-
Database Dynamic Applications: Database Dynamic Applications can be either the Performance or Configuration archetypes.
-
Snippet Dynamic Applications: Snippet Dynamic Applications can be any of the three archetypes: Performance, Configuration, and Journal.
-
XML/SOAP/XSLT Dynamic Applications: XML, SOAP, and XSLT Dynamic Applications can be either the Performance or Configuration archetypes.
-
SNMP Dynamic Applications: SNMP Dynamic Applications can be either the Performance or Configuration archetypes.
-
WMI and PowerShell Dynamic Applications: WMI and PowerShell Dynamic Applications can use either the Performance or Configuration archetypes.
-
-
Properties that define general settings for the Dynamic Application. For example, the name of the Dynamic Application, type of Dynamic Application (protocol and archetype), and frequency at which Skylar One should collect data using the Dynamic Application. Allow for version control, release notes, collection, and retention settings.
-
Collection Objects that the individual data points that will be retrieved by the Dynamic Application, called collection objects. Collection objects define what type of data is being collected (gauge, counter, etc.) and how it is grouped. For Dynamic Applications with an archetype of Configuration, collection objects also define how each value will be displayed in the table of data.
-
Database Dynamic Applications: Collection objects for database Dynamic Applications differ from collection objects in other types of Dynamic Applications.
-
Snippet Dynamic Applications: Collection objects for Snippet Dynamic Applications have settings that are unique to Snippet Dynamic Applications.
-
XML/SOAP/XSLT Dynamic Applications: XML, SOAP, and XSLT Dynamic Applications have collection object settings that are unique to the respective protocol.
-
-
Requests or Snippets that define how Skylar One should request data from a device. For Dynamic Applications types that use Requests or Snippets, each Collection Object is associated with the Request or Snippet that will populate that Collection Object. The implementation of this mechanism varies by protocol:
-
Requests are used in Dynamic Applications that use the SOAP, XML, or XSLT protocol
-
Snippets are used in Dynamic Applications that use the Snippet protocol
-
SQL Queries are used in Dynamic Applications that use the Database protocol
-
SNMP OIDs are used in Dynamic Applications that use the WMI or PowerShell protocol
-
WMI Queries or PowerShell commands are used in Dynamic Applications that use the WMI or PowerShell protocol
-
Predefined collections are used in Internal Collection Dynamic Applications (ICDA)
-
-
Presentations that define how collected values will be displayed in Performance and Journal Dynamic Applications in Skylar One. Presentation Objects are not used for Configuration Dynamic Applications.
-
Presentation Objects that define how Skylar One should present the collected data. For Dynamic Applications with an archetype of Performance or Journal, Presentation Objects define how the collected values are displayed by Skylar One. Presentation Objects are not used for Dynamic Applications with an archetype of Configuration.
-
Alerts that include formulas that Skylar One will evaluate each time data is collected. Each formula examines the current values for one or more Collection Objects. If the formula evaluates to true, Skylar One generates an alert. Additionally, you can align an event policy with each Alert, and Skylar One can trigger that event if the alert evaluates to true.
-
Thresholds that define variables that can be used in Alerts. Each Threshold defines an allowed range of values for the variable and a default value. The value of the Threshold variable can be changed on a per-device basis by users of the Dynamic Application, without having to modify the Dynamic Application.
NOTE: The threshold appears in the Device Thresholds page for each device that is aligned with the Dynamic Application. The threshold can be edited in the Device Thresholds page for each device without affecting the behavior of the Dynamic Application for other devices.
-
Credentials that define how authentication should occur for each Dynamic Application on each device. The credential type and authentication method vary by protocol. Each Dynamic Application requires credentials to be configured with protocol-specific parameters:
-
Database Dynamic Applications use database credentials. Supported database types include MySQL, MSSQL, Oracle, PostgreSQL, DB2, Sybase, Informix, and Ingress. Credentials must include the database name, username, password, and connection parameters.
-
SNMP Dynamic Applications use SNMP credentials. Supported SNMP versions include SNMPv1, SNMPv2c, and SNMPv3. Credentials must include the appropriate community string (SNMPv1/v2c) or authentication parameters (SNMPv3).
-
XML/SOAP/XSLT Dynamic Applications use SOAP/XML credentials. When an XML, SOAP, or XSLT Dynamic Application is aligned with a device, you must align a SOAP/XML credential to that Dynamic Application for collection to occur. Credentials must specify the URL, HTTP method (GET for XML, POST for SOAP, or GET/POST for XSLT), proxy settings if applicable, encoding, and up to four embed values that can be substituted into requests or responses.
-
Snippet Dynamic Applications can use any credential type for authentication; however, the snippet code must be written to use the credential information passed to the snippet by Skylar One. This flexibility allows Snippet Dynamic Applications to use Database, SNMP, SOAP/XML, Basic/Snippet, PowerShell, or SSH/Key credentials depending on the protocol the snippet code is designed to work with.
-
WMI Dynamic Applications use Basic/Snippet credentials. Credentials must include a username in the format DOMAIN\username, password, and hostname/IP address of the device. An optional port number can be specified. For WBEM requests, supply the port used by the WBEM service on the device.
-
PowerShell Dynamic Applications use PowerShell credentials. Credentials must include the account type (local or domain user), username, password, hostname/IP address, and timeout value (in milliseconds). Skylar One will stop trying to communicate with the authenticated server after the specified timeout.
-
Internal Collections Dynamic Applications (ICDAs) use the Snippet protocol, so they can use any credential type for authentication. Skylar One passes credential information to the ICDA snippet code, which must be written to use that information appropriately.
-
Optional Features for Dynamic Applications
You can enable the following optional features for a Dynamic Application:
- Dynamic Component Mapping. Skylar One can use Dynamic Application data that has been collected from a single management system, such as a VMware ESX server, to create a device record for each entity (such as a virtual machine) managed by that single management system. Dynamic Applications with Configuration archetype can be configured to use Dynamic Component Mapping. Dynamic Applications with Performance archetype cannot be used to create component devices.
- Snippet Dynamic Applications. Dynamic Component Mapping allows Skylar One to use Dynamic Application data that has been collected from a single management system, such as a VMware ESX server, and to create multiple device records for the entities managed by that single management system. The settings for configuring Dynamic Component Mapping in a Snippet Dynamic Application with Configuration or Performance archetype are the same as the Dynamic Component Mapping settings for other Dynamic Application protocols. Snippet Dynamic Applications with Journal archetype cannot be configured to use Dynamic Component Mapping.
- XML/SOAP/XSLT Dynamic Applications: Dynamic Component Mapping allows Skylar One to useDynamic Application data that has been collected from a single management system, such as a VMware ESX server, to create multiple device records for the entities managed by that single management system.
- Caching. When Skylar One requests information from a device during Dynamic Application collection, Skylar One can optionally cache the response from the device. If a response is cached, other Dynamic Applications that use the same protocol can use the cached response to populate collection objects. Caching responses reduces the number of requests performed by Skylar One and speeds up collection.
- Snippet Dynamic Applications. Dynamic Component Mapping allows Skylar One to use Dynamic Application data that has been collected from a single management system, such as a VMware ESX server, to create multiple device records for the entities managed by that single management system.
- Collector Affinity. Skylar One enables you to specify which Data Collectors are allowed to collect data from a device for a Dynamic Application. This ensures that a group of collection jobs that cannot be split up among multiple Data Collectors—for instance, Dynamic Applications that produce and consume cache—will run on a single Data Collector. For more information, see the Dynamic Application Settings section.
- Relationships. Dynamic Applications can be configured to automatically create relationships between devices. For example, the Dynamic Applications in the VMware vSphere and NetApp PowerPacks are configured to create relationships between VMware Datastore component devices and their associated NetApp Volume component devices. Relationships created by Dynamic Applications are used and visualized by Skylar One in the same manner as relationships created by topology collection, Dynamic Component Mapping, and manually in the user interface.
- Database Dynamic Applications. The settings for configuring the creation of relationships in a Database Dynamic Application with Configuration archetype are the same as the relationship settings for other Dynamic Application protocols.
- Snippet Dynamic Applications. The settings that allow you to create relationships in a Snippet Dynamic Application with Configuration archetype are the same as the relationship settings for other Dynamic Application protocols.
- XML/SOAP/XSLT Dynamic Applications. The settings for configuring the creation of relationships in an XML, SOAP, and XSLT Dynamic Application with Configuration archetype are the same as the relationship settings for other Dynamic Application protocols.
- Collection Labels. When multiple Dynamic Applications collect the same type of performance data from different devices, you can use collection labels to view data from those different Dynamic Applications at the same time. For example, when Skylar One displays the CPU utilization, Memory utilization, or Swap utilization for a device, the utilization values come from a presentation object in a Dynamic Application aligned with that device.
- Custom Attributes. Dynamic Applications of archetype configuration can collect configuration data and use that data to create and/or populate the value of a custom attribute. There are two ways Dynamic Applications can interact with custom attributes. A Dynamic Application can populate the value of an existing custom attribute, or a Dynamic Application can both create the custom attribute and populate its value. For general information on custom attribute, see the section on custom attributes.
- Asset Linking. Skylar One can use data collected by configuration Dynamic Applications to automatically populate fields in asset records.
- Inventory Linking. Skylar One can use data collected using configuration Dynamic Applications to automatically populate inventories of hardware components and installed software.
- Standard Deviation Alerting. Skylar One can calculate standard deviation data for values collected by performance Dynamic Applications. The standard deviation data can generate alerts when values deviate by a specified amount.
Managing Dynamic Applications
This section describes the operational and administrative tasks required to manage Dynamic Applications after they have been created or deployed. These tasks include viewing Dynamic Applications and searching by various criteria, manually aligning Dynamic Applications with devices, managing collection status and credentials, configuring thresholds and poll frequencies on a per-device basis, and coordinating Dynamic Application discovery and alignment. This section also covers how to test collection for debugging purposes, reset statistical and session data when needed, and manage the lifecycle of collected data including data removal and Dynamic Application un-alignment.
Viewing the List of Dynamic Applications
The Dynamic Applications Manager page (System > Manage > Dynamic Applications) displays a list of all existing Dynamic Applications. For each Dynamic Application, the page displays the following fields:
You can sort the list by a column's values by clicking on its column heading. You can also filter the items on the page by typing or selecting filter options in one or more of the filters found above the columns. For more information, see the topic on Filtering Inventory Pages.
- Dynamic Application Name. Name of the Dynamic Application, as defined in the Dynamic Applications Properties Editor page.
- Poll Rate. Frequency, in minutes, at which Skylar One will poll all devices that use this Dynamic Application. The Poll Rate column displays the default poll frequency for the Dynamic Application, as defined in the Dynamic Applications Properties Editor page. You can define a custom poll frequency for one or more devices in a device template. The poll frequency defined in the device template overrides the poll frequency defined for the Dynamic Application. Devices to which the device template is applied will use the poll frequency defined in the device template.
- Type. Type of Dynamic Application. The choices are:
- Bulk Snippet Configuration. A single instance of the Dynamic Application uses custom-written Python code to collect static configuration data from multiple devices. This is useful for systems that include a large number of component devices. For details on creating bulk snippet Dynamic Applications,
- Bulk Snippet Performance. A single instance of the Dynamic Application uses custom-written Python code to collect trendable performance data from multiple devices. This is useful for systems that include a large number of component devices. For details on creating bulk snippet Dynamic Applications,
- Database Configuration. The Dynamic Application retrieves configuration data from a database application. The Dynamic Application uses SQL queries. The queried device returns table data. For details on creating database Dynamic Applications,
- Database Performance. The Dynamic Application retrieves trendable performance data from a database application. The Dynamic Application uses SQL queries. The queried device returns table data. For details on creating database Dynamic Applications,
- Internal Collection Inventory. The Internal Collection Inventory Dynamic Application (ICDA) retrieves configuration data about filesystems and interface. For filesystem, an ICDA Inventory can retrieve data such as storage size, filesystem type, and storage used. These ICDAs can also collect configuration data about interfaces, such as physical address, operational status, and IP addresses. For details on creating ICDAs,
- Internal Collection Performance. The Internal Collection Performance Dynamic Application (ICDA) retrieves data about availability and latency, device information (system description, system uptime, system locale), filesystem performance, and interface performance. For details on creating ICDAs,
- IT Service. A special type of Dynamic Application that Skylar One uses to monitor IT Services. When you create and edit an IT Service in the IT Service Editor page, Skylar One will automatically create and maintain a Dynamic Application for that IT Service. Dynamic Applications for IT Services will appear in the Dynamic Applications Manager page. However, if you want to edit the settings for an IT Service, you should not edit the Dynamic Application for that IT Service. Instead, use the IT Service Editor page to edit IT Services. For details on creating IT Service policies,
- PowerShell Configuration. The Dynamic Application uses PowerShell commands to collect static configuration data from a Windows device. For details on creating PowerShell Dynamic Applications,
- PowerShell Performance. The Dynamic Application uses PowerShell commands to collect trendable performance data from a Windows device. For details on creating PowerShell Dynamic Applications,
- Snippet Configuration. The Dynamic Application uses custom-written Python code to collect configuration data from a device. For details on creating snippet Dynamic Applications,
- Snippet Journal. The Dynamic Application uses custom-written Python code to collect data formatted as log entries from a device. For details on creating snippet Dynamic Applications,
- Snippet Performance. The Dynamic Application uses custom-written Python code to collect trendable performance data from a device. For details on creating snippet Dynamic Applications,
- SNMP Configuration. The Dynamic Application uses SNMP to retrieve static, configuration data from devices or applications. For details on creating SNMP Dynamic Applications,
- SNMP Performance. The Dynamic Application uses SNMP to retrieve trendable performance data from devices or applications. For details on creating SNMP Dynamic Applications,
- SOAP Configuration. The Dynamic Application uses XML and SOAP to retrieve static configuration data from a SOAP server. The queried device returns XML data. For details on creating SOAP Dynamic Applications,
- SOAP Performance. The Dynamic Application uses XML and SOAP to retrieve trendable performance data from a SOAP server. The queried device returns XML data. For details on creating SOAP Dynamic Applications,
- WMI Configuration. The Dynamic Application retrieves configuration information from either WMI or WBEM running on a managed device. WMI Dynamic Applications use a query format to request data from a managed device. WBEM Dynamic Applications use wbemcli and HTTP to request data from a managed device. For details on creating WMI Dynamic Applications,
- WMI Performance. The Dynamic Application retrieves trendable performance data from either WMI or WBEM running on a managed device. WMI Dynamic Applications use a query format to request data from a managed device. WBEM Dynamic Applications use wbemcli and HTTP to request data from a managed device.
- XML Configuration. The Dynamic Application uses HTTP GET queries. The queried device returns static configuration data in XML format. For details on creating SOAP Dynamic Applications,
- XML Performance. The Dynamic Application uses HTTP GET queries. The queried device returns trendable performance data in XML format. For details on creating SOAP Dynamic Applications,
- XSLT Configuration. The Dynamic Application uses XML and SOAP to retrieve static configuration data from a SOAP server. The requests used to retrieve data are generated by performing an XSLT transformation on an XML document that contains data already collected by the Dynamic Application. The queried device returns XML data, which must be changed to a specific format by performing a second XSLT transformation. For details on creating SOAP Dynamic Applications,
- XSLT Performance. The Dynamic Application uses XML and SOAP to retrieve trendable performance data from a SOAP server. The requests used to retrieve data are generated by performing an XSLT transformation on an XML document that contains data already collected by the Dynamic Application. The queried device returns XML data, which must be changed to a specific format by performing a second XSLT transformation. For details on creating SOAP Dynamic Applications,
- State. Specifies whether the Dynamic Application is Enabled or Disabled.
- Version. Version number to assign to the Dynamic Application. You can customize this value and increment it according to your change management policies.
- ID. Unique application ID, assigned by Skylar One.
- Subscribers. Number of devices on which the Dynamic Application is enabled to collect data. Clicking on the icon leads to the Application Subscribers modal, where you can view the list of devices and access other pages for each subscriber device. You can also access this page by selecting the wrench icon (
 ) for a Dynamic Application and selecting the tab.
 - PowerPack. Specifies whether or not the Dynamic Application is included in a PowerPack.
- Environment. The execution environment to which the Dynamic Application is aligned, if it is a snippet or internal collection Dynamic Application. If it is not a snippet or internal collection Dynamic Application, then this column displays "n/a".
- Collects. Number of objects included in the Dynamic Application. Clicking on the icon (
 ) leads to the Collection Objects page, where you can view the list of collection objects and edit their properties.
 - Alerts. Number of custom alerts defined for the Dynamic Application. Clicking on the icon () leads to the Alert Objects page, where you can view and edit each alert defined for the Dynamic Application.
- Events. Number of events associated with the Dynamic Application. Clicking on the icon () leads to the Event Policy Manager page, where you can view information about each event definition associated with the Dynamic Application definition and edit each event definition.
- Thresh. Number of threshold objects defined for the Dynamic Application. Clicking on the icon () leads to the Threshold Objects page, where you can view and edit information about each threshold object defined for the Dynamic Application.
- Edited By. Username of the person who created or last edited the Dynamic Application.
- Last Edit. Date that the Dynamic Application was created or last edited.
Performing Other Tasks in the Dynamic Application Manager Page
From the Dynamic Applications Manager page, you can also perform the following tasks:
- Manually perform dynamic discovery for a Dynamic Application. In the Dynamic Applications Manager page, find the Dynamic Application you want to use for network-wide discovery and select its lightning bolt icon (
 ).
). - Filter the list by application. Selecting the Filter on this Application icon (
 ) sets the Dynamic Applications Manager page to display only Dynamic Applications with the same name as the selected Dynamic Application.
 - Change an application's type. To change the type of one or more Dynamic Applications, select the checkbox of each Dynamic Application you want to change. In the Select Action drop-down menu in the bottom right, scroll to the Change Type section and select a new type. Select the button. Each selected Dynamic Application will now be assigned the new type.
- Change polling interval. To change the polling interval for one or more Dynamic Application, select the checkbox of each Dynamic Application you want to change. In the Select Action drop-down menu in the bottom right, select a new polling interval for the Dynamic Application. Select the button. Each selected Dynamic Application will now be assigned the new polling interval.
- Delete an Application. To delete one or more Dynamic Applications, select the checkbox of each Dynamic Application you want to change. In the Select Action drop-down menu in the bottom right, select DELETE Application, and then select the button. A confirmation dialog will appear. Review the list of Dynamic Applications you selected for deletion, then click to proceed. Each selected Dynamic Application will be deleted.
- Clear Application Data. To clear all historical data, including logs and reports, associated with one or more Dynamic Application, select the checkbox for each Dynamic Application you want to change. In the Select Action drop-down menu in the bottom right, select CLEAR Application, and then select the button. A confirmation dialog will appear. Review the list of Dynamic Applications, then click to proceed. The historical data for each selected Dynamic Application will be deleted.
- Enable an Application. Enables the selected Dynamic Applications so that Skylar One can collect the data for those applications. In the Select Action drop-down menu in the bottom right, select ENABLE Application, and then select the button.
- Disable an Application. Disables the selected Dynamic Applications. In the Select Action drop-down menu in the bottom right, select DISABLE Application, and then select the button.
- Discover Applications using the Select Action drop-down menu. To start the Dynamic Application discovery process on all managed devices, select the checkbox for each Dynamic Application you want to use in the discovery process. In the Select Action drop-down menu in the bottom right, select DISCOVER Applications. Select the button. Skylar Onestarts the Dynamic Application discovery process on all devices in Skylar One using the selected Dynamic Applications.
- Validate and Repair Applications. For each selected Dynamic Application, ensures that the Dynamic Application includes the objects, thresholds, and alerts that are referenced in the Dynamic Application and in other parts of Skylar One. Also ensures that if an event that is associated with the Dynamic Application has an auto-clear event, that auto-clear event is also associated with the Dynamic Application. This tool will troubleshoot and then fix the database tables that reference the Dynamic Application's objects, presentations, thresholds and alerts.
- Align a Device Dashboard. To align one or more Dynamic Applications with a Device Dashboard, select the checkbox for each Dynamic Application you want to align with the Device Dashboard. In the Select Action drop-down menu in the bottom right, scroll to the Change Device Dashboard section and select a Device Dashboard. Select the button. For each device that subscribes to the selected Dynamic Application, the selected device dashboard will appear as an entry in the Device Dashboard field in the Device Summary page.
- Align an Execution Environment. To align one or more Dynamic Applications with an execution environment, select the checkbox for each Dynamic Application you want to align with the environment. In the Select Action drop-down menu in the bottom right, scroll to the Align Collection Environment section and select an execution environment, and then click the button.
Viewing the Dynamic Applications Associated with a Device
You can view the Dynamic Applications associated with a device from the Dynamic Application Collections page. The Dynamic Application Collections page also allows you to associate another Dynamic Application with the device, assign a credential to the Dynamic Application, or perform other administrative tasks for an aligned Dynamic Application.
To view the Dynamic Applications associated with a device:
- Go to the Device Manager page (Devices > Classic Devices, or Registry > Devices > Device Manager in the classic user interface).
- In the Device Manager page, find the device for which you want to view Dynamic Applications. Select its wrench icon ().
- In the Device Administration panel, select the tab.
- The Dynamic Application Collections page displays a list of all Dynamic Applications aligned with the current device. For each Dynamic Application, the Dynamic Application Collections page displays the following read-only information:
- Plus Sign (
 ). Clicking on this icon displays a list of all Presentation Objects included in Dynamic Applications of type "Performance" and "Journal" or a list of all Collection Objects included in Dynamic Applications of type "Configuration". You can click on the plus sign next to each Presentation Object to see all the Collection Objects included in the Presentation Object.
 - Minus Sign (
 ). Collapses a Dynamic Application and hides the display of Presentation Objects and Collection Objects.
 - Dynamic Application. Name of the Dynamic Application.
- ID. Numeric ID for the Dynamic Application.
- Poll Frequency. Frequency at which Skylar One will query the device to retrieve the data specified in the Dynamic Application. Each Dynamic Application includes a default frequency. From this page (Dynamic Application Collections), you can change the poll frequency for a Dynamic Application on the current device. This edited poll frequency will override the default frequency for the Dynamic Application and the poll frequency defined for a Dynamic Application in one or more device templates.
- Type. The protocol used by the Dynamic Application (Database [SQL], Internal Collection Inventory or Internal Collection Performance (ICDA), Snippet [Python], SNMP, SOAP, WMI, XML, or XSLT) and the type of data collected by the Dynamic Application (Configuration, Performance, or Journal).
- Credential. Name of the credential that Skylar One uses to access the device and retrieve the data specified in the Dynamic Application.
NOTE: Cache-consuming Dynamic Applications do not require a credential. If you aligned a cache-consuming Dynamic Application in the Dynamic Application Alignment modal page, the Credential field displays N/A and is grayed out. You do not have to select a credential in the Dynamic Application Alignment modal page.
- Collector. Name of the specific Data Collector used to collect data from the Dynamic Application.
Based on the Dynamic Application's Collector Affinity settings, the Dynamic Application might be assigned to a different Data Collector than the Data Collector that is assigned to the device in the Device Properties page (Devices > Classic Devices > wrench icon). In the Dynamic Application Collections page, hover your mouse over the Collector name for any of the Collection Objects to view a tooltip that explains why the Dynamic Application is assigned to its particular Data Collector.
- Run Dynamic Application (). Performs a test run of data collection for the selected Dynamic Application on the current device.
NOTE: If a device is currently unavailable, the lightning-bolt icon () will be grayed out for each Dynamic Application aligned with the device.
- Checkbox (
 ). Apply an action from the Select Action field to this instance of the Dynamic Application.
- From this page, you can associate another Dynamic Application with the device, assign a credential to the Dynamic Application, or perform other administrative tasks for an aligned Dynamic Application.
Viewing the Status of a Dynamic Application
For each device, Skylar One maintains the collection status for each collection object in each Dynamic Application aligned with that device. The Dynamic Application Collections page displays the status of each collection object for a device as represented by two values: Found and Collect. The Dynamic Application Collections page also displays the Found and Collect values for each presentation object, which are derived from the status of each collection object used by the presentation object.
Found
The Found status for a collection object has two possible values:
- Yes. Data has been successfully collected from this device for this object. Found is set to Yes the first time data is successfully collected from this device for this object.
- No. Data has never been successfully collected from this device for this object. No is the initial value of Found for every object when a Dynamic Application is initially aligned with a device.
The Found status for a presentation object also has two possible values (Yes and No).
- If the presentation object uses only one collection object, the presentation object always has the same default Found and default Collect values as that collection object.
- If a presentation object uses multiple collection objects, the default Found value for the presentation object will be Yes only if all the collection objects used by the presentation object have a Found value of Yes.
After Found is set to Yes for an object, Skylar One will never automatically change the value of Found for this object.
The value of Found is used by Skylar One to determine whether icons, tabs, and Navbar links that lead to the or page where the collection object is used should be active.
Collect
The Collect status for a collection object has two possible values:
- Yes. Skylar One will attempt to collect data for this object when collection for this Dynamic Application occurs. Yes is the initial value for Collect for every object when a Dynamic Application is initially aligned with a device.
- No. Skylar One will not attempt to collect data for this object when collection for this Dynamic Application occurs. Skylar One might set Collect to No automatically if no data has been collected.
- If a collection object has a Collect value of No, all presentation objects that use that collection object will also have a Collect value of No.
For information about how Skylar One determines the Collect status, see the section on How Skylar One Manages the Collection Status for Dynamic Applications.
If you have the proper user permissions, you can enable or disable collection for certain collection objects. For more information, see the section on Enabling and Disabling Collection Objects.
The Collect status for a presentation object also has two possible values (Yes and No).
- If the presentation object uses only one collection object, the presentation object always has the same default Found and default Collect values as that collection object.
- If a presentation object uses multiple collection objects, the default Collect value for the presentation object will be Yes only if all the collection objects used by the presentation object have a Collect value of Yes. If one or more collection objects used by the presentation object have a Collect value of No, the presentation object will also have a default Collect value of No.
- The Collect status for a presentation object has no effect upon its collection objects. If you manually change the Collect status for a presentation object, the Collect status for the collection objects used by the presentation object will not change.
Before determining which collection objects defined in a Dynamic Application will be collected, Skylar One determines whether the Dynamic Application itself should be collected. Dynamic Applications are not collected for devices that are unavailable (because of a failed availability check) or have collection disabled (either manually by a user or because of maintenance scheduled in Skylar One) regardless of the Collect value of the objects.
How Skylar One Manages Collect Status
Stopping CollectionOne of the ScienceLogic hourly maintenance tasks checks the last collection time for every collection object being collected from every device. If the last collection time for an object on a device is more than 48 hours ago, collection is stopped for that collection object on that device. Skylar One will set the Collect status of that object to No.
NOTE: If a device is in maintenance mode, is unavailable, or has been manually disabled by a user, Skylar One will not automatically set the Collect status of objects to No. Skylar One will automatically set the Collect status of objects to No only if the device is up and running, but Skylar One still cannot collect the object.
When Skylar One sets the Collect status of that object to No, Skylar One generates an event. The event will include the name of the device, the name of the Dynamic Application, the name of the collection object, and the collection object IDs. By default, this event is of severity "notice".
NOTE: For Dynamic Applications that have the Component Mapping checkbox selected in the Dynamic Applications Properties Editor page, Skylar One will never automatically set the Collect status to No for any of the collection objects in the Dynamic Application.
NOTE: For Dynamic Applications that have the Caching fields set to either Cache Results or Consume cached results in the Dynamic Applications Properties Editor page, Skylar One will never automatically set the Collect status to No for any of the collection objects in the Dynamic Application.
Starting Collection
For each object that has the Collect status of No, Skylar One will attempt to re-collect the object once a day. If re-collection is successful, Skylar One will automatically set the Collect value for that object to Yes.
NOTE: If a user manually sets the Collect status of a collection object or presentation object to No, Skylar One will not attempt to re-collect the object once a day and will not set the Collect status to Yes.
Collection Objects that are Excluded from Maintenance
The Collect status of the following collection objects is never changed automatically:
- Collection objects in Dynamic Applications that have the Component Mapping checkbox checked in the Dynamic Applications Properties Editor page.
- Collection objects in Dynamic Applications that have the Caching fields set to either Cache Results or Consume cached results, in the Dynamic Applications Properties Editor page.
- Collection objects that have the Disable Object Maintenance setting enabled.
- Collection objects that have a Collect status defined by a user, i.e. collection objects that were manually enabled or disabled by a user.
Status of Objects for Deviation
Skylar One allows you to examine the value of an object and trigger an alert if that value falls outside the range of "normal" values for that object at the hour of the day on that day of the week. The deviation function allows you to define such alerts.
To use the deviation function, you must configure Skylar One to store and calculate the mean values and standard deviation for an object. You do this by selecting the Enable Deviation Alerting field in the Collection Objects page. You then specify the minimum and maximum number of weeks to collect deviation data for the object. Skylar One must have already collected at least the minimum number of weeks' worth of values for an object before Skylar One can evaluate alert formulas that use the deviation function. To use the deviation function, you must specify a minimum value of at least two weeks.
If a Dynamic Application in the Dynamic Application Collections page contains one or more alerts that use the deviation function, the Dynamic Application Collections page displays the status of the collection objects.
For example, suppose an alert in a Dynamic Application will apply the deviation function to object "o_123". Suppose that you specified that Skylar One must collect at least two weeks' worth of deviation data for this object. Suppose that Skylar One contains only one weeks' worth of values for object "o_123". In this case, the Dynamic Application Collections page will display the following message:
Note: object 123 not ready for deviation alerting.
When Skylar One contains at least two weeks worth of values for object "o_123", the Dynamic Application Collections page will display the following message:
All objects ready for deviation alerting.
Manually Associating a Dynamic Application with a Device
From the Dynamic Application Collections page, you can manually associate a new Dynamic Application with a device.
To manually associate a Dynamic Application with a device:
- Go to the Device Manager page (Devices > Classic Devices, or Registry > Devices > Device Manager in the classic user interface).
- In the Device Manager page, find the device you want to associate with a Dynamic Application. Click its wrench icon ().
- In the Device Administration panel, click the tab.
- In the Dynamic Application Collections page, click the [Actions] menu and select Add Dynamic Application.
- The Dynamic Application Alignment modal page appears. To align a Dynamic Application with a device in this page:
Select the Dynamic Application you want to align with the device in the Dynamic Applications field. You can filter the list of Dynamic Applications using the search field above the Dynamic Applications field.
After selecting a Dynamic Application, you must select a credential. Select a credential in the Credentials field. You can filter the list of credentials using the search field above the Credentials field.
Your organization membership(s) might affect the list of credentials you can see in the Credentials field.
Cache-consuming Dynamic Applications do not require a credential. If you selected a cache-consuming Dynamic Application in the Dynamic Application Alignment modal page, the Credential field displays N/A and is grayed out. You do not have to select a credential in the Dynamic Application Alignment modal page.
- Click the [Save] button in the Dynamic Application Alignment modal page to align the Dynamic Application and the credential to the device.
- Skylar One will associate the Dynamic Application with the device and immediately attempt to collect the data specified in the Dynamic Application using the selected credential.
- After the first, immediate collection, Skylar One will collect the data at the frequency defined in the Polling Frequency field in the Application Configuration Editor page for the Dynamic Application.
Editing the Credential Associated with a Dynamic Application
From the Dynamic Application Collections page, you can change the credential associated with a Dynamic Application. This credential will be used by Skylar One for this specific Dynamic Application associated with this specific device . For all other devices, Skylar One will use the default credential associated with the device, or will use the credential defined in the Dynamic Application Collections page for each device.
NOTE: Cache-consuming Dynamic Applications do not require a credential. If you aligned a cache-consuming Dynamic Application with this device (you do this in the Dynamic Application Alignment modal page), the Credential field displays N/A and is grayed out.
To change the credential associated with a Dynamic Application for a device:
Go to the Device Manager page (Devices > Classic Devices, or Registry > Devices > Device Manager in the classic user interface).
In the Device Manager page, find the device for which you want to define a credential. Select its wrench icon (
).In the Device Administration panel, select the tab.
In the Dynamic Application Collections page, find the Dynamic Application for which you want to change the credential. Select its checkbox. To apply a credential to multiple Dynamic Applications, select the checkbox for each Dynamic Application.
From the Select Action drop-down list, select the credential from the list of all credentials that you are allowed to use, and then select the [Go] button.
Your organization membership(s) might affect the list of credentials you can see in the Select Action drop-down list.
If this Dynamic Application has already been aligned with a credential to which you do not have access, the Credential column will display the value Restricted Credential. If you align the device with a different credential, you will not be able to re-align the device with the Restricted Credential.
- You should see your change reflected in the Credential column in the Dynamic Application Collections page.
Performing Other Administrative Tasks for an Aligned Dynamic Application
You can perform the following other administrative tasks for an aligned Dynamic Application in the Dynamic Application Collections page:
- Enable or disable one or more collection objects or presentation objects.
- Stop data collection for the whole Dynamic Application.
- Reset the statistical data that has been stored for standard deviation alerting.
- Reset persistent session objects that have been collected and stored for a Dynamic Application.
- Test collection for a Dynamic Application.
- Remove all data collected using the Dynamic Application and optionally unalign the Dynamic Application from the device.
To perform one of these tasks:
- Go to the Device Manager page (Devices > Classic Devices, or Registry > Devices > Device Manager in the classic user interface).
- In the Device Manager page, find the device for which you want to perform an administrative task. Select its wrench icon ().
- In the Device Administration panel, select the tab.
- In the Dynamic Application Collections page, find the Dynamic Application for which you want to perform an administrative task. The following sections describe how to perform each task.
Enabling or Disabling Objects
From the Dynamic Application Collections page, you can customize the collection performed by the Dynamic Application for the current device. This customization will be used by Skylar One only for this specific device. For all other devices, Skylar One will use the default list of objects from the Dynamic Application's definition or will use the list of objects defined in the Dynamic Application Collections page for that device.
If a collection object has a Collect value of No, all presentation objects that use that collection object will also have a Collect value of No.
To enable or disable collection for one or more objects in a Dynamic Application:
- To disable collection for one or more collection objects, unselect the checkbox for each object for which you want to disable collection.
- For each unselected object, the Collect column should now display No.
- To enable collection for one or more collection objects, select the checkbox for each object for which you want to enable collection.
- For each selected object, the Collect column should now display Yes.
- Select the [Save] button.
NOTE: If a user manually sets the Collect status of a collection object or presentation object to No, Skylar One will not attempt to re-collect the object once a day and will not automatically set the Collect status to Yes.
Restarting Automatic Maintenance of Collection Objects
If a user manually sets the Collect status of a collection object or presentation object, Skylar One will not automatically change the Collect status of that object as described in the How Skylar One Manages Collect Status section.
If you want Skylar One to restart automatic maintenance of the objects in a Dynamic Application, perform the following steps:
- In the Dynamic Application Collections page, select the checkbox for the Dynamic Application for which you want to restart automatic collection maintenance. To restart automatic collection maintenance for multiple Dynamic Applications, select the checkbox for each Dynamic Application.
- From the Select Action drop-down list, select Restore System Control of Collection State and then select the [Go] button.
- Automatic collection maintenance for all objects in the Dynamic Application will now occur. The Collect status of the objects in the Dynamic Application will not change immediately.
Editing the Poll Frequency for a Dynamic Application on the Current Device
Poll Frequency is the frequency at which Skylar One will query the device to retrieve the data specified in the Dynamic Application. Each Dynamic Application includes a default frequency.
From the Dynamic Application Collections page, you can change the poll frequency for a Dynamic Application on the current device. For the current device, the edited poll frequency will override:
- the default frequency for the Dynamic Application.
- the poll frequency defined for a Dynamic Application in one or more device templates.
To edit the poll frequency for a Dynamic Application on the current device:
- In the Dynamic Application Collections page, select the checkbox for the Dynamic Application for which you want to change the poll frequency. To change the poll frequency for multiple Dynamic Applications, select the checkbox for each Dynamic Application.
- From the Select Action drop-down list, select Poll Frequency from the list of poll frequencies and then select the [Go] button.
- You should see your change reflected in the Poll Frequency column in the Dynamic Application Collections page.
Stopping Data Collection for a Dynamic Application
You can stop data collection for a Dynamic Application on the current device. This will affect collection only for this specific device. For all other subscriber devices, Skylar One will continue to use this Dynamic Application to collect data.
To stop data collection for a Dynamic Application on this device:
- Select the checkbox of each Dynamic Application for which you want to stop data collection.
- From the Select Action drop-down list, select the following:
- Disable All Collection Objects. For all collection objects in the selected Dynamic Application(s), the Collect value will be set to No.
- Select the [Go] button.
NOTE: If a user manually sets the Collect status of a collection object or presentation object to No, Skylar One will not attempt to re-collect the object once a day and will not set the Collect status to Yes.
Resetting Statistical Data for a Dynamic Application
Skylar One allows you to examine the value of an object and trigger an alert if that value falls outside the range of "normal" values for that object at that hour of the day on that day of the week. The deviation function allows you to define such alerts.
To use the deviation function, you must configure Skylar One to store and calculate the mean values and standard deviation for an object. You do this by selecting the Enable Deviation Alerting field in the Collection Objects page. You then specify the minimum and maximum number of weeks to collect deviation data for the object. Skylar One must have already collected at least the minimum number of weeks' worth of values for an object before Skylar One will evaluate alert formulas that use the deviation function. To use the deviation function, you must specify a minimum value of at least two weeks.
In some cases, you might want to delete all the collected statistics for an object and start over. This is useful if known circumstances change the value of an object, and you no longer want to use the old data to calculate the "normal" ranges. You can do this by "resetting" the statistical data for an object.
For example, suppose you were monitoring bandwidth usage with a standard deviation alert. Suppose your company previously ran on a 09:00 to 17:00 work schedule. Suppose your company has recently added a nightshift to the schedule. In this circumstance, you might want to reset the statistical data to determine the new "normal" usage patterns.
When you reset the statistical data for an object, you are telling Skylar One to ignore all previously collected values and to use only values from today onward. When you reset the statistical data for an object, the Dynamic Application Collections page will again display a message like:
Note: object 123 not ready for deviation alerting.
until enough data has been collected to again calculate standard deviation for the object. Skylar One will again start collecting the minimum number of weeks of data for the object (as specified in the Enable Deviation Alerting field in the Collection Objects page) and calculating the "normal" ranges for those objects for each hour at each day of the week.
To delete all current statistical data for an object:
- In the Dynamic Application, find the object for which you want to reset data.
- In that Dynamic Application, find the object for which you want to reset data. Select its checkbox.
- From the Select Action drop-down list, select the following option:
- Reset Statistical Data. Removes all previously collected statistical data for the selected object. Skylar One will again start collecting the minimum number of weeks of data for the object (as specified in the Enable Deviation Alerting field in the Collection Objects page) and calculating the "normal" ranges for those objects for each hour at each day of the week.
- Select the button.
- The Dynamic Application Collections page will display a message like:
Note: object 123 not ready for deviation alerting.
Resetting Persistent Session Objects for a Dynamic Application
SOAP or XSLT Dynamic Applications can contain a collection object that stores a Session ID. The value for this collection object can be defined as a persistent value. If Skylar One has already retrieved and stored a value in the collection object for the Session ID, Skylar One will not collect a new value for the collection object until a SOAP fault occurs. You can force Skylar One to re-collect a Session ID collection object by deleting the current persistent value.
To delete the current persistent value for a session object:
In the Dynamic Application, find the object for which you want to reset data. Select its checkbox.
From the Select Action drop-down list, select Reset Persistent Session Objects. Removes the stored value for collection objects of type SOAP/XSLT Session ID. SOAP/XSLT Session ID objects are persistent across collection periods; Skylar One does not collect a SOAP/XSLT Session ID object if a collected value is available from a previous poll. After selecting this option, Skylar One will delete the existing value for the object and collect a new value during the next collection.
Select the button.
Testing Data Collection for a Dynamic Application
On a single device, you can perform a test-run of collection with a single Dynamic Application. During this test run, Skylar One displays details of each step of the collection process. This information can be very helpful for troubleshooting and debugging.
During a test run of a collection with a Dynamic Application, Skylar One does not store the collected data or generate alerts. Skylar One will continue to collect data and generate alerts using the selected Dynamic Application at the frequency defined in the Dynamic Application.
To execute a test run of collection with a single Dynamic Application:
Locate the device on which you want to test the Dynamic Application and click its wrench icon (
).Click the Collections tab.
Find the Dynamic Application for which you want to test collection and click its lightning bolt icon (
). If a device is currently unavailable, the lightning bolt icon (
) will be grayed out for each Dynamic Application aligned with the device.Skylar One displays a Session Logs modal that includes details about each step of the collection process and diagnostic details about alerts in the Dynamic Application. This information can be helpful during troubleshooting.
Removing Data Collected by a Dynamic Application
You can remove the data retrieved with a Dynamic Application from the current device. You have two options for removing Dynamic Application data associated with a device:
- Remove all previously collected data, but continue to collect data at the specified polling frequency.
- Remove all normalized data, but retain all raw collected data and continue to collect data at the specified polling frequency.
- Remove all previously collected data and stop collecting data with this Dynamic Application. This unaligns the device from the Dynamic Application. The device will no longer be a subscriber to the Dynamic Application.
To remove Dynamic Application data associated with a device:
- In the Dynamic Application Collections page, select the checkbox of the Dynamic Application for which you want to remove data. To remove data for multiple Dynamic Applications, select the checkbox for each Dynamic Application.
- From the Select Action drop-down list, select one of the following options:
- Remove Data. Removes all previously collected data, but data will continue to collect at the specified polling frequency.
- Remove Normalized Data. Removes all normalized data, but all raw collected data is retained and data will continue to collect at the specified polling frequency.
- Stop Collection and Remove Data. Removes all previously collected data and stops collection of data with this Dynamic Application. This "unaligns" the device from the Dynamic Application. The device is no longer considered a subscriber to the Dynamic Application. If you perform this option and later want to subscribe to this Dynamic Application again, you must re-align the device with the Dynamic Application.
- Select the button.
Bulk Un-aligning Dynamic Applications
The Application Subscribers page contains a drop-down field in the lower right called Select Action. This field allows you to un-align a Dynamic Application from one or more subscriber-devices.
To un-align a Dynamic Application from one or more devices:
- Go to the Dynamic Applications Manager page (System > Manage > Dynamic Applications).
- In the Dynamic Applications Manager page, find an application with a subscriber icon (
 ) in the Subscribers column. Click the icon.
 - The Application Subscribers page appears.
- In the Application Subscribers page, select the checkbox for each device you want to apply the action to. To select all checkboxes for all devices, select the checkbox at the top of the page.
- In the Select Action drop-down list, select Unalign Device and Remove Collection Data. This option un-aligns the device from the Dynamic Application and deletes all data collected by the Dynamic Application from the device. The device is no longer considered a subscriber to the Dynamic Application. If you perform this option and later want to subscribe to this Dynamic Application again, you must re-align the device with the Dynamic Application.
- Click the button to apply the action to all selected devices.
Setting Thresholds for Dynamic Applications
If a Dynamic Application includes one or more thresholds, you can change the threshold value on a per-device basis. To change a Dynamic Application threshold for a device:
Go to the Device Manager page (Devices > Classic Devices, or Registry > Devices > Device Manager in the classic user interface).
In the Device Manager page, find the device for which you want to define a threshold. Select its wrench icon (
).In the Device Administration panel, select the tab.
The Device Thresholds page displays a list of thresholds defined for each Dynamic Application that is aligned to the device. To change a threshold, move the slider for that threshold or enter a value in the number field for that threshold.
After changing one or more thresholds, select the button to save your changes.
Changing a threshold in the Device Thresholds page affects only the current device. The threshold values defined in the Dynamic Application remain unchanged.
Dynamic Applications and Discovery
Discovery is the ScienceLogic tool that automatically discovers devices in your network. You supply the discovery tool with a range or list of IP addresses, and the discovery tool determines if a device exists at each IP address. The discovery tool also determines which (if any) Dynamic Applications to align with the device. If the discovery tool finds Dynamic Applications to align with the device, the discovery tool triggers collection for each aligned Dynamic Application.
To learn more about discovery, see the Discovery and Credentials manual.
How Does Skylar One Align Dynamic Applications During Discovery?
Most Dynamic Applications include a discovery object. A discovery object enables Skylar One to determine which devices to align with a Dynamic Application.
During discovery, Skylar One:
- Searches the list of Dynamic Applications.
- If a Dynamic Application includes a discovery object, Skylar One adds that Dynamic Application to the list of Dynamic Applications to try to align during discovery.
- For each Dynamic Application that includes a discovery object, Skylar One checks the current discovery session for an appropriate credential. For example, for each database Dynamic Application, Skylar One would look for one or more database credentials that have been selected for the discovery session.
- For each discovered device, both those that support SNMP and those that don't, discovery tries to determine which Dynamic Applications to align. For each discovered device, Skylar One tries to align each Dynamic Application in the list of Dynamic Applications to try during discovery. For each Dynamic Application in the list, Skylar One tries to connect to each device with each of the appropriate credentials (until Skylar One finds a working credential) and then tries to find the discovery object. If Skylar One is able to connect to a device with one of the credentials and can then retrieve the discovery object, Skylar One will align the Dynamic Application with the device.
NOTE: Skylar One also includes more sophisticated logic that allows you to define multiple discovery objects, validate the value of the discovery object, and to align the Dynamic Application if a discovery object is not available. However, the most common use of a discovery object is as described above (discovery object exists).
- If discovery aligns a Dynamic Application with a device, immediately after discovery completes Skylar One will start the first collection from that device using the aligned Dynamic Application. This step is not performed for Dynamic Applications that meet all of the following three criteria:
- Has a collection frequency of 1 minute, 2 minutes, 3 minutes or 5 minutes.
- Does not have component mapping enabled (does not discover component devices).
- Is aligned with a component device.
NOTE: During discovery, Skylar One tries each SNMP credential specified in the discovery session on each discovered device, to determine if Skylar One can collect SNMP details from the device. Later in the discovery session, during alignment of Dynamic Applications, discovery again tries each SNMP credential specified in the discovery session. If one of the SNMP credentials times out three times without any response, discovery will stop trying to use that SNMP credential to align SNMP Dynamic Applications. Note that "no response" means that a device did not respond at all. Note that if a device reports that "no OID was found" or "the end of the OID tree was reached", these are considered a legitimate response and would not cause Skylar One to abandon the credential.
Queuing Discovery from the Dynamic Applications Manager Page
From the Dynamic Applications Manager page, you can manually run the Dynamic Application alignment portion of discovery for all devices in the system using one or more selected Dynamic Applications.
To manually queue discovery from the Dynamic Applications Manager page:
Go to the Dynamic Applications Manager page (System > Manage > Dynamic Applications).
In the Dynamic Applications Manager page, select the checkbox for each Dynamic Application you want to use for discovery.
In the Select Action drop-down list, select Discover Applications. Select the button.
You can also run the Dynamic Application alignment portion of discovery for all devices in the system using a single Dynamic Application. To do this, select the lightning bolt icon (
) for that Dynamic Application.
System Settings That Affect Dynamic Application Discovery
Some of the parameters in the Behavior Settings page affect how Skylar One aligns Dynamic Applications during discovery (discovery, auto-discovery, and re-discovery).
To define or edit the settings that affect discovery in the Behavior Settings page:
- Go to the Behavior Settings page (System > Settings > Behavior).
- In the Behavior Settings page, edit the values in one or more of the following fields:
- Initial Discovery Scan Level. Specifies the data to be gathered during the initial discovery session. You can override this setting for a single discovery session in the Discovery Session Editor modal page. The options are:
- 0. Model Device Only. Discovery tool will discover if device is up and running and if so, collect the make and model of the device. Skylar One will then generate a device ID for the device, so it can be managed by Skylar One.
- 1. Initial Population of Apps. Discovery tool will search for Dynamic Applications to associate with the device. Discovery tool will attempt to collect data for the aligned Dynamic Applications. Discovery will also perform 0. Model Device Only discovery.
- 2. Discover SSL Certificates. Discovery tool will search for SSL certificates and retrieve SSL data. Discovery tool will also perform 1. Initial Population of Apps and 0. Model Device Only.
- 3. Discover Open Ports. Discovery tool will search for open ports. Discovery tool will also perform 2. Discover SSL Certificates, 1. Initial Population of Apps, and 0. Model Device Only. If your system includes a firewall and you select 3. Discover Open Ports, discovery might be blocked and/or might be taxing to your network.
- 4. Advanced Port Discovery. Discovery tool will search for open ports, using a faster TCP/IP connection method. Discovery tool will also perform 2. Discover SSL Certificates, 1. Initial Population of Apps, and 0. Model Device Only. If your system includes a firewall and you select 4. Advanced Port Discovery, some auto-discovered devices might remain in a pending state (purple icon) for some time after discovery. These devices will achieve a healthy status, but this might take several hours.
- 5. Deep Discovery. Discovery tool will use nmap to retrieve operating system name and version. Discovery will also scan for services running on each open port and can use this information to match devices to device classes. Discovery tool will search for open ports, using a faster TCP/IP connection method. Discovery tool will also perform 2. Discover SSL Certificates, 1. Initial Population of Apps, and 0. Model Device Only. For devices that don't support SNMP, option 5. Deep Discovery allows you to discover devices that don't support SNMP and then align those devices with a device class other than "pingable".
Option 5. Deep Discovery is compute-intensive and might significantly tax your network if used as the default setting. ScienceLogic recommends that you use this option on a per-discovery basis by selecting it in the Discovery Session Editor page.
- Rediscovery Scan Level (Nightly). Specifies the data to be gathered/updated each night during auto-discovery. The auto-discovery process will find any changes to previously discovered devices and will also find any new devices added to the network. The options are the same as for Initial Discovery Scan Level.
ScienceLogic recommends that you delete all unused PowerPacks from your Skylar One system to improve the performance of the nightly auto-discovery process.
- Discovery Scan Throttle. Specifies the amount of time a discovery process should pause between each IP address or hostname in a discovery session. (You specify the list of IP addresses or hostnames for a discovery session in the IP Address/Hostname Discovery List field in the Discovery Session Editor page.) Pausing discovery processes between IP addresses or hostnames spreads the amount of network traffic generated by discovery over a longer period of time. The choices are:
- Disabled. Discovery processes will not pause.
- 1000 Msec to 10000 Msec. A discovery process will pause for a random amount of time between half the selected value and the selected value.
- Port Scan All IPs. Specifies whether Skylar One should scan all IP addresses on a device for open ports. You can override this setting for a single discovery session in the Discovery Session Editor modal page. The choices are:
- 0. Disabled. Skylar One will scan only the primary IP address (the one used to communicate with Skylar One) for open ports.
- 1. Enabled. Skylar One will scan all discovered IP addresses for open ports.
- Port Scan Timeout. Length of time, in milliseconds, after which Skylar One should stop trying to scan an IP address for open ports and begin scanning the next IP address (if applicable). You can override this setting for a single discovery session in the Discovery Session Editor modal page. Choices are between 60,000 and 1,800,000 milliseconds.
- Restart Windows Services (Agent required). Specifies whether Skylar One should automatically restart failed Windows services that have been defined on the device with a startup type of "automatic". To use this feature, the managed device must be running the agent SNMP Informant, WMI Edition. For assistance or information on purchasing and installing this agent, please contact ScienceLogic. Users must also supply a value in the SNMP Write field in the Device Properties page for the device. The choices are:
- 0. Disabled. Skylar One will not automatically restart failed Windows services that have been defined on the device with a startup type of "automatic".
- 1. Enabled. Skylar One will automatically restart failed Windows services that have been defined on the device with a startup type of "automatic".
- Hostname Precedence. Specifies which name Skylar One will use for each discovered device. Choices are:
- SNMP System Name. Use the device name specified in the device's SNMP System MIB. If SNMP System Name is selected and Skylar One cannot find an SNMP name for the device, Skylar One will assign the name returned by the DNS Reverse Lookup. If Skylar One cannot find a DNS Reverse Lookup name for the device, Skylar One will use the device's Admin Primary IP address as the device name in Skylar One.
- DNS Reverse Lookup. Use the device name specified in the device's reverse-lookup record.
Event Interface Name Format. Specifies the format of the network interface name that you want to appear in events. If you selected Interface Alias for the deprecated Interface Name Precedence field in a previous release of Skylar One, the format for existing interfaces is set to {alias}. If you selected Interface Name for the deprecated Interface Name Precedence field in a previous release of Skylar One, the format for existing interfaces is set to {name}. The default format is {name}. You can use a combination of string text and the following tokens to define the interface name format for events, such as string_{name}, string_{alias}, {name}{alias}, or {ifdesc}:
- {alias}
- {name}
- {state}
- {ifdescr}
- {if_id}
- {did}
- {ifindex}
- {ifphysaddress}
- {iftype}
- {ifspeed}
- {ifhighspeed}
- {ifoperstatus}
- {ifadminstatus}
- DNS Hostnames. If Skylar One will use the DNS Reverse Lookup name as the device name (see the description of the field Hostname Precedence), this field specifies whether Skylar One will use the fully-qualified domain name or only the hostname for each discovered device. Choices are:
- Strip Device Name (Hostname). Skylar One will use only the device name as the DNS hostname for each device.
- Use Full Domain Name (FQDN). Skylar One will use the fully-qualified domain name as the device name for each device.
Viewing Dynamic Application Data and Alerts
You can view the data collected from a device by Dynamic Applications in the following places:
- The Device Performance page allows you to view detailed reports for the selected device, including the graphs generated for each presentation object in each performance Dynamic Application that is aligned to the device.
- The Configuration Report page displays data collected by all configuration Dynamic Applications aligned to a device.
- The Journal Report page displays data collected by all journal Dynamic Applications aligned to a device.
This section will describe how to view each type of Dynamic Application and how to view alerts generated by Dynamic Applications:
Performance Dynamic Applications
The Device Performance page displays performance reports for a device. To view the Device Performance page:
- Go to the Device Manager page (Devices > Classic Devices, or Registry > Devices > Device Manager in the classic user interface).
- Find the device for which you want to view Dynamic Application data. Select its bar graph icon (
 ).
). - Click the tab. The Device Performance page is displayed.
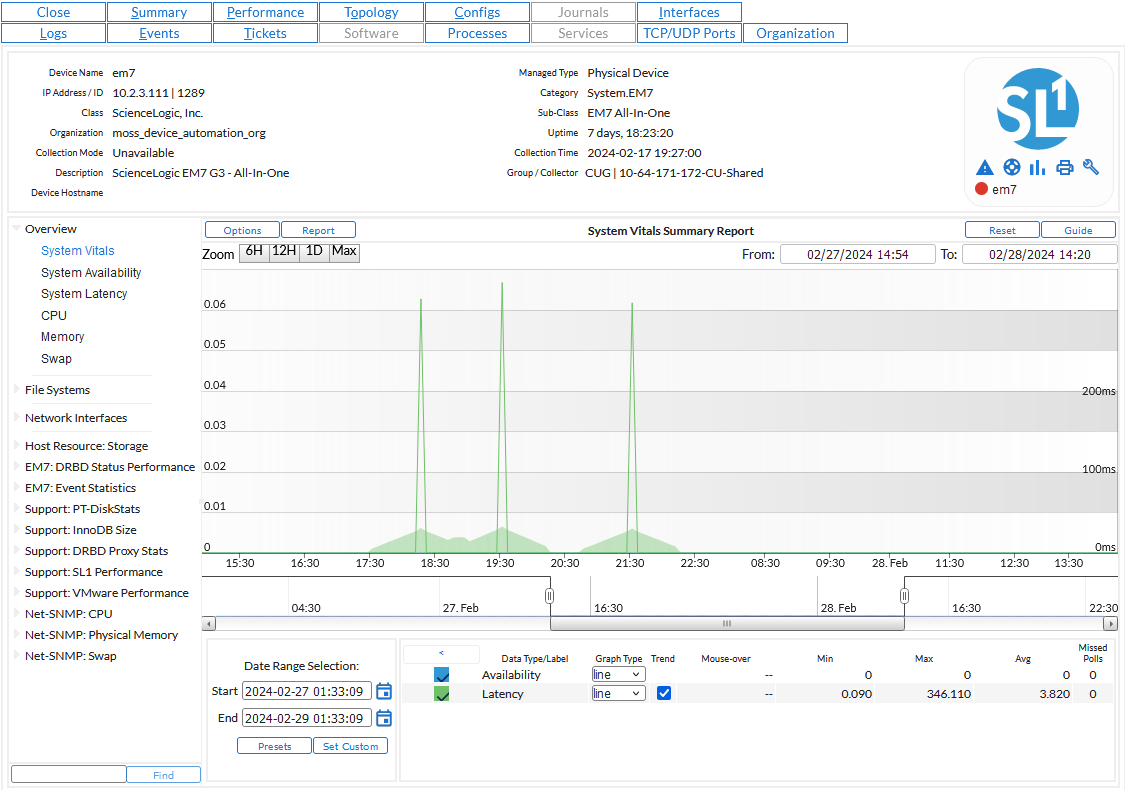
The Device Performance page displays all performance graphs that are available for the device. These graphs include:
- Graphs defined by the Dynamic Applications associated with the device.
- Graphs generated using data collected by other processes, such as availability data, file system usage, interface usage, and data from monitoring policies.
Viewing Performance Dynamic Application Data
To view a performance graph defined in a Dynamic Application:
- The bottom of the left NavBar of the Device Performance page lists all performance Dynamic Applications that include performance graphs. Select the Dynamic Application for which you want to view data.
- Selecting a performance Dynamic Application will expand the NavBar item and display a list of all presentation objects in that Dynamic Application. Select a presentation object to view the graph for that presentation object.
For each graph associated with a performance Dynamic Application:
- The x-axis of a Performance Dynamic Application graph displays time.
- The y-axis displays the collected value(s).
- Mousing over the graph will display the exact value for each data series at that point on the graph.
- The exact values are displayed in the "Mouse-over" column in the table below the graph.
Viewing Details with the Data Table
At the bottom of each graph is a table that allows you to view details about each data series and overview information about the entire graph.
The data table includes the following:
- Data Type/Label. For graphs that include multiple data series on a single graph (when the collection objects used to generate the graph have collected a list of values instead of a single value), each data series has its own row in this table. This column displays the name of the data series and how it is color-coded in the report. Clicking on the check-mark toggles the display of the data series in the graph.
- Trend. Allows you to toggle the trendline on and off. The trendline shows average values on each side of the current point. This checkbox is checked (trendline is displayed) by default.
- Mouse-over. When you mouse-over the graph, this column displays the exact value for each data series at that time point on the graph.
- Min. The column displays the minimum value for the data series in the graph.
- Max. This column displays the maximum value for the data series in the graph.
- Avg. This column displays the average value for the data series in the graph.
- Missed Polls. This column displays the number of times Skylar One was unable to collect the data within the time span of the graph.
Configuring the Data for the Report
You can use the menu to determine how you want to configure the data that is displayed in the graph. Your choices are:
- Default. The initial graph that is displayed is not normalized and displays every collected value.
- Normalized. In Skylar One, normalized data does not include polling sessions that were missed or skipped. So for normalized data, null values are not included when calculating maximum values, minimum values, or average values. When you select this option, Skylar One normalizes all the data collected in each 24 hour period and displays a single value for each day.
- Percentile. Displays percent on the y-axis. This can be applied to normalized or non-normalized graphs.
- Kiosk. Displays the report in full-page mode. This is helpful for NOC personnel who need to display graphs on large screens.
- Detach. Spawns the graph in a new window.
- Series Selection. Each performance graph is limited to displaying eight data series at a time. When you select this option, the Graph Index Selection page is displayed, where you can select up to eight data series to display.
- Edit Current Presentation. Selecting this option allows you to edit the Presentation Object that was used to generate the graph.
Generating a Report from a Performance Graph
You can use the button to save the report to a file on your local computer. You can select the format to save the file in. Your choices are:
- HTML with Images. Saves the graph and a table of all the data in the report, in HTML format.
- HTML Text Only. Saves the report as a table of data, in HTML format.
- HTML Text Only all indexes. Saves the report as a table of data, in HTML format. In the Device Performance page, the report can include up to eight data series (indexes); when you select this option, the HTML report will include all indexes collected by Skylar One, even if the number of indexes is greater than eight.
- CSV. Saves the data from the report (usually date, time, and value) as comma-separated values.
- CSV all indexes. Saves the data from the report (usually date, time, and value) as comma-separated values. In the Device Performance page, the report can include up to eight data series (indexes); when you select this option, the CSV report will include all indexes collected by Skylar One, even if the number of indexes is greater than eight.
- Graph Image Only. Saves only the graph from the report as a .png file.
- ODS w/Chart Img. Saves the graph and a table of all the data in the report, in ODS format.
- ODS Plain. Saves the table of all the data in the report, in ODS format.
- XLSX w/ Chart Img. Saves the graph and a table of all the data in the report, in XLSX (Excel) format.
- XLSX Plain. Saves the table of all the data in the report, in XLSX (Excel) format.
- PDF w/chart Img. Saves the graph and a table of all the data in the report, in PDF format.
- PDF Plain. Saves the table of all the data in the report, in PDF format.
Defining the Date Range for a Report
The fields in the Date Range Selection pane allow you to define the time span that will be displayed in the report. When you define a Date Range, only data from the specified time span will be included in the report.
You can use the following fields, menus, and buttons to define the dates and associated data that will be displayed in the report:
- Start. Allows you to define the Start date for the report. Data from this date until the specified End date will be included in the report.
- End. Allows you to define the end date for the report. Data from the specified Start date until this End date will be included in the report.
- . Allows you to select some pre-defined time spans for the report.
- . Applies the values from the Start and End fields to the report.
- . Allows you to zoom in or out for a specific time span. Choices are dependent upon the values selected in the Date Range Selection pane and can range from 6 hours to 90 days.
- You can drag the Date Range slider to the left or right, and the Performance graph will display the information for the selected time range.
Configuration Dynamic Applications
The Configuration Report page displays data collected from the device by configuration Dynamic Applications. Usually, configuration data contains static information about hardware and configuration settings, such as serial numbers, version numbers, and hardware status.
NOTE: If you select the Hide Object checkbox for an object in the Collection Objects page (System > Manage > Dynamic Applications > Create/Edit), the object will not be included in the Configuration Report page.
You can define the layout of the Configuration Report page in the Collection Objects page for the Dynamic Application. In the Collection Objects page, you can use the Group field and the Table Alignment fields to define which objects will be grouped together, and which table each object will appear in.
You can enable change detection for an object in the in the Collection Objects page for the Dynamic Application, in the Change Alerting field. If an object's value has changed, it will be highlighted in red in the Configuration Report page. You can then click on the object's value in the Configuration Report page and view a list of historical values for the object.
For more information about configuring the table layout and change detection for a configuration Dynamic Application, see Collection Objects.
For objects of type "enum," you can mouseover the object and view all the possible values for the object.
NOTE: The Configuration Report page does not display Dynamic Applications that have Cache Results selected in the Caching field in the Dynamic Applications Properties Editor page. Dynamic Applications that cache results are designed to collect data only for other Dynamic Applications and cannot be used to display data.
To view Configuration Dynamic Application information:
- Go to the Device Manager page (Devices > Classic Devices, or Registry > Devices > Device Manager in the classic user interface).
- Find the device for which you want to view configuration Dynamic Application data and select its bar graph icon ().
- In the Device Administration panel, select the tab. The Device Configuration page appears.
Selecting Data to View
If one or more Dynamic Applications of type "configuration" are associated with the device, the Configuration Report page will display that list of Dynamic Applications in the left NavBar.
NOTE: The left navigation bar does not display Dynamic Applications that have Cache Results selected in the Caching field in the Dynamic Applications Properties Editor page. Dynamic Applications that cache results are designed to collect data only for other Dynamic Applications and cannot be used to display data.
Viewing Data
When you select a Dynamic Application in the left NavBar, the right pane displays data collected from the device by the Dynamic Application.
- Some objects may appear in a list at the top of the right pane. These are objects that are not grouped into a table. For each of these values, no values were specified in the Group field and the Table Alignment field, in the Collection Objects page. These are usually objects for which there is only one, non-changing value (like model number, for example).
- Some objects may appear in tables. Tables work best for objects with multiple values, like RAM location. Each row represents one value from each collection object in the group, which all have the same index.
- Each column heading is the name of an object. Mousing over the column heading displays a description of the object. To edit the description, click on the column heading. The Collection Objects page appears, populated with values from the appropriate object. You can edit the value in the Description field, and that value will appear when you mouseover the column heading in the Configuration Report page.
- Mousing over a value can display the following:
- If the object is of type "enum", the mouseover text displays the list of all possible values for the object. For example, "0 unknown, 1 disabled, 2 enabled".
- If change detection has not been enabled, displays the text "Change detection is disabled. No history available".
- If change detection has been enabled, displays "Click to view change history". If you click, Skylar One displays the Change History modal, where you can view all the values collected from the device for the selected object.
Generating a Report of the Data
You can generate a report about the data in the Configuration Report page. To do so:
- In the Configuration Report page, in the Navigation Bar (left pane), select the Dynamic Application you want to generate a report from.
- In the Configuration Report page, select the menu. Select Print a Report.
- Skylar One generates an HTML report that contains all the data from the Configuration Report page. You can view, print, or save the report.
Viewing Historical Data
By default, the Configuration Report page displays data from the latest polling session. However, you can use the Snap-Shot Selector page to display data from a previous polling session in the Configuration Report page.
The Snap-Shot Selector page displays a list of polling sessions where a change was discovered in the configuration data. If none of the data in a Dynamic Application changes from one polling session to the next, then Skylar One does not include an entry in the Snap-Shot Selector page.
To display data from a previous polling session in the Configuration Report page:
- In the Configuration Report page, in the Navigation Bar (left pane), select the Dynamic Application for which you want to view historical data.
- When the data is displayed in the right pane, select the button.
- The Snap-Shot Selector modal page appears. This page displays a calendar interface, in which you can select a date for which you want to view a list of Snap-Shots.
- To select a date for a Snap-Shot, scroll through the calendar until you find the month that you are interested in. Click on the date you are interested in.
- The pane to the right will display a list of all available Snap-Shots for the selected date. Each Snap-Shot is labeled with a date and time stamp and specifies how many objects had changed values. To select a Snap-Shot, click on it and select the button.
NOTE: If the pane to the right does not display one or more available Snap-Shots, this means that Skylar One did not detect any changes to the objects on the selected date.
- The data from the selected Snap-Shot is loaded and displayed in the Configuration Report page.
Editing the Application
From the Configuration Report page, you can edit the properties of a Dynamic Application. When you do so, you change the behavior of the Dynamic Application for all subscriber devices, not just the current device.
To edit a Dynamic Application from the Configuration Report page:
- In the Configuration Report page, in the Navigation Bar (left pane), select the Dynamic Application you want to view and edit.
- When the data from the Dynamic Application is displayed in the right pane, select the menu and choose Edit This Application.
- The Collection Objects page appears. In this page, you can edit how Skylar One retrieves values for an object and how those values are displayed in the Configuration Report page. You can also access all the other tabs in the Dynamic Applications panel for the Dynamic Application.
For more information about editing collection objects, see the Collection Objects section.
Journal Dynamic Applications
The Journal View page displays journal entry information collected from the device by Dynamic Applications. All information from Dynamic Applications of type journal is included in the Journal View page. Journal Dynamic Applications store information in log format; for example, telephone call records or access logs.
To sort the list, click on a column heading. The list will be sorted by the column value, in ascending order. To sort the list in descending order, click the column heading again. You can also filter the items on this inventory page by typing filter text or selecting filter options in one or more of the filters found above the columns on the page. For more information, see Filtering the Items on a Classic Page in the Introduction to Skylar One manual.
To view journal Dynamic Application information:
- Go to the Device Manager page (Devices > Classic Devices, or Registry > Devices > Device Manager in the classic user interface).
- Find the device for which you want to view journal Dynamic Application data and select its bar graph icon ().
- In the Device Reports panel, select the tab. The Journal View page appears.
Selecting Data to View
If one or more journal Dynamic Applications are associated with the device, the tab of the Device Investigator (or the Journal View page in the classic Skylar One user interface) will display that list of Dynamic Applications on the left side of the page.
When you select a Dynamic Application on the left side of the page, the right pane displays data collected from the device by the selected Dynamic Application.
Viewing Data
The tab of the Device Investigator (or the Journal View page in the classic Skylar One user interface) arranges collected journal entries in tabular format.
- The table contains a row for each journal entry.
- The table contains a column for each presentation object, plus the State and Collected On columns. Presentation objects define the text to display in each row in the column, including which collection values will be displayed. Presentation objects are defined in the Presentation Objects page for the Dynamic Application.
The tab of the Device Investigator (or the Journal View page in the classic Skylar One user interface) displays the following about each journal entry:
To sort by descending order, click the column heading again. To sort a column that contains presentation objects, sorting must be enabled in the Presentation Objects page (System > Manage > Dynamic Applications > Create/Edit). Date and time column sorts by descending order on the first click; to sort by ascending order, click the column heading again.
- Presentation Objects. One or more columns in the table of journal entries will be presentation objects defined in the Dynamic Application. The values in this column can be based on one or more collection objects, and can be a text string, a number, or a time and date value.
- State. Specifies the current state of the journal entry. Journal entries can have one of the following states:
- Open
- Closed
- Abandoned
- Error
- Reopened
- Collected On. Specifies the last time the journal entry was updated.
Generating a Report of the Data
You can generate a report about the data in the tab of the Device Investigator (or the Journal View page in the classic Skylar One user interface).
To generate a report about the a device's journal data:
- Go to the tab of the Device Investigator (or the Journal View page in the classic Skylar One user interface).
- In the left NavBar, select the Dynamic Application from which you want to generate a report.
- You can filter the journal entries to include in the report. Using the search filters at the top of the table of journal entries, filter the list of journal entries so that only the journal entries you want to include on the report are displayed.
- Click the button and then select Generate Report.
- The Export current view as a report page displays. Select the output format for the report, optionally select if Skylar One must force the browser to save the file to disk, and then click .
Editing the Application
From the tab of the Device Investigator (or the Journal View page in the classic Skylar One user interface), you can edit the properties of a Dynamic Application. When you do so, you change the behavior of the Dynamic Application for all subscriber devices, not just the current device.
To edit a journal Dynamic Application:
- Go to the tab of the Device Investigator (or the Journal View page in the classic Skylar One user interface).
- In the left NavBar, select the Dynamic Application you want to view and edit.
- When the data from the Dynamic Application is displayed in the right pane, click the button and then select Edit This Application.
- The Collection Objects page appears. In this page, you can edit how Skylar One retrieves values for an object. You can also access all the other tabs in the Dynamic Applications panel for the Dynamic Application.
Viewing Alerts Generated by Dynamic Applications
You can view alerts generated by a Dynamic Application in the Device Logs & Messages page. To view alerts on a device generated by a Dynamic Application:
- Go to the Device Manager page (Devices > Classic Devices, or Registry > Devices > Device Manager in the classic user interface).
- In the Device Manager page, find the device for which you want to view alerts generated by a Dynamic Application. Select its bar graph icon ().
- Click the tab. The Device Logs & Messages page displays the following for each log message:
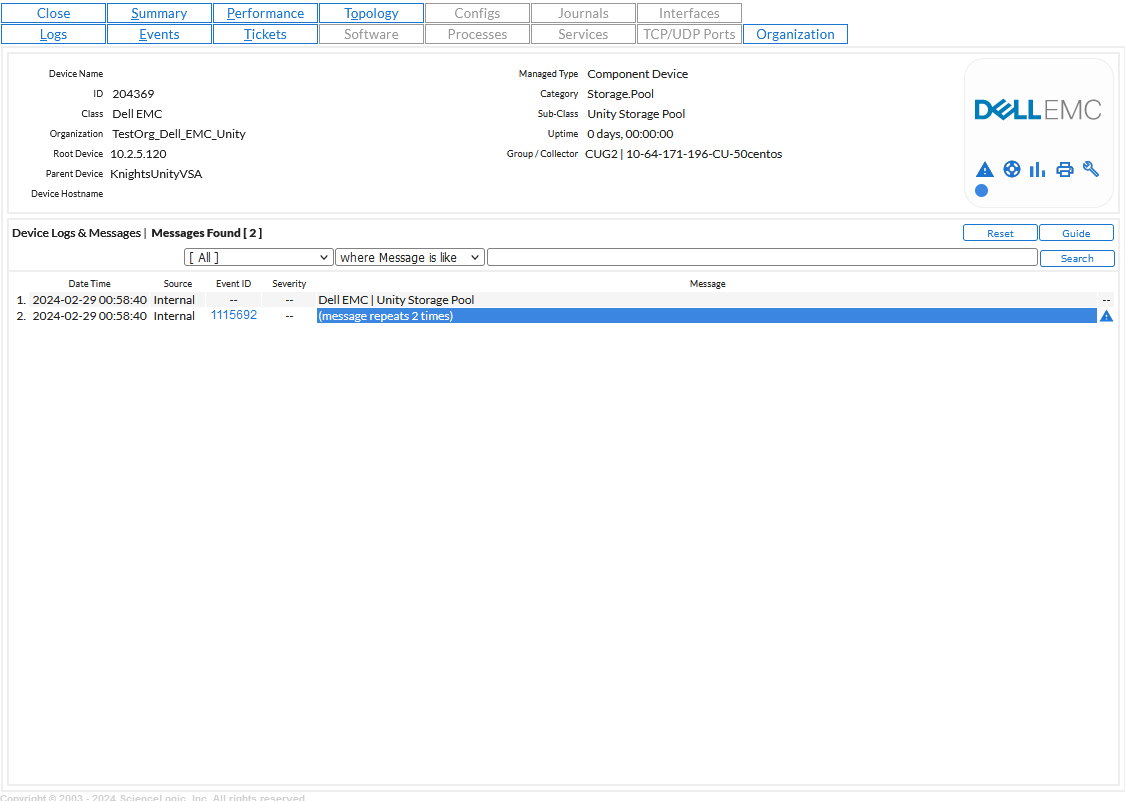
- Date Time. The date and time the entry was made in the log.
- Source. The entity or process that generated the message. If generated by a Dynamic Application, the source will be Dynamic.
- Event ID. If an event was created, a unique event ID, generated by Skylar One. If the log entry is not associated with an event, no ID appears in this column.
- Priority. This column is not applicable to alerts generated by Dynamic Applications.
- Message. Text of the log entry, color-coded to match event severity (if applicable).
Searching the List of Log Entries for a Dynamic Application
The search fields at the top of the Device Logs & Messages pane allows you to search log entries for messages generated by a Dynamic Application associated with a device. To search the list of log entries for a Dynamic Application:
- In the Device Logs & Messages pane, select the drop-down list.
- Select [Search Dynamic].
- In the drop-down list search bar, you can optionally define the parameters for the search. Choices are:
- Where Message is like. Search the message portion of the log entry.
- Where Date received is like. Search the date portion of the log entry.
- Where Priority is like. This selection is not applicable to alerts generated by Dynamic Applications.
- In the regular expression field, you manually enter the text to search for. You can use the following special characters in this field:
- * Match zero or more characters preceding the asterisk. For example:
"dell*" would match "dell", "dell2650", "dell7250" and "dell1700N".
"*dell*" would match "mydell", "dell", "dell2650", "dell7250" and "dell1700N".
- % Match zero or more characters preceding the percent symbol. This special character behaves in the same way as the asterisk.
- When you select the button, the Device Logs & Messages page will be refreshed and will display only log entries that match the search parameters.
Viewing Active Events for a Dynamic Application
Events are messages that are triggered when a specific condition is met. For example, an event can signal that a server has gone down, that a device's hard drives are getting too full, or simply display the status of a device. You can view events generated by Dynamic Applications in the Viewing Events page. You can view active events, as well as events that have been cleared.
To view active events generated by a Dynamic Application:
- Go to the Device Manager page (Devices > Classic Devices, or Registry > Devices > Device Manager in the classic user interface).
- In the Device Manager page, find the device for which you want to view events generated by a Dynamic Application. Select its bar graph icon ().
- In the Device Reports Panel, select the tab. The Viewing Events page displays the following for each event message:
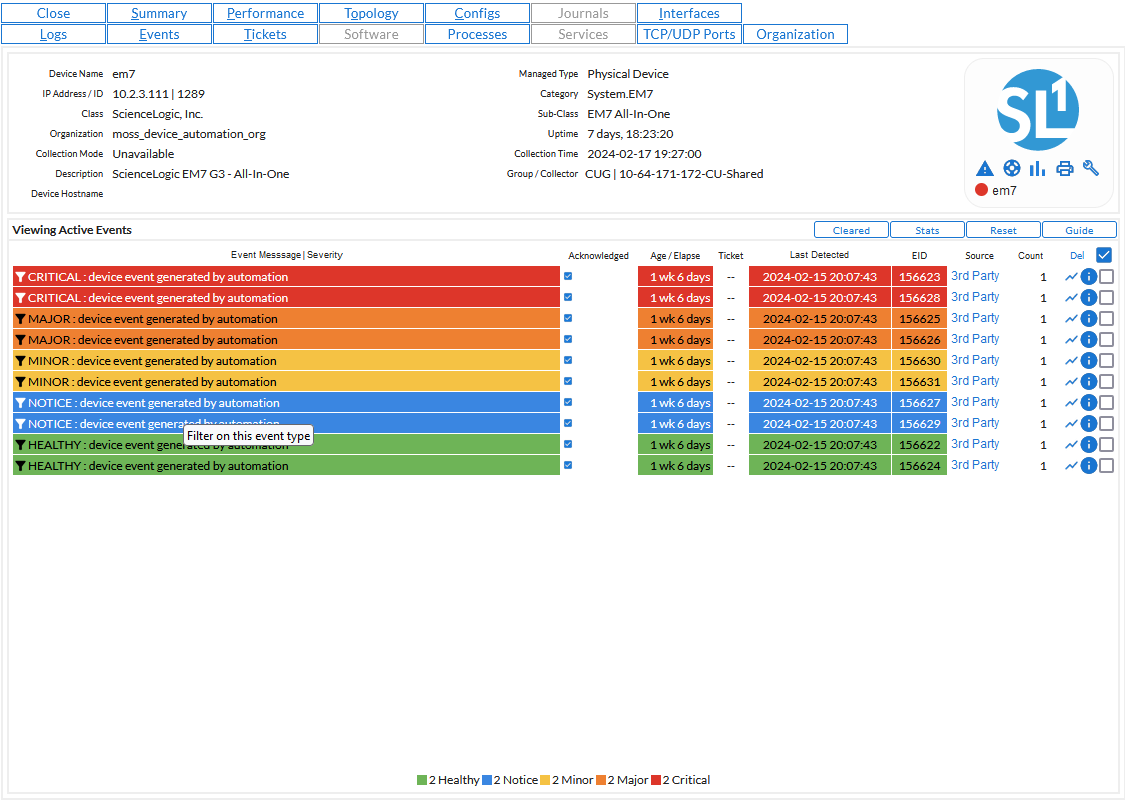
- Event Message | Severity. Message generated by event, as defined in the Event Policy Editor page. The message is color-coded for severity.
- Critical. Critical events are those that require immediate attention.
- Major. Major events are those that require immediate investigation.
- Minor. Minor events are those that need to be investigated before problems become severe.
- Notice. Notice events are those that require attention but are not problem-related.
- Healthy. Healthy events are those that are not urgent.
- Acknowledged. Specifies whether anyone has acknowledged this event.
- Red check. Event has not been acknowledged.
- Gray check with name. Event has been acknowledged.
- Age / Elapse. Number of days, hours, and minutes since the last occurrence of the event.
- Ticket. Ticket ID associated with this event, if applicable.
- Last Detected. Date and time of last occurrence of the event.
- EID. Unique ID for the event, generated by Skylar One. By default, this column appears only if specified in your Account Settings or if you select the [Advanced] button.
- Source. Source of the log message that triggers the event, as defined in the Event Policy Editor page. If the event was generated by a Dynamic Application, the Source will be Dynamic.
- Count. Number of times this event has occurred.
- External Ticket. The numeric ID associated with a ticket from an external ticketing system (that is, a ticket that was not created in Skylar One). If this field displays a value, you can click on that value to spawn a new window and view the external ticket.
Viewing Details About an Active Event
You can view details about an active event in the Event Information page. The Event Information page displays more detailed data about a single active event. To view details about an active event:
- In the Viewing Active Events pane, find the event for which you want to view detailed information.
- Select its information icon (
 ).
). - The Event Information page displays the following for each active event:
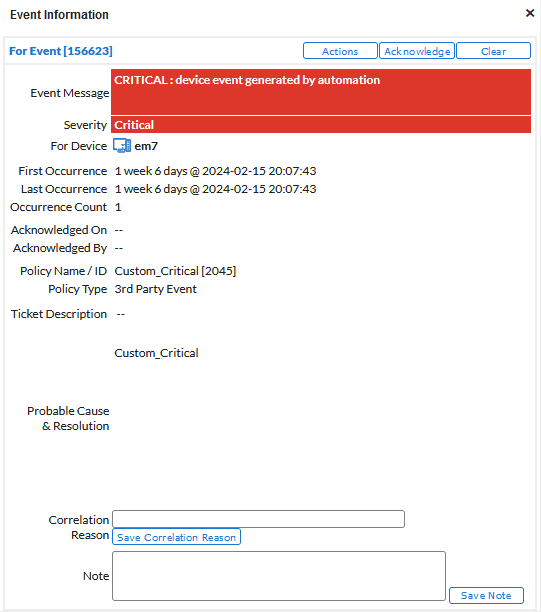
- Event ID. Unique ID for the event, generated by Skylar One.
- Event Message. Message generated by event, as defined in the Event Policy Editor page.
- Severity. Severity of the event. Choices are:
- Critical
- Major
- Minor
- Notice
- Healthy
- For Element. Name of the element associated with the event.
- First Occurrence. Number of days and hours since the first occurrence of the event. Date and time of first occurrence of the event.
- Last Occurrence. Number of days and hours since the last occurrence of the event. Date and time of last occurrence of the event.
- Occurrence Count. Number of times this event has occurred on this entity.
- Acknowledged On. Date and time the event was acknowledged.
- Acknowledged By. Username of user who acknowledged the event.
- Policy Name/ID. Name of the event policy, as defined in the Event Policy Editor page and policy ID.
- Policy Type. Source of the log message that triggers the event, as defined in the Event Policy Editor page. If the event was generated by a Dynamic Application, the Policy Type will be Dynamic.
- Ticket Description. Description field from the associated ticket, if applicable.
- Probable Cause & Resolution Text. This pane displays additional information about the event, as defined in the Event Policy Editor page.
Viewing Cleared Events from a Dynamic Application
You can view cleared events from a Dynamic Application from the Viewing Cleared Events page. A cleared event is an event that is no longer occurring, and has been manually cleared by a user, or has expired.
To view cleared events from a Dynamic Application:
- Go to the Device Manager page (Devices > Classic Devices, or Registry > Devices > Device Manager in the classic user interface).
- In the Device Manager page, find the device for which you want to view events generated by a Dynamic Application. Select its bar graph icon ().
- Click the tab.
- In the Viewing Events page, click the button. The Viewing Cleared Events page displays the following information:
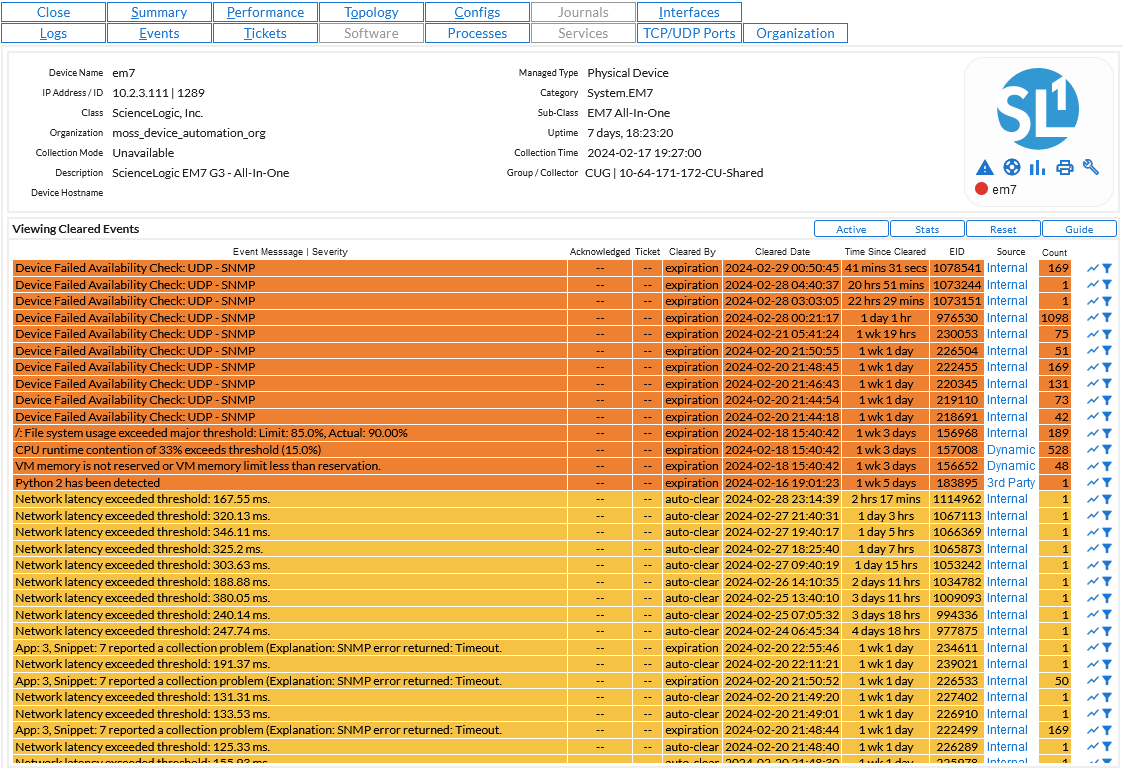
- Event Message | Severity. Message generated by event, as defined in the Event Policy Editor page. The message is color-coded for severity.
- Critical. Critical events are those that require immediate attention.
- Major. Major events are those that require immediate investigation.
- Minor. Minor events are those that need to be investigated before problems become severe.
- Notice. Notice events are those that require attention but are not problem-related.
- Healthy. Healthy events are those that are not urgent.
- Acknowledged. Specifies whether anyone has acknowledged this event.
- Gray Dash. Event has not been acknowledged.
- Gray check with name. Event has been acknowledged.
- Ticket. Ticket ID associated with this event, if applicable.
- Cleared By. Username of the person who cleared the ticket.
- Cleared Date. Date and time on which event was cleared.
- Time Since Cleared. Number of days, hours, and minutes since the event was cleared.
- EID. Unique ID for the event, generated by Skylar One. By default, this column appears only if specified in your Account Settings or if you select the button.
- Source. Source of the log message that triggers the event, as defined in the Event Policy Editor page. If the event was generated by a Dynamic Application, the Source will be Dynamic.
- Count. Number of times this event has occurred.
Dynamic Application Settings
Every Dynamic Application has a set of properties specific to that Dynamic Application. This section will describe how to view and edit the properties for a Dynamic Application.
There are also some global settings that affect the operation of Dynamic Applications; these global settings are described in Managing Dynamic Applications.
Dynamic Application Properties
Every Dynamic Application has a set of properties that define the general settings for that Dynamic Application. To view and edit the settings for a Dynamic Application:
- Go to the Dynamic Applications Manager page (System > Manage > Dynamic Applications).
- Find the Dynamic Application you want to view or edit the properties for. Select its wrench icon (). The Dynamic Applications Properties Editor page is displayed.
- A Dynamic Application has the following properties:
- Application Name. The name of the Dynamic Application.
- Application Type. Specifies the Dynamic Application type, which comprises a protocol and an archetype. For a description of protocols and archetypes, see the Types of Dynamic Application section. The following options are available in the Application Type field:
- Bulk Snippet Configuration
- Bulk Snippet Performance
- Database Configuration
- Database Performance
- IT Service
- PowerShell Configuration
- PowerShell Performance
- SNMP Configuration
- SNMP Performance
- SOAP Configuration
- SOAP Performance
- Snippet Configuration
- Snippet Journal
- Snippet Performance
- WMI Configuration
- WMI Performance
- XML Configuration
- XML Performance
- XSLT Configuration
- XSLT Performance
The Application Type field cannot be changed after the Dynamic Application is created. When editing an existing Dynamic Application, the Application Type field is view-only.
- Execution Environment. The execution environment to which the Dynamic Application is aligned. This field appears only for snippet and internal collection Dynamic Applications. An execution environment contains the supporting modules, code, scripts, directories, and files (packaged in ScienceLogic Libraries) for the snippet. An execution environment includes its own installation directories, doesn't share libraries with other environments, and allows granular control of dependencies and versions. The default execution environment is System. For more information, see
- Caching. This field is disabled for Dynamic Applications that use Bulk Snippet, Database, or Internal Collection (ICDA) type. When Skylar One requests information from a device during Dynamic Application collection, Skylar One can optionally cache the response from the device. If a response is cached, other Dynamic Applications that use the same protocol can retrieve collection object values from the cached response. When you cache responses, you reduce the number of requests performed by Skylar One and speed up collection. Typically, Dynamic Applications aligned to component devices retrieve values from a cached repository. The cached repository is created with a Dynamic Application aligned with the root device. Choices are:
NOTE: When Skylar One performs Dynamic Application collection, the Dynamic Application API uses the Verify SSL for Collections by Default setting (System > Settings > Collection Settings) as the default value for SSL verification during collection, instead of a hardcoded value. This change does not affect credential types that do not support SSL verification, such as classic PowerShell or SSH credentials, and does not affect SNMP Dynamic Applications.
- No caching. Specifies that this Dynamic Application does not use the caching feature. The requests that are used to populate the collection objects in this Dynamic Application are defined within this application and the responses to those requests are not available to other Dynamic Applications.
- Cache Results. Specifies that Skylar One should cache the responses from the requests defined in this Dynamic Application. Other Dynamic Applications that use the same protocol or Snippet Dynamic Applications can retrieve data from the cached responses associated with this Dynamic Application. When this option is selected, the collection objects defined in this Dynamic Application are no longer collected at a regular frequency. If you select this option, you must not define collection objects that are used to generate configuration tables or performance graphs.
- Consume Cached Results. Specifies that the collection objects defined in this Dynamic Application are populated with values from other Dynamic Applications that use the same protocol and have Cache Results enabled.
- In a SOAP or WMI Dynamic Application that uses the Consume Cached Results option, you cannot define requests.
- For XSLT Dynamic Applications that use the Consume Cached Results option, you must still define the XSLT Parser Code that will be used to transform the cached responses.
- For Snippet Dynamic Applications that use the Consume Cached Results option, you must still define snippet code that processes the cached responses; however, Snippet Dynamic Applications that use the Consume Cached Results option can consume cached responses from any Dynamic Application type that can cache responses.
- Dynamic Applications that use the Consume Cached Results option can use cached responses from multiple different Dynamic Applications.
- If a cached response is unavailable when Skylar One performs collection for a "Consume Cached Results" Dynamic Application, Skylar One will automatically attempt to execute the appropriate request to re-populate the cache.
NOTE: If a Dynamic Application includes Consume Cached Results and is aligned with a device that is not a component device, the Dynamic Application that provides the results to be consumed (includes Cache Results) must be aligned with the same device. If a Dynamic Application includes Consume Cached Results and is aligned with device that is a component device, the related Dynamic Application that provides the results to be consumed (includes Cache Results) must be aligned with the root device for that component.
- Device Dashboard. Select a device dashboard from a list of all device dashboards in Skylar One. The selected device dashboard will be associated with all devices that subscribe to this Dynamic Application and will appear as an option in the Device Summary page. For more information about device dashboards,
- Version Number. Specifies the current revision level of the Dynamic Application as specified by the developer of the Dynamic Application.
- Operational State. Specifies whether Skylar One will collect data from devices using the Dynamic Application. The Operational State also specifies whether Skylar One will automatically align the Dynamic Application to devices during discovery, re-discovery, and nightly auto-discovery. The following options are available:
- Enabled. Skylar One will collect data from devices using the Dynamic Application and will automatically align this application to devices during discovery, re-discovery, and nightly auto-discovery.
- Disabled. Skylar One will not collect data from devices using the Dynamic Application and will not align this application to devices during discovery, re-discovery, and nightly auto-discovery. Selecting Disabled does not remove existing device alignments for the Dynamic Application and does not prevent a user from manually aligning the Dynamic Application with a device.
- Collector Affinity. Specifies which Data Collectors are allowed to run collection jobs for this Dynamic Application. Choices are:
- Default. If the Dynamic Application is auto-aligned to a component device during discovery, then the Data Collector assigned to the root device will collect data for this Dynamic Application as well. For devices that are not component devices, the Data Collector assigned to the device running the Dynamic Application will collect data for the Dynamic Application.
- Root Device Collector. The Data Collector assigned to the root device will collect data for the Dynamic Application. This guarantees that Dynamic Applications for an entire Device Component Map (DCM) tree will be collected by a single Data Collector. You might select this option if:
- The Dynamic Application has a cache dependency with one or more other Dynamic Applications.
- You are unable to collect data for devices and Dynamic Applications within the same Device Component Map on multiple Data Collectors in a collector group.
- The Dynamic Application will consume cache produced by a Dynamic Application aligned to a non-root device (for instance, a cluster device).
- The Dynamic Application includes snippet code with a root_device tuple.
- Assigned Collector. The Dynamic Application will use the Data Collector assigned to the device running the Dynamic Application. This allows Dynamic Applications that are auto-aligned to component devices during discovery to run on multiple Data Collectors. You might select this option if:
- The Dynamic Application has no cache dependencies with any other Dynamic Applications.
- You want the Dynamic Application to be able to make parallel data requests across multiple Data Collectors in a collector group.
- The Dynamic Application can be aligned using mechanisms other than auto-alignment during discovery (for instance, manual alignment or alignment via Device Class Templates or Run Book Actions).
- Poll Frequency. Specifies how often Skylar One will use this Dynamic Application to collect data from the device(s) the Dynamic Application is aligned with. Choices range from Every 1 Minute to Every 24 Hours.
NOTE: You can define a custom poll frequency for a Dynamic Application aligned with one or more devices in a device template. The poll frequency defined in the device template overrides the poll frequency defined for the Dynamic Application. Devices to which the device template has been applied will use the poll frequency defined in the device template. You can override both the Poll Frequency field and on a per-device basis from the Dynamic Application Collections page.
- Maximum Devices. Appears only for Dynamic Applications of type Bulk Snippet Configuration and Bulk Snippet Performance. Specifies the maximum number of devices that a single instance of the Dynamic Application can collect data from. If the number of discovered devices exceeds the value in this field, Skylar One runs additional instances of the Dynamic Application. Enter a number between 1 and 500.
- Abandon Collection. Specifies how many collection objects must timeout in one poll period before Skylar One stops trying to collect data for the Dynamic Application from a specific device. For more information about how this field works, see the Abandon Collection Property section.
- Context. Optional field that is used for Dynamic Applications that use the SNMP protocol. For SNMPv3, specifies the snmp ID of the device from which you want to retrieve data. This helps differentiate between multiple instances of MIBs and OIDs.
- Disable Rollup of Data. If you select this checkbox, Skylar One does not roll up the collected data from this Dynamic Application. Selecting this checkbox decreases the workload on the Skylar One System. Skylar One displays rolled-up data from Dynamic Applications in multiple pages throughout the user interface, including, but not limited to, dashboard widgets, reports, and device summary/performance pages. If you select this checkbox, those pages that depend on rolled-up data will no longer display data for this Dynamic Application.
- Description. Optional field that describes the purpose and function of the Dynamic Application.
- Release Notes & Change Log. Optional field that specifies any additional information the developer wants to provide with the Dynamic Application.
For Dynamic Applications that use the Snippet, SOAP, WMI, XML, or XSLT protocols, the following additional fields appear:
- Caching. For information about this field, see Caching. If you do not want to use the caching feature, select No Caching in this field.
NOTE: The Caching field does not appear for Bulk Snippet Dynamic Applications.
- Component Mapping. If you select this checkbox, Skylar One will use data collected by the Dynamic Application to create Component Devices. For more information about this checkbox, see Dynamic Component Mapping section.
For Dynamic Applications of type "configuration, the following additional fields appear:
- Null Row Option. This field is active only for Dynamic Applications of type "configuration". If this Dynamic Application does not collect any values for a row in a table of configuration data that previously returned data, you can specify how Skylar One will display the row in the Configuration Report page. Choices are:
- --values. Skylar One will display the "--" (dash dash) characters to signify that no data was collected for the current snapshot.
- Last collected. Skylar One will display the last successfully collected values for the row. Skylar One will not indicate that it has collected no values for the row.
- Last collected with indicator.
- Hide Row. Skylar One will not display the row that contains no values.
- Null Column Option. This field is active only for Dynamic Applications of type "configuration". If this Dynamic Application does not collect a value for a table cell for which data was previously collected, you can specify what Skylar One will display in the table cell in the Configuration Report page. Choices are:
- --values. Skylar One will display the "--" (dash dash) characters to signify that no data was collected for the current snapshot.
- Last collected. Skylar One will display the last successfully collected value for the table cell. Skylar One will not indicate that it has collected no value for the table cell.
- Last collected with indicator. Skylar One will display the last successfully collected value for the table cell. The value in the table cell is highlighted, to indicate that this is not the latest value, but only the latest successfully collected value.
- To edit one or more of the properties for a Dynamic Application, change the value for that property, and then select the button.
If you modify a Dynamic Application that is included in an imported PowerPack, for example, Dynamic Applications provided by ScienceLogic, your changes will be overwritten if the PowerPack is reimported and reinstalled.
The Abandon Collection Property
The Abandon Collection field in the Dynamic Applications Properties Editor specifies how many collection objects must timeout before Skylar One stops trying to collect data for the Dynamic Application from a specific device. At the next scheduled collection interval, Skylar One will try again to collect data for this Dynamic Application from the device.
The following options are available in the Abandon Collection field:
- Default. Specifies a threshold of two collection objects.
- After 1 Timed-Out Objects to After X Timed-Out Objects. Specifies how many collection objects must time out before this collection session is abandoned on the device. Options will be displayed for each number between 1 and the number of collection objects defined in the Dynamic Application. For example, if three collection objects are defined in a Dynamic Application, the following options are available:
- Default
- After 1 Timed-Out Objects
- After 2 Timed-Out Objects
- After 3 Timed-Out Objects
During a polling session on a device, the frequency of which is controlled by the Poll Frequency field, the Dynamic Application collection process connects to the aligned device using the aligned credential and then requests each collection object. If Skylar One cannot retrieve a value for a collection object before the timeout limit (defined in the credential), the collection object is considered timed-out. In a single polling session on a single device, when the number of collection objects that are timed-out reaches the number specified in the Abandon Collection field, Skylar One abandons collection of the Dynamic Application on the device for the current polling session. When collection is abandoned:
- Skylar One will not attempt to collect any of the other collection objects in the Dynamic Application from that device in this polling session.
- Skylar One can generate an event with the message "Dynamic Application stopped collection - abandon threshold crossed". The event will include the Dynamic Application ID, device ID, and the collection object IDs that timed out.
NOTE: The event "Dynamic Application Stopped collection - abandon threshold crossed" is disabled by default. To enable this event, go to the Event Category Manager page and edit the definition for this event.
- Subsequent polling sessions are not affected. During the next polling session, the collection process for the Dynamic Application will attempt to collect all the collection objects
- If a device is unavailable or consistently abandons collection for more than two days, Skylar One will set the Collect status of all objects for all the Dynamic Applications aligned with the device to No.
NOTE: For all objects except those retrieved from a database, the timeout limit is specified in the credential. For database objects, the timeout limit is specified internally by Skylar One.
Creating a Dynamic Application
This
Skylar One creates an audit log message whenever you create, edit, or delete a Dynamic Application. For more information, see Monitoring User Actions and Events.
To create a new Dynamic Application, you must perform the following general steps:
- Determine what data you want to collect from a monitored device that would help you manage that device.
- Determine what management interfaces are available on the monitored device and how the data that you need is made available - through an SNMP agent, WMI agent, web server, database, or another method. You can then choose the appropriate protocol type for your Dynamic Application. The same information might be available through multiple management interfaces on the monitored device; you will need to determine which management interface you will use based on ease of implementation, security, and other factors.
- Determine which data points you want to collect, and how you want that data displayed in Skylar One. You can then:
- Choose the archetype of your Dynamic Application.
- List the requests, collection objects, and presentation objects you will need to create.
- Determine the other features that you will use for this Dynamic Application. In addition to collecting and displaying data, Skylar One can:
- Automatically align your Dynamic Application to devices during discovery.
- Generate alerts when the collected data meets specified thresholds.
- Create component devices using the collected data.
- Cache the results of requests defined in Snippet, SOAP, WMI, XML, and XSLT Dynamic Applications for use by other Dynamic Applications.
- Use the performance graphs defined in a Dynamic Application to represent CPU, Memory, or Swap utilization for subscriber devices.
- Use the collected data to automatically populate asset records.
- Use the collected data to automatically populate inventory lists for hardware components and installed software.
- Use the collected data to create and/or populate custom attributes.
- Create the container for the Dynamic Application. During this step, you will use the protocol and archetype you chose in the previous steps to define the Dynamic Application type. You will also define the basic properties for your Dynamic Application, such as how often Skylar One will perform collection. There are three methods for creating a container for your Dynamic Application:
- Creating a new Dynamic Application from scratch.
- Creating a new Dynamic Application by duplicating an existing Dynamic Application using the button. This option is useful if you are creating multiple, similar Dynamic Applications.
- If you are creating an SNMP Dynamic Application, use the SNMP Walker Tool to create the Dynamic Application and populate the collection objects.
- If you are creating a Snippet, Bulk Snippet, SOAP, WMI, or XSLT Dynamic Application, define the requests or snippets that will be used to populate the collection objects in your Dynamic Application. If one or more other Dynamic Applications are already configured to cache all the data you need to populate the collection objects in this Dynamic Application, you can configure your Dynamic Application to consume cached requests.
- Create the collection objects for the Dynamic Application.
- If you are creating a performance or journal Dynamic Application, create the presentation objects for the Dynamic Application.
- At this stage of development, you might want to test the basic functionality of your Dynamic Application before adding additional features such as discovery objects or alerts. To test your Dynamic Application:
- If required, create the appropriate credential for your Dynamic Application.
- Discover a device from which the Dynamic Application can collect data.
- In the Dynamic Application Collections page for the device, manually align the Dynamic Application.
- Implement the other features you want to use for your Dynamic Application. After implementing each feature, you might want to re-test your Dynamic Application. To implement additional features:
- To automatically align your Dynamic Application to devices during discovery, create one or more discovery objects.
- To generate alerts when the collected data meets specified thresholds, define thresholds and alerts.
- To create component devices using the collected data, enable Dynamic Component Mapping.
- To cache the results of requests for use by other Dynamic Applications, enable caching.
- To use the performance graphs defined in your Dynamic Application to represent CPU, Memory, or Swap utilization for subscriber devices, define a vitals link for one or more presentation objects.
- To use the data collected by your Dynamic Application to automatically populate asset records, define an asset link for one or more collection objects.
- To use the data collected by your Dynamic Application to automatically populate inventory lists for hardware components and installed software, define an inventory link for one or more collection objects.
- To use data collected by your Dynamic Application to automatically create and/or populate custom attributes, align a custom attribute with one or more collection objects.
If you configure your Dynamic Application to cache the results, you cannot include collection objects (other than a discovery object) or presentation objects in the same Dynamic Application. You must create a second Dynamic Application to use the cached results to display data in Skylar One. If you configure your Dynamic Application to cache the results, skip steps six and seven of these instructions.
To speed up your testing, you might want to change the Poll Frequency setting in the Dynamic Applications Properties Editor to Every 1 minute. When your Dynamic Application is complete, you can change this setting back to the desired value.
Creating the Container for a Dynamic Application
If you are creating a new Dynamic Application from scratch, you must create a container for your Dynamic Application. To do this:
- Go to the Dynamic Applications Manager page (System > Manage > Dynamic Applications).
- Select the button, and then select Create New Dynamic Application. The Dynamic Applications Create New Application page appears in a new window.
- Enter a value in each field in the Dynamic Applications Create New Application page. For a description of each field, see the Dynamic Application Settings section.
- Select the button to create your new Dynamic Application.
Duplicating an Existing Dynamic Application
If you are creating a new Dynamic Application that is similar to an existing Dynamic Application, you can duplicate the existing Dynamic Application. To do this:
- Go to the Dynamic Applications Manager page (System > Manage > Dynamic Applications).
- Find the Dynamic Application you want to duplicate. Select its wrench icon (). The Dynamic Applications Properties Editor page is displayed.
- Enter a new name for your Dynamic Application in the Application Name field. You can also change the values in the other fields on this page. For a description of each field on this page, see Dynamic Application Settings.
- Select the button to duplicate the Dynamic Application:
When a Dynamic Application is duplicated:
- A new Dynamic Application is created using the properties defined in this page.
- New instances of the collection objects, presentation objects, thresholds, and alerts in the existing Dynamic Application are created and associated with the new Dynamic Application.
- New instances of the event policies associated with the existing Dynamic Application are created and associated with the alerts in the new Dynamic Application.
- For Dynamic Applications that have the Component Mapping checkbox enabled, a new instance of the associated component device class is created and associated with the new Dynamic Application.
- For Dynamic Applications that have the Component Mapping checkbox enabled, the Dynamic Applications aligned in the Dynamic App Component Alignment page will also be aligned with the new Dynamic Application. Skylar One does not create new instances of the Dynamic Applications aligned in the Dynamic App Component Alignment page.
- The new Dynamic Application is not automatically included in a PowerPack.
Creating a Dynamic Application Using the SNMP Walker Tool
The easiest way to create an SNMP Dynamic Application is to use the SNMP Walker Tool to determine what information is available from the SNMP agent on a device. You can then select the SNMP OIDS directly from the SNMP Walker Tool and add them to a new or existing Dynamic Application. For information on how to use the SNMP Walker Tool to create an SNMP Dynamic Application,
Collection Objects
This section describes how Skylar One uses Collection Objects.
What is a Collection Object?
Each Collection Object in a Dynamic Application specifies a data point that Skylar One will attempt to collect. A Dynamic Application must have at least one Collection Object. Each Dynamic Application protocol uses a different method to specify how Skylar One should collect the data point associated with a Collection Object.
How Does a Collection Object Work?
Dynamic Applications that use the Snippet, SOAP, WMI, XSLT, or PowerShell protocols include one or more requests that define how Skylar One should request data from a device. For Snippet Dynamic Applications, the requests are referred to as snippets. Each request specifies an operation that will gather a response from the device.
Each collection object in a Snippet, SOAP, WMI, XSLT, or PowerShell Dynamic Application is associated with a request. The collection object specifies how to parse a data point from the response. A single request can be used to populate multiple collection objects.
For example, the default "Windows Interface" WMI Dynamic Application includes one request and will return one response. The request includes a WMI query that retrieves six properties. The Dynamic Application includes six collection objects, one collection object for each property included in the response.
Collection objects in Dynamic Applications that use the Database, SNMP, XML, or PowerShell protocols do not use separate requests. For Database, SNMP, XML, or PowerShell Dynamic Applications, the collection object itself defines the method of collection:
- A Database collection object specifies a database query that Skylar One must execute to populate the collection object.
- An SNMP collection object specifies the SNMP OID that Skylar One must retrieve to populate the collection object.
- An XML collection object specifies how to parse a value from an XML document to populate the collection object. The XML document to parse is specified in the SOAP/XML credential aligned with the Dynamic Application.
- A PowerShell collection object specifies the PowerShell command that Skylar One must execute to populate the collection object.
For information on how to define requests and define the collection object fields specific to each Dynamic Application protocol,
How Collection Objects are Used by Skylar One
The data collected for each Collection Object is displayed differently for each Dynamic Application archetype:
- For the Configuration archetype, each collection object represents a column in a table of collected data. The value(s) collected by Skylar One for the collection object are displayed in that column. For example, the default "Host Resource: Software" Dynamic Application includes two collection objects called "Install Date" and "Software Title".
- For the Performance archetype, collection objects are used in Presentation Objects. Each presentation object specifies a formula that must include one or more collection objects. The formula in a presentation object is used to generate a time series graph of data. For more information on presentation objects for Dynamic Applications with an archetype of Performance, see the Presentation Objects.
- For the Journal archetype, collection objects are attributes of a Journal Entry. The collection objects are used in Presentation Objects to define how the collection objects will be formatted in the log of journal entries. For information on collection objects in Dynamic Applications with an archetype of Journal,
A Dynamic Application can define multiple tables.
Collection Objects are also used to define alerts in Dynamic Applications. Each alert specifies a formula that must include one or more collection objects. Skylar One examines alert formulas to evaluate whether an alert should be generated based on the collected data. For more information on alerts for Dynamic Applications, see Alerts and Thresholds.
Viewing the Collection Objects in a Dynamic Application
To view the collection objects in a Dynamic Application:
- Go to the Dynamic Applications Manager page (System > Manage > Dynamic Applications).
- Find the Dynamic Application you want to view the collection objects for. Select its wrench icon (). The Dynamic Applications Properties Editor page is displayed.
- Select the tab. The Dynamic Applications | Collections Objects page is displayed. The Collection Object Registry pane at the bottom of the page displays the following information about each collection object:
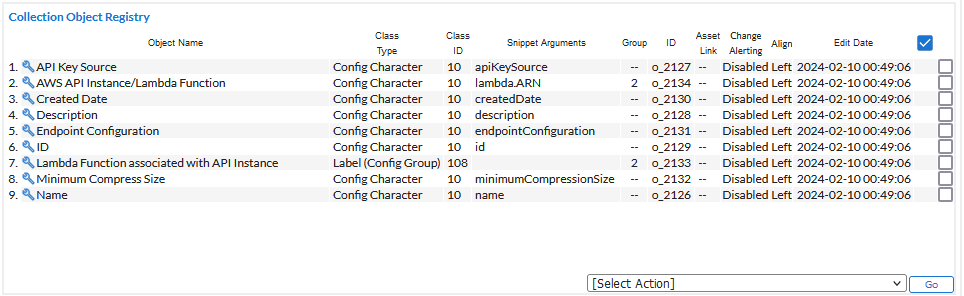
- Object Name. The name of the collection object.
- Class Type and Class ID. The data type of the collection object. See the Creating a Collection Object section for a description of the possible class types.
- Protocol Specific Collection Method. The label displayed for this column is different for each Dynamic Application protocol. The values displayed in this column specify how Skylar One will request the collection object or parse the collection object from a separately defined request.
- Group. The group number for the collection object.
- ID. The unique ID assigned to the collection object by Skylar One. You can use this ID to reference the collection object in presentation formulas and alert formulas. The unique ID will always start with "o_" (lowercase "oh", underscore).
- Edit Date. The last time a user edited the collection object.
- Asset Link. The asset record field that is automatically populated with values collected for the collection object.
For collection objects in configuration Dynamic Applications, the following additional information is displayed:
- Change Alerting. Specifies whether change alerting is enabled for the collection object. Possible values are:
- Enabled. Specifies that if a collected value for the collection object changes, Skylar One will trigger an event.
- Disabled. Specifies that if a collected value for the collection object changes, Skylar One will not trigger an event.
- Align. Specifies how the collected values for the collection object will be justified in the table of configuration data. Possible values are:
- Left
- Center
- Right
To edit a collection object, select its wrench icon ().
For SNMP Dynamic Applications, an information icon () is displayed for each collection object. Select this icon to view information about the SNMP OID defined for a collection object. The information displayed is defined in the SNMP MIB for that SNMP OID.
Creating a Collection Object
This section does not apply to Dynamic Applications with an archetype of Journal. For information on collection objects in Dynamic Applications with an archetype of Journal,
To add a Collection Object to a Dynamic Application, perform the following steps:
- Go to the Dynamic Applications Manager page (System > Manage > Dynamic Applications).
- Find the Dynamic Application you want to add a collection object to. Select its wrench icon (). The Dynamic Applications Properties Editor page is displayed.
- Select the tab. The Dynamic Applications | Collections Objects page is displayed. The fields that appear on this page are different for each Dynamic Application type.
- Enter values in the fields on this page.
- Basic Settings. This section describes the fields that specify the name, description, and data type of the collection object. You must supply values in these fields for all collection objects.
- Collection Settings. This section describes the fields that specify how Skylar One should collect values for the collection object. These fields are different for each Dynamic Application protocol. You must supply values in these fields for all collection objects.
- Grouping & Indexing Settings. This section describes the fields that specify how Skylar One should group collection objects. These fields are optional; however, collection objects in most Dynamic Applications have values specified in these fields. The Usage Type field also defines how the data collected by a Dynamic Application is used to build device relationships.
- Configuration Dynamic Application Settings. This section describes the fields that specify how Skylar One should use and display the collected data for collection objects in configuration Dynamic Applications. These fields appear only for configuration Dynamic Applications. These fields are optional.
- Standard Deviation Settings. This section describes the fields that specify how Skylar One should calculate standard deviation data for a collection object. These fields appear only for performance Dynamic Applications. These fields are optional. Supply values in these fields only if you are using this collection object in the standard deviation function in an alert formula.
- Dynamic Component Mapping Settings. This section describes the fields that specify how Skylar One should create component devices using the collection object. These fields appear only for Dynamic Applications that have the Component Mapping checkbox checked in the Dynamic Applications Properties Editor page. These fields are optional. Supply values in these fields only if you are using this collection object to create a component device.
- Select the button to save the collection object.
Basic Settings
To define the basic settings for a collection object, supply a value in the following fields:
- Object Name. The name of the collection object. This name is used to label the collection object in the following places in Skylar One:
- In the Collection Object Registry pane at the bottom of this page.
- In the list of collection objects in the Dynamic Applications Presentation Objects page.
- In the list of collection objects in the Dynamic Applications Alert Objects page.
- For configuration Dynamic Applications, in the Dynamic Application Collections page (the tab in the Device Administration panel). This page displays the collection status of each collection object.
- For configuration Dynamic Applications, in the Configuration Report page (the tab in the Device Reports panel). The Object Name appears as the column heading for the collection object.
- Class Type. The type of data that will be collected for this collection object. The data type defines how Skylar One will process and display the collected values. For configuration Dynamic Applications, the choices are:
- [10] Config Character. Collection object will be populated with strings that Skylar One should display with no text formatting applied.
- [11] Config Enum. Collection object will be populated with numeric values that map to a numeric label. You must define the label value for each of the possible numeric values in the Enum Values field.
- [12] Config Timeticks. Collection object will be populated with numeric values that represent timeticks.
- [14] Config Gauge. Collection object will be populated with numeric values that can increase and decrease with each polling session.
- [15] Config Numeric. Collection object will be populated with numeric values.
- [16] Config Time Stamp. Collection object will be populated with timestamps.
- [17] Config MAC Address. Collection object will be populated with MAC addresses.
- [18] Config IP Address. The values collected by this collection object are IP addresses. If the collected value is a hexadecimal string, Skylar One will convert the string to the standard dotted decimal format and store that dotted decimal value for the collection object.
- [19] Config Date & Time. Collection object will be populated with date and time values in the format "Year-Month-Day,Hour:Minute:Second" or in Hex notation. Skylar One will convert the collected value to a human-readable date & time string before storing the value.
- [100] Discovery. For information about this class type, see the Creating a Discovery Object section.
- [101] Label (Hourly Polled). Collection object will be populated with strings that will be collected only once an hour and for which only the newest collected value will be stored.
- [104] Label (Always Polled). Collection object will be populated with strings for which only the newest collected value will be stored.
- [105] Index. Collection object will be populated with the indexes associated with the list of values, not the values themselves.
- [108] Label (Config Group). Collection objects of this type are not collected. The Object Name defined for this collection object will be used to label the table of data for the group selected in the Group field for this collection object.
For performance Dynamic Applications, the choices are:
- [1] Performance Counter. Collection object will be populated with counter values. When Skylar One evaluates a presentation formula or alert formula that contains a collection object of this type, the value for the collection object is calculated by subtracting the previous collected value for the collection object from the current collected value.
- [2] Performance Percent. Collection object will be populated with percentage values (i.e. values from 0 - 100).
- [3] Performance Kilobyte. Collection object will be populated with values that represent size in kilobytes.
- [4] Performance Gauge. Collection object will be populated with numeric values that can increase or decrease with each polling session. The values collected are the actual values that should be used when Skylar One evaluates presentation formulas and alert formulas.
- [100] Discovery. For information about this class type, see the Creating a Discovery Object section.
- [101] Label (Hourly Polled). Collection object will be populated with strings that will be collected only once an hour. Collection objects of this type are used to label the lines on a performance graph.
- [104] Label (Always Polled). Collection object will be populated with strings. Collection objects of this type are used to label the lines on a performance graph.
- [105] Index. Collection object will be populated with the indexes associated with the list of values, not the values themselves.
- [110] Label IP (Hourly Polled). The object value for the label (IP address) will be retrieved only hourly, not at the Poll Frequency defined for the Dynamic Application. In the String Type field, specify the format of the collected string, to allow Skylar One to convert the string to dotted decimal notation.
- [111] Label IP (Always Polled). The object value for the label (IP address) will be at the Poll Frequency defined for the Dynamic Application. In the String Type field, specify the format of the collected string, to allow Skylar One to convert the string to dotted decimal notation.
- String Type. Specifies whether a collected string is in hex notation or standard text. This field helps Skylar One convert collected strings to the appropriate format. Choices are:
- Standard. Collected string is a standard text string.
- Hex. Collected string is in hex notation.
- Description. A description of the collection object. This field is optional.
- Formula. If you require Skylar One to examine and manipulate the object's value before storing the value in Skylar One, you can enter a formula in this field. Instead of storing the collected values for this collection object, Skylar One stores the result of this formula. The formula field can include any arithmetic Python statement and any Python time statement that returns a single value. That returned, single value will be stored instead of the collected value. You can use the following variables in the formula field:
- %V. Collected value for the object.
- %P. Collected value for the object from the last successful poll.
- %L. Date and time of the last successful poll of the object, in DateTime format, including seconds.
- %C. Date and time of the current poll of the object, in DateTime format, including seconds.
- %E. Number of seconds, in integer format, that have elapsed since last poll of object.
- Disable Object Maintenance. When you select this checkbox, Skylar One will never automatically disable collection of this object on an aligned device. For details on how Skylar One manages collection status, see Managing Dynamic Applications.
Collection Settings
The fields that define how Skylar One should collect data for a collection object are different for each Dynamic Application protocol.
In general, one field specifies how Skylar One should request the collection object or parse the collection object from a separately defined request. For example, for the SNMP protocol, this field is called SNMP OID and specifies the SNMP OID that Skylar One must request to obtain a value for this collection object. This field has one of the following labels:
- SNMP OID
- SQL Query
- SOAP Tags
- Snippet Arguments
- WMI Request Arguments
- PowerShell Arguments
- XML Tags
- XSLT Tags
For SOAP, Snippet, WMI, and XSLT Dynamic Applications, a second field specifies the request or snippet that will return a value for the collection object. This field has one of the following labels:
- SOAP Request
- Snippet
- WMI Request
- PowerShell Request
- XSLT Request
For more information about these fields, see the supplementary
Grouping & Indexing Settings
The collection objects in a Dynamic Application can be divided into groups. When collection objects are in the same group:
- For configuration Dynamic Applications, the collection objects will appear in the same table of configuration data.
- The collected values for the collection objects will share the same indexes. When a list of values is collected for a collection object, indexes are used to maintain an association between values collected at different times for the same collection object and maintain associations between collection objects in the same Dynamic Application. For more information, see the Indexing section. Typically, you should group collection objects together if:
- The collection objects will be used in the same presentation object formula.
- The collection objects will be used in the same alert formula.
The following fields define the grouping and indexing settings:
- Group Number. The group for this collection object. The options are No Group or a group number from 1 to 50.
- Usage Type. If Group Index is selected in this field, Skylar One will use the collected values for this collection object to assign indexes for this Group Number. To use the default indexing method for the collection objects in this group, select Standard in this field. See the Indexing section for information on how to use this field. The Usage Type field also defines how the data collected by a Dynamic Application is used to build device relationships. For more information about how to use the Usage Type field to define relationships, see the Dynamic Application Relationships section.
Configuration Dynamic Application Settings
For collection objects in configuration Dynamic Applications, the following additional fields are displayed:
- Custom Attribute. This field appears only for collection objects in configuration Dynamic Applications. For details, see the section on Custom Attribute Settings.
- Asset/Form Link. Skylar One can automatically populate the asset record for a device using data collected by configuration Dynamic Applications. In these two drop-down lists, you can select a standard asset field that appears in the Asset Properties page or the other pages in the Asset Administration panel. The selected asset field will be automatically populated with the value collected for this collection object. To populate a standard asset field, select the name of the field from the first drop-down list. Choices are:
- Make
- Model
- Serial Number
- Operating System
- Host ID / SID
- OS System Name
- CPU Count
- CPU Type/Make
- CPU Speed
- Firmware / BIOS Name
- Installed Memory
- Asset Tag
- Disk Array Size
- Disk Count
- Disk Size
To change the priority value of an asset field, select the priority value in the second drop-down list. Increasing the value from 50 will cause the asset to have a higher precedence.
- Form Link. To populate a custom asset field, select the name of a field in the second drop-down list. The choices are all fields included in the Application Form for "Embedded Asset Form Fields". To view or configure this form, go to System > Customize > Form Fields.
- Inventory Link. Skylar One can automatically populate inventory lists of hardware components and installed software using data collected by configuration Dynamic Applications. In the first drop-down list, you can select the type of inventory record to populate. In the second drop-down list, select the field in that record to populate. If you select Disabled in the first drop-down list, the second drop-down list is not displayed. Choices are:
- CPU. The collection object will populate a hardware inventory record for a CPU. If you select this option, the following field choices appear in the second drop-down list:
- CPU Index ID
- CPU Description
- Disk. The collection object will populate a hardware inventory record for a physical disk. If you select this option, the following field choices appear in the second drop-down list:
- Disk Index ID
- Disk Name
- Disk Capacity Kb
- Disk Read/Write Mode
- Media Description
- Memory. The collection object will populate a hardware inventory record for installed memory. If you select this option, the following field choices appear in the second drop-down list:
- Memory Index ID
- Memory Name
- Total Physical Memory Kb
- Physical Memory in Use Kb
- Physical Memory Percent in Use
- Virtual Memory. The collection object will populate a hardware inventory record for virtual memory. If you select this option, the following field choices appear in the second drop-down list:
- Swap Index ID
- Swap Description
- Total Swap Memory Kb
- Swap Memory in Use Kb
- Swap Memory Percent in Use
- Hardware Components. The collection object will populate a hardware inventory record for any other type of hardware component. If you select this option, the following field choices appear in the second drop-down list:
- Component Index ID
- Component Description
- Component Type
- Software Titles. The collection object will populate a software inventory record. If you select this option, the following field choices appear in the second drop-down list:
- Install Date
- Software Title
- Change Alerting. This field enables or disables change detection. If the collected value of the collection object changes or is removed, Skylar One can automatically trigger an event. A change alert is created when a collected value is different from the previously collected value. When a new value is added for the first time, a change alert is not created. You can view the change history for the collection object in the Configuration Report page for each subscriber device. The choices for this field are:
- Enabled. Specifies that if the value of this collection object changes, Skylar One will trigger an event.
- Disabled. Specifies that if the value of this collection object changes, Skylar One will not trigger an event.
- Table Alignment. These two drop-down lists define how the values collected for this collection object will be displayed in the table of configuration data in the Configuration Report page. The first drop-down list defines how the value will be justified in the table cell. The choices in the first drop-down list are:
- Left
- Center
- Right
- Hide Object. If you select this checkbox, the object will not appear in the Configuration Report page for each subscriber device.
- Enum Values. Applies only to collection objects with a class type [11] Config Enum. In this field you can map each possible collected value to a descriptive string that will be displayed in Skylar One. Use the following format:
number:value1#number:value2#number:value3#
Where number is the collected value and value is the descriptive string. You must include a "#" as the last character in this field and as a separator between number:value pairs.
For example, suppose a [11] Config Enum object returns an integer that represents a status condition. The possible returned values and the conditions they represent might be:
- 3 = healthy4 = minor5 = major6 = critical
You would supply the following string in the Enum Values field:
3:healthy#4:minor#5:major#6:critical#
Custom Attribute Settings
In Dynamic Applications of archetype configuration, you can:
- Use a collection object to populate the value of an existing custom attribute.
- Use a pair of collection objects to create a custom attribute and provide a value for that custom attribute. You must define a collection object to define the name of the custom attribute; this causes the Skylar One system to create a custom attribute with the name from the collection object. You must also define a second collection object to populate the value of the custom attribute.
For details on creating and managing custom attributes,
For component devices, only assigned Collector Affinity is supported when using a Dynamic Application to populate custom attributes. If a custom attribute value is manually edited or removed for a device that is using a different collector than its root device, the Dynamic Application will not be able to update the value on subsequent polls unless the Dynamic Application is using assigned Collector Affinity. For more information, see the section on Collector Affinity.
The following fields in the Collection Objects page allow you to use one or more collection objects to define and/or populate a custom attribute:
- Align to Custom Attribute. Specify the custom attribute to associate with this collection object. The custom attribute will be populated with a value from a collection object. Choices are:
- None. This collection object is not associated with a custom attribute.
- Static. This collection object is associated with a specific custom attribute.
- Static Name. If you selected Static in the Custom Attribute field, the Static Name field appears. In this field, specify the name of the custom attribute that you want to populate with the value of the collection object. You can select from a list of existing custom attributes.
- If the list does not include the custom attribute you want to align with the collection, select the plus-sign icon (
 ). The icon clears the field and allows you to manually enter a value.
- If you manually specify a custom attribute, Skylar One will search for a custom attribute with a matching name and populate the custom attribute with the value of this collection object. If Skylar One does not find a custom attribute with a matching name and therefore creates the custom attribute, the new custom attribute will be an extended custom attribute, for devices. The data type will be integer (for numeric values) or string (for all other value types).
- Dynamic Name. You can use a pair of collection objects to populate the name and value of a custom attribute. You must define each collection object separately. When you select Dynamic Name in the Custom Attribute field, the name of the custom attribute is populated with the value of the collection object. If Skylar One does not find a custom attribute with a matching name, Skylar One will create the custom attribute. If Skylar One does not find a custom attribute with a matching name and therefore creates the custom attribute, the new custom attribute will be an extended custom attribute, for devices. The data type will be integer (for numeric values) or string (for all other value types).
If you select Dynamic Name in the Custom Attribute field, you must create a second collection object that will populate the value of the custom attribute.
Names for custom attributes must conform to XML naming standards. The attribute name can contain any combination of alphanumeric characters, a period, a dash, a combining character or an extending character. If a collected value for an attribute name does not conform to XML standards, Skylar One will replace non-valid characters with an underscore + the hexadecimal value of the illegal character + an underscore. So "serial number" would be replaced with "serial_X20_number". The attribute label will use the original, non-converted value ("serial number").
- Dynamic Value. The value of the custom attribute selected in the Dynamic Name field is populated with the value of the collection object.
- Dynamic Name. If you selected Dynamic Value in the Custom Attribute field, the Dynamic Name field appears. Select from the list of collection objects that have a Custom Attribute value of Dynamic Name.
The collection object assigned to the Dynamic Value is added to the same Group as the collection object assigned to the associated Dynamic Name. If the collection object for Dynamic Name is not assigned to a Group, you will be prompted to select a Group for the both the collection object for Dynamic Name and the collection object for Dynamic Value.
Each group can contain only one collection object that is assigned to a Dynamic Value and only one collection object that is assigned to a Dynamic Name. The group can contain other collection objects, but should not contain more than one collection object assigned to a Dynamic Value and not more than one collection object assigned to a Dynamic Name.
Standard Deviation Settings
To use a collection object with the standard deviation function (deviation) in an alert formula, you must enable standard deviation alerting for the collection object. To enable standard deviation alerting for a collection object, supply a value in the following fields:
These fields appear only for collection objects in performance Dynamic Applications that collect numeric values.
- Enable Deviation Alerting. If selected, Skylar One will calculate and store standard deviation data for the collection object. To use a collection object with the standard deviation function in an alert formula, this checkbox must be checked.
- Max Weeks Data. If you selected Enable Deviation Alerting, you must specify a value in this field. This field specifies the maximum number of weeks of data that Skylar One should use when evaluating a standard deviation function that uses this collection object. The default value is "4". This means that when Skylar One evaluates an alert formula that contains a standard deviation function that uses this collection object, Skylar One will use the last four weeks of data for the collection object to calculate the standard deviation. Any data older than the last 4 weeks is not included in calculations for standard deviation.
- Min Weeks Data. If you selected Enable Deviation Alerting, you must specify a value in this field. This field specifies the minimum number of weeks of data required for Skylar One to evaluate a standard deviation function that uses this collection object. The default value is "2". This means that Skylar One requires at least the data from the last two weeks from today to calculate standard deviation for this collection object.
If you enable deviation alerting for an existing collection object and if Skylar One has already collected data for that collection object, Skylar One will use the already-collected data to "backfill" and calculate mean and standard deviation using the historical data. For example, suppose a Dynamic Application has already been collecting data for 12 weeks. Suppose during the twelfth week of collection, you enable deviation alerting for a collection object for the first time. Suppose you set Max Weeks Data to "6" and Min Weeks Data to "4". The first time Skylar One performs calculations for standard deviation for this collection object (once every hour), Skylar One would then "backfill" and include the last six weeks of historical data when calculating standard deviation for the collection object. If Skylar One has already collected at least the Min Weeks Data, Skylar One will use the historical data to calculate standard deviation.
The backfill functionality works only during the very first time Skylar One performs calculations for standard deviation for a collection object. If you change the settings for Min Weeks Data and Max Weeks Data so that the new value of Min Weeks Data exceeds the previous value for Max Weeks Data, Skylar One will require you to collect additional data to meet the new requirement. For example, suppose you initially set Min Weeks Data to "2" (two weeks) and Max Weeks Data to "4" (four weeks). Suppose that 9 weeks later, you edit Min Weeks Data to "5" (five weeks) and Max Weeks Data to "7". Because of the previous Max Weeks Data of "4", Skylar One will have retained only four weeks of calculated standard deviation data. After editing the values, you will have to wait one additional week before Skylar One will have enough data (five weeks, as specified by Min Weeks Data) to generate standard deviation alerts. Skylar One will not use historical data to backfill the additional week.
Dynamic Component Mapping Settings
For Dynamic Applications that have the Component Mapping checkbox selected in the Dynamic Applications Properties Editor page, the Component Identifiers field is displayed in the Collection Objects page:
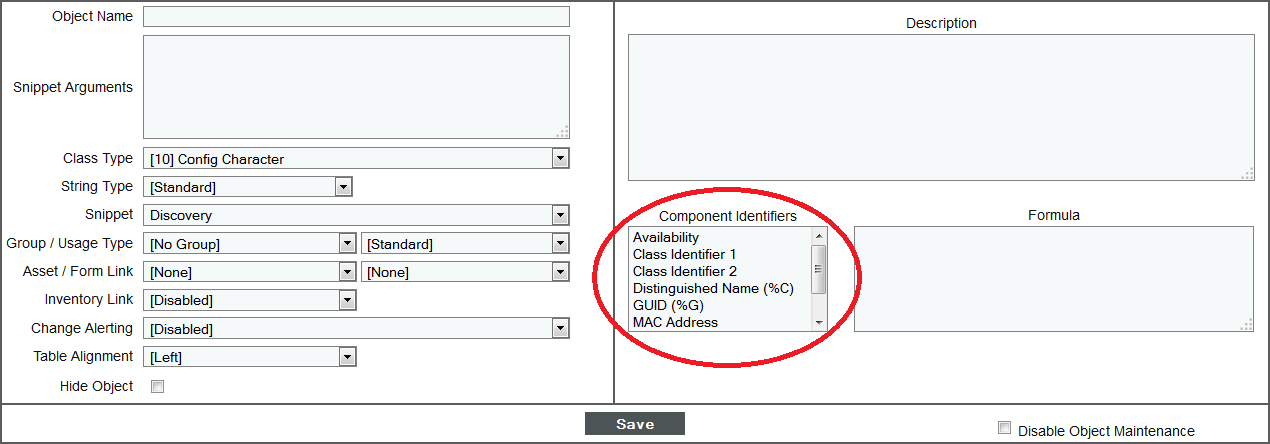
In this field, select one or more identifiers that Skylar One can use to create component devices. The values collected for this collection object will populate the selected identifier for the component devices. Collection objects can define the following component identifiers:
- Availability. The availability of the component devices. The values collected using this collection object will be used to generate availability reports and graphs for each component device.
- Class Identifier 1. The class type of the component devices, typically the vendor.
- Class Identifier 2. The class sub-type of the component devices, typically the model.
- Device Name (%N). The name of the component devices in Skylar One.
- Distinguished Name (%C). The name that the system that monitors the component devices (the root device) uses to identify the component devices.
- GUID (%G). The globally unique identifier Skylar One will use for the component devices. This value must be unique for all component devices in Skylar One. This value is used to determine when a component device should be associated with a different root device.
- MAC Address. The MAC Address of the component device.
- Organization. During discovery, if the value of the collection object exactly matches an organization name in Skylar One, Skylar One will align the component device with that organization. During subsequent collections, if the value of this collection object changes and exactly matches an organization name in Skylar One, Skylar One aligns the new organization with the component device. If the value of this collection object does not exactly match any organizations in Skylar One, Skylar One will create an event and align the event with the device aligned with the Dynamic Application.
- Unique Identifier (%U). The unique identifier Skylar One will use for the component devices. This value must be unique for all component devices associated with the same root device.
- UUID. The universally unique identifier for the component devices.
- GUID. Globally unique identifier. This value will be unique within Skylar One. No two component devices can have the same GUID. This component identifier protects the integrity of a component device even if it is aligned with a different root device (for example, with a vmotion event).
Each of these options can be defined by only one collection object in a Dynamic Application. If a component identifier is already defined by a collection object in this Dynamic Application, that component identifier will not be displayed in the list.
If the Dynamic Application is aligned with a component device class, Skylar One will create a component device when the collection objects that map to the Device Name and Unique Identifier of a component device are successfully collected from a device.
For more information about configuring a Dynamic Application to use Dynamic Component Mapping, see the Dynamic Component Mapping section.
Creating a Discovery Object
A discovery object is a type of collection object that allows Skylar One to automatically align a Dynamic Application to a device during discovery.
Skylar One attempts to automatically align Dynamic Applications to devices under the following circumstances:
- When a discovery session that has an Initial Scan Level of 1. Initial Population of Apps or higher is executed, either manually or on a schedule, Skylar One will attempt to automatically align Dynamic Applications using the credentials specified in the discovery session.
- For devices that have the Auto-Update and Dynamic Discovery checkboxes enabled on the Device Properties page, Skylar One will attempt to automatically align Dynamic Applications once a day using the credentials aligned with the device.
- When a user selects the lightning bolt icon () for a Dynamic Application in the Dynamic Applications Manager page, Skylar One will attempt to automatically align that single Dynamic Application with all devices using the credentials aligned with each device.
Every discovery object specifies a condition that can evaluate to true or false. When Skylar One attempts to automatically align a Dynamic Application to a device, every available credential is used to try and collect every discovery object in the Dynamic Application. If all the discovery objects in a Dynamic Application evaluate to true for a device, Skylar One will align the Dynamic Application with the device.
A discovery object can specify one of the following conditions:
- If the device returns a value for the discovery object, evaluate to true. Otherwise, evaluate to false.
- If the device returns a value for the discovery object and that value matches specific criteria, evaluate to true. Otherwise, evaluate to false.
- If the device does not return a value for the discovery object, evaluate to true. Otherwise, evaluate to false.
To add a discovery object to a Dynamic Application:
- Go to the Dynamic Applications Manager page (System > Manage > Dynamic Applications).
- Find the Dynamic Application you want to add a collection object to. Select its wrench icon (). The Dynamic Applications Properties Editor page is displayed.
- Select the tab. The Dynamic Applications | Collections Objects page is displayed. Enter values in the following fields:
- Object Name. The name of the discovery object. If you are defining only one discovery object for this Dynamic Application, best practice is to enter "Discovery" in this field.
- Protocol Specific Collection Method. The label displayed for these fields is different for each Dynamic Application protocol. Specify how Skylar One should collect the discovery object.
- Class Type. Select [100] Discovery in this from the drop-down list.
- Select the button to save the collection object. Because this collection object has been defined with a Class Type of [100] Discovery, additional fields that are specific to discovery objects are displayed:
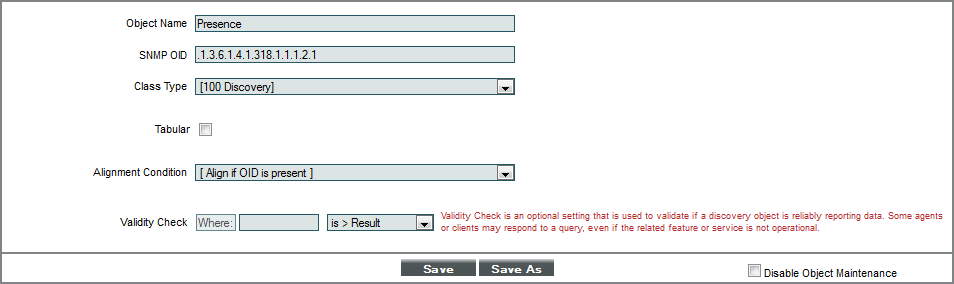
- Enter values in the following fields:
- Tabular. If the value specified in the Protocol Specific Collection Method fields will return tabular data (a list of values) and you want to match the returned values to specific criteria, select this checkbox. You must then specify a value in the Validity Check field. Skylar One will iterate through the returned tabular data and search for the value specified in the Validity Check field.
- Alignment Condition. Specifies how this discovery object should be evaluated. Choices are:
- Align if OID is present. Specifies that if the device returns a value for the discovery object, evaluate to true. Optionally, in the Validity Check field you can specify the criteria that the returned value must meet.
- Align if OID is NOT present. Specifies that if the device does not return a value for the discovery object, evaluate to true.
- Validity Check. If you selected Align if OID is present in the Alignment Condition field, this field is displayed. In this field, you can specify criteria that the returned value must meet for the discovery object to evaluate to true. To use this field, enter a value or regular expression in the text area, then select from the drop-down list of operators to specify how that value should be compared to the returned value. The choices for the comparison operator are:
- is > Result. Specifies that the discovery object evaluates to true if the specified value is greater than the returned value.
- is == Result. Specifies that the discovery object evaluates to true if the specified value is equal to the returned value.
- is < Result. Specifies that the discovery object evaluates to true if the specified value is less than the returned value.
- is != Result. Specifies that the discovery object evaluates to true if the specified value is not equal to the returned value.
- is LIKE Result. Specifies that the discovery object evaluates to true if the returned value contains the specified value.
- matches REGEX. Specifies that the discovery object evaluates to true if the returned value matches the specified regular expression.
- Click to save the discovery object.
Editing a Collection Object
To edit a Collection Object in a Dynamic Application, perform the following steps:
- Go to the Dynamic Applications Manager page (System > Manage > Dynamic Applications).
- Find the Dynamic Application you want to edit. Select its wrench icon (). The Dynamic Applications Properties Editor page is displayed.
- Select the tab. The Dynamic Applications | Collections Objects page is displayed.
- In the Collection Object Registry pane at the bottom of the page, locate the collection object you want to edit. Select the wrench icon () for the collection object you want to edit.
- The fields in the top pane will be populated with the saved values for the selected collection object. Edit the values in one or more fields. For a description of each field, see the Creating a Collection Object section.
- Select the button to save your changes to the collection object. Select the button to save the changes as a new collection object.
Performing Bulk Actions on Collection Objects
You can perform the following bulk actions on the collection objects in a Dynamic Application:
- Delete collection objects from Skylar One.
- Change the group value.
- Enable or disable Change Alerting for collection objects in configuration Dynamic Applications.
To perform a bulk action on the collection objects in a Dynamic Application, perform the following steps:
- Go to the Dynamic Applications Manager page (System > Manage > Dynamic Applications).
- Find the Dynamic Application you want to edit. Select its wrench icon (). The Dynamic Applications Properties Editor page is displayed.
- Select the tab. The Dynamic Applications | Collections Objects page is displayed.
- In the Collection Object Registry pane at the bottom of the page, locate the collection object(s) you want to perform the action on. Select the checkbox for each collection object you want to perform the action on.
- In the Select Action drop-down list, select the action you want to perform, and then select the button. The selected collection objects will have the selected action applied to them.
Caching
This section describes caching, which is when Skylar One requests information from a device during Dynamic Application collection, and Skylar One saves or caches the response from the device. If a response is cached, other Dynamic Applications that use the same protocol can use the cached response to populate collection objects.
What is Caching?
When Skylar One requests information from a device during Dynamic Application collection, Skylar One can cache the response from the device. If a response is cached, other Dynamic Applications that use the same protocol can use the cached response to populate collection objects. Caching responses reduces the number of requests performed by Skylar One and speeds up collection. Typically, Dynamic Applications aligned to component devices must use cached responses from Dynamic Applications aligned with the root device (the device that "manages" the component device).
Caching is configured in the Caching drop-down list in the general properties for a Dynamic Application. The following options are available:
- No caching. Specifies that this Dynamic Application does not use the caching feature. The requests that populate the collection objects in this Dynamic Application are defined within this Dynamic Application. The responses to those requests are not available to other Dynamic Applications.
- Cache Results. Skylar One will cache all responses retrieved by the Dynamic Application. See the Caching Responses section for more information.
- Consume Cached Results. Skylar One will use the cached responses from other Dynamic Applications to populate the collection objects defined in this Dynamic Application. See the Consuming Cached Responses section for more information.
All types of Dynamic Applications except Bulk Snippet, Database, and ICDA can both cache results and consume cached results.
Caching Responses
Dynamic Applications that use the following protocols can cache responses:
- SNMP
- Snippet
- SOAP
- WMI
- PowerShell
- XML
- XSLT
NOTE: Bulk Snippet Dynamic Applications cannot cache responses.
For XSLT Dynamic Applications, the untransformed response is cached, not the transformed response.
For Dynamic Applications that cache responses, the collection objects defined in this Dynamic Application are no longer collected at a regular frequency. You must not define collection objects that are used to generate configuration tables or performance graphs in a Dynamic Application that caches responses. Typically, Dynamic Applications that cache results will contain only a discovery object.
For information about caching responses in Snippet Dynamic Applications,
Consuming Cached Responses
Dynamic Applications that use the following protocols can consume cached responses:
- SNMP
- Snippet
- SOAP
- WMI
- PowerShell
- XML
- XSLT
NOTE: Bulk Snippet Dynamic Applications cannot consume cached responses.
Snippet Dynamic Applications can consume cached results from any Dynamic Application that caches responses. For more information about using cached responses in snippet code,
For Dynamic Applications that consume cached responses:
- All collection objects in the Dynamic Application must be populated using cached responses from other Dynamic Applications. If a Dynamic Application consumes cached responses, you cannot define additional requests in that Dynamic Application.
- If the Dynamic Application is aligned to a non-component device, all the other Dynamic Applications that cache requests used by the Dynamic Application must be aligned to the same device.
- If the Dynamic Application is aligned to a component device, all the other Dynamic Applications that cache requests used by the Dynamic Application must be aligned to the same device or the root device.
- If a cached response is unavailable when Skylar One performs collection for a Dynamic Application that consumes cached responses, Skylar One will automatically attempt to execute the appropriate request to re-populate the cache.
- For XSLT Dynamic Applications that use the Consume Cached Results option, XSLT Parser Code must still be defined in the Dynamic Application. The XSLT Parser Code will be used to transform the cached responses.
Configuring Collection Objects in Cache-Consuming Dynamic Applications
The following sections describe how to configure collection objects to use responses that are cached by other Dynamic Applications in SOAP, WMI, XML, and XSLT Dynamic Applications.
SOAP Dynamic Applications
When a SOAP Dynamic Application is configured to Consume Cached Results:
- The tab will not be displayed.
- In the Dynamic Applications | Collections Objects page, the SOAP Request field will display a list of all requests defined in SOAP Dynamic Applications that cache responses. Select the cached response that Skylar One should use to populate the collection object.
WMI Dynamic Applications
When a WMI Dynamic Application is configured to Consume Cached Results:
- The tab will not be displayed.
- In the Dynamic Applications | Collections Objects page, the WMI Request field will display a list of all requests defined in WMI Dynamic Applications that cache responses. Select the cached response that Skylar One should use to populate the collection object.
PowerShell Applications
When a PowerShell Dynamic Application is configured to Consume Cached Results:
- The tab will not be displayed.
- In the Dynamic Applications | Collections Objects page, the PowerShell Request field will display a list of all requests defined in PowerShell Dynamic Applications that cache responses. Select the cached response that Skylar One should use to populate the collection object.
XML Dynamic Applications
When an XML Dynamic Application is configured to Consume Cached Results, an additional field is displayed in the Dynamic Applications | Collections Objects page:
- XML Document. This field lists all XML Dynamic Applications that cache responses. Select the XML Dynamic Application that requests the XML Document that contains this collection object.
For the XML Dynamic Application that caches responses, the URL of the requested XML Document is defined in the credential that is aligned to that Dynamic Application.
XSLT Dynamic Applications
When an XSLT Dynamic Application is configured to Consume Cached Results, you must still define XSLT Requests for the Dynamic Application in the Dynamic Applications Request Editor and Registry page (the tab). To define an XSLT Request for an XSLT Dynamic Application that is configured to Consume Cached Results:
- Go to the Dynamic Applications Request Editor and Registry page (the tab) for the Dynamic Application.
- Supply values in the Request Name, Execution Sequence, and Active State fields.
- The XSLT Request Code field in the Dynamic Applications Request Editor and Registry page (the tab) is renamed Cached XSLT Request. The Cached XSLT Request field displays a list of all requests defined in XSLT Dynamic Applications that cache responses. Select the cached response that Skylar One should transform using the XSLT Parser Code defined in this request.
- Define the XSLT document that Skylar One should use to transform the cached response selected in the Cached XSLT Request field. The output of the transformation should be in the standard format from which Skylar One parses collection objects.
For an XSLT Dynamic Application that is configured to Consume Cached Results, the XSLT Request field in the Dynamic Applications | Collections Objects page will contain only the XSLT Requests defined in the same Dynamic Application.
Collector Affinity for Dynamic Applications That Use Caching
Collector Affinity specifies which Data Collectors are allowed to run collection jobs for Dynamic Applications aligned to component devices. You can define Collector Affinity for each Dynamic Application.
For Dynamic Applications that create cache or consume cache, you should select the following option for Collector Affinity:
- Root Device Collector. The Data Collector assigned to the root device will collect data for the Dynamic Application. This guarantees that Dynamic Applications for an entire DCM tree will be collected by a single Data Collector. This option ensure that caching Dynamic Applications can access the required cache.
Dynamic Component Mapping
This section describes Dynamic Application Mapping, which allows Skylar One to collect data from a single management system, such as a VMware ESX server, and then use that data to create multiple device records for the entities managed by that single management system.
What is Dynamic Component Mapping?
Dynamic Component Mapping allows Skylar One to collect data from a single management system, such as a VMware ESX server, and then use that data to create multiple device records for the entities managed by that single management system. For example, the managed entities for a VMware ESX server would be the Guest VMs hosted by that ESX server.
Skylar One uses Dynamic Applications to retrieve data from the management device and discover each entity managed by that management device. Skylar One then uses that retrieved data to create a device for each managed entity. In some cases, the managed entities are nested.
- In Skylar One, a managed entity is called a component device. A component device is an entity that runs under the control of a management device.
- In Skylar One, the root device is the physical device that manages one or more component devices.
- In Skylar One, a parent device is a device that has associated entities modeled as component devices. A parent device can be either a root device or another component device.
- In Skylar One, a component identifier is a collection object that Skylar One uses to populate information about a component device, such as the device name.
For example, in a Cisco UCS system, Skylar One might discover a physical server that hosts the UCS manager. Skylar One might discover a chassis as a component device. The chassis is a child device to the physical server; the physical server is the root device. Skylar One might also discover a blade as a component device that is part of the chassis. The blade is a child device to the chassis. The chassis is the parent device.
Where in Skylar One are Component Devices Displayed?
You can view root devices and their associated component devices in the following places in Skylar One:
- The Device Components page (Devices > Device Components) displays a list of all root devices and component devices discovered by Skylar One. The Device Components page displays all root devices and component devices in an indented view, so you can easily view the hierarchy and relationships between child devices, parent devices, and root devices.
- The Component Map page (Classic Maps > Device Maps > Components) allows you to view devices by root node and view the relationships between root nodes, parent components, and child components in a map. This makes it easy to visualize and manage root nodes and their components. Skylar One automatically updates the Component Map as new component devices are discovered. Skylar One also updates each map with the latest status and event information.
Configuring a Dynamic Application to Create Component Devices
Dynamic Applications that use the following protocols can be configured to create component devices:
- SNMP
- Snippet
- SOAP
- WMI
- PowerShell
- XML
- XSLT
For Skylar One to create component devices using your Dynamic Application, you must perform the following steps to configure Dynamic Component Mapping:
- In the Dynamic Applications Properties Editor page, select a configuration Application Type.
- In the Dynamic Applications Properties Editor page, check the Component Mapping checkbox.
- In the Dynamic Applications | Collections Objects page, configure a collection object that maps to the Device Name component identifier.
- In the Dynamic Applications | Collections Objects page, configure a collection object that maps to the Unique Identifier component identifier.
- Create a Device Class with a Device Type of Component to align with the Dynamic Application.
Performance Dynamic Applications cannot be used to create component devices.
If a Dynamic Application is configured to create component devices, Skylar One will create a component device when the collection objects that map to the Device Name and Unique Identifier of a component device are successfully collected from a device.
For information on configuring device classes for component devices, see the section on aligning device classes with component devices.
You can also perform the following additional configuration steps for Dynamic Applications that create component devices:
- In the Dynamic Applications | Collections Objects page, configure collection objects that map to the following component identifiers:
- The availability of the component devices. The values collected using this collection object will be used to generate availability reports and graphs for each component device.
- The manufacturer of the component devices.
- The model of the component devices.
- The names the management system uses to refer to the devices, known as the Distinguished Name.
- The globally unique identifier of the component devices. This value is used to determine when a component device should be associated with a different root device.
- The MAC Address of the component devices.
- The UUID of the component devices.
- In the Dynamic Application Component Alignment page, define a list of Dynamic Applications Skylar One should automatically align to component devices created using this Dynamic Application.
Configuring Collection Objects as Component Identifiers
To configure a collection object to map to a component identifier:
- Go to the Dynamic Applications Manager page (System > Manage > Applications).
- Find the Dynamic Application that you want to configure. Select its wrench icon (). The Dynamic Applications Properties Editor page is displayed.
- Select the tab. The Dynamic Applications | Collections Objects page is displayed.
- Select the wrench icon () for the collection object you want to edit.
- For Dynamic Applications that have the Component Mapping checkbox selected in the Dynamic Applications Properties Editor page, the Component Identifiers field is displayed. In this field, select one or more identifiers that Skylar One can use to create and monitor component devices. The values collected for this collection object will populate the selected identifier for the component devices. Collection objects can define the following component identifiers:
- Availability. The availability of the component devices. Skylar One uses Availability collection objects to generate availability reports and graphs for each component device. For information about how Skylar One calculates availability using this component identifier, see the Availability for Component Devices section.
- Class Identifier 1. The class type of the component devices, typically the vendor. This field can be used to align a discovered component device with an existing device class.
- Class Identifier 2. The class sub-type of the component devices, typically the model. This field can be used to align a discovered component device with an existing device class.
- Device Name (%N). The name of the component devices in Skylar One.
- Distinguished Name (%C). The name that the system that monitors the component devices (the root device) uses to identify the component devices. Using this component identifier is optional; this name is not used as a unique identifier by Skylar One. This component identifier is useful if an additional substitution character is required in your Dynamic Application.
- GUID (%G). The globally unique identifier Skylar One will use for the component devices. This value must be unique for all component devices in Skylar One. This value is used to determine when a component device should be associated with a different root device. For information about how Skylar One moves component devices using this component identifier, see the Moving Component Devices Between Root Devices section.
- IP Address. The IP address of the component device.
- MAC Address. The MAC Address of the component device. This value is used to match component devices to devices that are discovered using the discovery tool. If a component device is matched to a physical device, Skylar One discovers a component device directly using the discovery tool. For more information, see the Merging Component Devices with Physical Devices section.
- Organization. During discovery, if the value of the collection object exactly matches an organization name in Skylar One, Skylar One will align the component device with that organization. During subsequent collections, if the value of this collection object changes and exactly matches an organization name in Skylar One, Skylar One aligns the new organization with the component device. If the value of this collection object does not exactly match any organizations in Skylar One, Skylar One will create an event and align the event with the device aligned with the Dynamic Application.
- Unique Identifier (%U). The unique identifier for the component devices. This value must be unique for all component devices associated with the same root device.
- UUID. The universally unique identifier for the component devices.
- GUID. Globally unique identifier. This value will be unique within Skylar One. No two component devices can have the same GUID. This component identifier protects the integrity of a component device even if it is aligned with a different root device (for example, with a vmotion event).
Each of these options can be defined by only one collection object in a Dynamic Application. If a component identifier is already defined by a collection object in this Dynamic Application, that component identifier will not be displayed in the list. For example, if you have already assigned a collection object to be the device name, the Device Name (%N) entry will not appear in the Component Identifiers list for other collection objects in the Dynamic Application.
- Select the button to save your changes.
Duplicate MAC Addresses for Component Devices
Skylar One handles duplicate MACs for component devices differently than duplicate MACs for physical devices. When a component device is assigned a MAC address, Skylar One does not enforce uniqueness and will allow a component device to be created with the same MAC address as existing physical devices and/or existing component devices.
Unlike how Skylar One discovers physical devices, Skylar One uses Dynamic Applications to retrieve data from a management device and "discover" each entity managed by that management device as a component device. Skylar One then uses that retrieved data to create a device for each managed entity. In some cases, the managed entities are nested. In Skylar One, physical devices are identified by IP address and MAC address. In Skylar One, component devices are identified by a device name, a unique identifier, and a device class. A Dynamic Application that creates component devices can assign a MAC address to each component device, but is not required to.
- In Skylar One, a managed entity is called a component device. A component device is an entity that runs under the control of a physical management device.
- In Skylar One, the root device is the physical device that manages one or more component devices.
- In Skylar One, a parent device is a device that has associated entities modeled as component devices. A parent device can be either a root device or another component device.
For example, in a Cisco UCS system, Skylar One might discover a physical server that hosts the UCS manager. This physical server is the root device. Skylar One might discover a chassis on the root device. The chassis is a component device. The chassis is a child device to the physical server. Skylar One might also discover a blade as a component device that is part of the chassis. The blade is a child device to the chassis. The chassis is the parent device.
Skylar One does not automatically combine new component devices with any existing device record using the MAC address of the new component device. A component device can be combined with an existing device record under the following conditions:
- Dynamic Applications that create component devices can assign a globally unique identifier (GUID) to each component device. When Skylar One performs collection for a Dynamic Application, and the Dynamic Application includes a collection object with a GUID component identifier, Skylar One compares the collected values for that collection object with all GUID values for all component devices discovered in the system. If a newly collected value matches a GUID value for an existing component device, the device from which Skylar One collected the new value will become the parent of the existing component device. The existing component device will no longer be associated with its previous parent device. No new component device will be created.
- You can merge a physical device and a component device. You can do this in the menu in the Device Properties page (Devices > Classic Devices > wrench icon) for either the physical device or the component device. When you merge a physical device and a component device, the device record for the component device is no longer displayed in the user interface; the device record for the physical device is displayed in user interface pages that previously displayed the component device. For example, the physical device is displayed in lieu of the component device in the Device Components page and the Component Map page. All existing and future data for both devices will be associated with the physical device. You can unmerge a component device from a physical device in the menu in the Device Properties page for the physical device (Devices > Classic Devices > wrench icon).
Component Devices, Collector Groups, and Load Balancing
To perform initial discovery, Skylar One uses a single, selected Data Collector from the collector group. This allows you to troubleshoot discovery if there are any problems.
After each discovered device is modeled (that is, after Skylar One assigns a device ID and creates the device in the database), Skylar One distributes devices among the Data Collectors in the collector group. The newest device is assigned to the Data Collector currently managing the lightest load.
This process is known as Collector load balancing, and it ensures that the work performed by the Dynamic Applications aligned to the devices is evenly distributed across the Data Collectors in the collector group.
Skylar One performs Collector load balancing in the following circumstances:
- A new Data Collector is added to a collector group
- New devices are discovered
- Failover or failback occurs within a collector group (if failover is enabled)
- A user clicks the lightning bolt icon () for a collector group to manually force redistribution
- Devices in DCM or DCM-R trees will be loaded on the Data Collector currently assigned to the DCM or DCM-R tree rather than being distributed across the collector group. DCM or DCM-R trees will be rebalanced as an aggregate when rebalancing occurs to an available Data Collector with sufficient capacity to sustain the load.
Whenever a device is load-balanced from one Data Collector to another, whether due to failover or regular load balancing, the device state information is not transferred to the new Data Collector.
The lightning bolt icon () appears only for collector groups that contain more than one Data Collector. For collector groups with only one Data Collector, this icon is grayed out. This icon does not appear for All-In-One Appliances.
When all of the devices in a collector group are redistributed, Skylar One will assign the devices to Data Collectors so that all Data Collectors in the collector group will spend approximately the same amount of time collecting data from devices.
Collector load balancing uses two metrics:
- Device Rating. A device's rating is the total elapsed time consumed by either 1) all of the Dynamic Applications aligned to the device, or 2) collecting metrics from the device's interfaces, whichever is greater. A Collector's load is the sum of the ratings of the devices assigned to the Collector. The balancer tries to evenly divide the work performed by Collectors by assigning devices to Collectors using the device ratings and Collector loads.
- Collector Load. The sum of the device ratings for all of the devices assigned to a collector.
Skylar One performs the following steps during Collector load balancing:
- Searches for all devices that are not yet assigned to a collector group.
- Determines the load on each Data Collector by calculating the device rating for each device on a Data Collector and then summing the device ratings.
- Determines the number of new devices (less than one day old) and old devices on each Data Collector.
- On each Data Collector, calculates the average device rating for old devices (sum of the device ratings for all old devices divided by the number of old devices). If there are no old devices, sets the average device rating to "1" (one).
- On each Data Collector, assigns the average device rating to all new devices (devices less than one day old).
- Assigns each unassigned device (either devices that are not yet assigned or devices on a failed Data Collector) to the Data Collector with the lightest load. Add each newly assigned device rating to the total load for the Data Collector.
Collector Affinity
Collector Affinity specifies the Data Collectors that are allowed to run collection for Dynamic Applications aligned to component devices. You can define Collector Affinity for each Dynamic Application. Choices are:
Default. If the Dynamic Application is auto-aligned to a component device during discovery, then the Data Collector assigned to the root device will collect data for this Dynamic Application as well. For devices that are not component devices, the Data Collector assigned to the device running the Dynamic Application will collect data for the Dynamic Application.
Default might appear as the Collector Affinity setting for older Dynamic Applications. However, it is no longer an option when creating or editing a Dynamic Application.
Root Device Collector. The Data Collector assigned to the root device will collect data for the Dynamic Application. This guarantees that Dynamic Applications for an entire DCM tree will be collected by a single Data Collector. You might select this option if:
- The Dynamic Application has a cache dependency with one or more other Dynamic Applications.
- You are unable to collect data for devices and Dynamic Applications within the same Device Component Map on multiple Data Collectors in a collector group.
- The Dynamic Application will consume cache produced by a Dynamic Application aligned to a non-root device (for instance, a cluster device).
- The Dynamic Application includes snippet code with a root_device tuple.
- Assigned Collector. The Dynamic Application will use the Data Collector assigned to the device running the Dynamic Application. This allows Dynamic Applications that are auto-aligned to component devices during discovery to run on multiple Data Collectors. This is the default setting. You might select this option if:
- The Dynamic Application has no cache dependencies with any other Dynamic Applications.
- You want the Dynamic Application to be able to make parallel data requests across multiple Data Collectors in a collector group.
- The Dynamic Application can be aligned using mechanisms other than auto-alignment during discovery (for instance, manual alignment or alignment via Device Class Templates or Run Book Actions).
Failover for Collector Groups for Component Devices
If you specified Default or Root Device Collector for Dynamic Applications, and the single Data Collector in the collector group for component devices fails, users must create a new collector group with a single Data Collector and manually move the devices from the failed collector group to the new collector group. For details on manually moving devices to a new collector group, see the section on Changing the Collector Group for One or More Devices.
Merging Component Devices
Skylar One does not automatically combine new component devices with any existing device record. A component device can be combined with an existing device record under the following conditions:
- Dynamic Applications that create component devices can assign a globally unique identifier (GUID) to each component device. When Skylar One performs collection for a Dynamic Application, and the Dynamic Application includes a collection object with a GUID component identifier, Skylar One compares the collected values for that collection object with all GUID values for all component devices discovered in the system. If a newly collected value matches a GUID value for an existing component device, the device from which Skylar One collected the new value will become the parent of the existing component device. The existing component device will no longer be associated with its previous parent device. No new component device will be created.
- You can merge a physical device and a component device. You can do this two ways:
- From the menu in the Device Properties page (Devices > Classic Devices > wrench icon) for either the physical device or the component device.
- From the menu in the Device Manager page (Devices > Classic Devices, or Registry > Devices > Device Manager in the classic user interface), select Merge Devices to merge devices in bulk.
When you merge a physical device and a component device, the device record for the component device is no longer displayed in the user interface; the device record for the physical device is displayed in user interface pages that previously displayed the component device. For example, the physical device is displayed in lieu of the component device in the Device Components page and the Component Map page. All existing and future data for both devices will be associated with the physical device.
If you manually merge a component device with a physical device, Skylar One allows data for the merged component device and data from the physical device to be collected on different Data Collectors. Data that was aligned with the component device can be collected on the Data Collector for its root device. If necessary, data aligned with the physical device can be collected on a different Data Collector.
NOTE: You can merge a component device with only one physical device.
- You can unmerge a component device from a physical device. You can do this in two ways:
- From the menu in the Device Properties page (Devices > Classic Devices > wrench icon) for either the physical device or the component device.
- From the menu in the Device Manager page (Devices > Classic Devices, or Registry > Devices > Device Manager in the classic user interface), select Unmerge Devices to unmerge devices in bulk.
Availability for Component Devices
For non-component devices, Skylar One checks availability every 5 minutes by performing a ping request, SNMP request, or TCP connection to the admin primary IP address for the device. The result of the availability check is either available or unavailable. Skylar One uses availability data to generate events when a device is unavailable and to generate availability reports and graphs.
In the Dynamic Applications | Collections Objects page, you can configure a collection object to represent the availability of the component devices created by a Dynamic Application. Skylar One processes and stores the availability values returned by the availability collection object in the same way that Skylar One processes and stores the values collected by the availability check for physical devices.
When you configure a collection object to represent the availability of component devices:
- When Skylar One performs collection for this Dynamic Application, if Skylar One can collect a value for a component device using the collection object and the value is not 0 (zero) or "false", the component device is considered "available".
- When Skylar One performs collection for this Dynamic Application, if Skylar One cannot collect a value for a component device using the collection object or Skylar One collects a value that is 0 (zero) or "false", the component device is considered "unavailable".
- If the collection objects aligned with the Device Name and Unique Identifier component identifiers return lists of values, Skylar One will create multiple component devices. Each component device will be associated with an index, i.e. a location in the list of values. To monitor the availability of all the component devices in the list, the collection object aligned with the Availability component identifier should return a list of values with a value at each index associated with a component device. Skylar One will consider a component device "unavailable" when the list of values returned by the collection object aligned with the Availability component identifier does not include a value, or returns a value of 0 (zero) or false, at the index for that component device. For more information about Dynamic Application indexing, see the Indexing section.
- If you align a collection object with the Availability component identifier, Skylar One will create a system availability graph in the Device Performance page of each component device created using the Dynamic Application.
- If you align a collection object with the Availability component identifier and Skylar One determines that a component device is unavailable, Skylar One will generate an event and supply the value "Unavailable" in the Collection State column in the Device Components page.
The following rules apply to the availability state for component devices:
- Component devices can use a Component Identifier to monitor availability. However, in a tree of component devices, some component devices might have a component identifier for availability and others might not. For example, suppose a component device has a component identifier for availability, and Skylar One considers that component device "unavailable". All the descendents of that component device that do not have their own component identifier for availability will be considered unavailable. As soon as Skylar One finds a descendent with its own component identifier for availability, Skylar One stops checking that descendent and its descendents for availability. Component devices without their own component identifier for availability inherit their availability from their nearest ancestor that has a component identifier for availability.
- For trees that include merged devices, i.e. those that include both hardware devices and component devices, Skylar One skips over the hardware devices and allows them to use a network-based protocol to determine availability. For example, suppose you have a tree like this:
- Grandparent device is a component device with a component identifier for availability. Skylar One has determined that the grandparent device is unavailable.
- Child device is a hardware device that uses ICMP and ping to determine availability. When Skylar One evaluates the grandparent's component identifier, Skylar One skips over this device. ICMP and ping determine the availability of this device.
- Grandchild device is a component device that does not have its own component identifier for availability. When Skylar One evaluates the grandparent's component identifier, Skylar One assigns the grandparent's availability state to this grandchild device.
- If all the hosts in a cluster are powered off or unavailable, both the hardware-based hosts and the associated component devices will have an availability value of "Unavailable". When at least one host in the cluster becomes available, some or all of the associated component devices will also become available.
For instructions on how to align a collection object to a component identifier, see the Configuring Collection Objects as Component Identifiers section.
Moving Component Devices Between Root Devices
Depending on the type of management system that you want to monitor using Dynamic Component Mapping, it might be possible for a component device to move from one root device to another root device. For example, if a Dynamic Application with Dynamic Component Mapping configured is aligned with multiple VMware ESX servers that are root devices with guest VMs discovered as component devices, a vMotion event might move a guest VM from one VMware ESX server to another VMware ESX server.
If your Dynamic Applications will create component devices that can move from one root device to another root device, you can configure a collection object that maps to a globally unique identifier (GUID) for each component device. The value of the GUID component identifier must be unique for every component device in Skylar One.
When Skylar One performs collection for a Dynamic Application, and the Dynamic Application includes a collection object with a GUID component identifier, Skylar One compares the collected values for that collection object with all GUID values for all component devices discovered in the system. If a newly collected value matches a GUID value for an existing component device, the device from which Skylar One collected the new value will become the parent of the existing component device. The existing component device will no longer be associated with its previous parent device.
Automatically Aligning Dynamic Applications with Component Devices
In a Dynamic Application that has Dynamic Component Mapping enabled, you can define a list of Dynamic Applications that Skylar One will automatically align to the component devices that are discovered by the Dynamic Application. The Dynamic Applications in the list are automatically aligned to a component device when the component device is created. Every time collection is performed for the Dynamic Application that created a component device, any new Dynamic Applications that have been added to the list of Dynamic Applications are aligned to the component device.
This feature is useful when you want to nest component devices, that is, discover additional component devices that have a component device as the parent. To nest component devices, you must specify that Skylar One should immediately align Dynamic Applications that discover additional component devices upon creation of a component device.
To define a list of Dynamic Applications that you want Skylar One to automatically align to component devices:
- Go to the Dynamic Applications Manager page (System > Manage > Dynamic Applications).
- Find the Dynamic Application that has Dynamic Component Mapping enabled. Select its wrench icon (). The Dynamic Applications Properties Editor page is displayed.
- Select the tab. The Dynamic Application Component Alignment page is displayed.
- The Dynamic Application Component Alignment page displays two lists of Dynamic Applications:
- Unaligned Dynamic Apps. Displays a list of all Dynamic Applications in Skylar One that are not automatically aligned to the component devices discovered by this Dynamic Application.
- Aligned Dynamic Apps. Displays a list of Dynamic Applications that Skylar One will automatically align to the component devices discovered by this Dynamic Application.
- Select the button to save your changes.
The tab and the Dynamic Application Component Alignment page do not appear for Dynamic Applications that do not have component mapping enabled in the Dynamic Applications Properties Editor page.
To move a Dynamic Application from the Unaligned Dynamic Apps list to the Aligned Dynamic Apps list, select the Dynamic Application and then select the right-arrow button.
To move a Dynamic Application from the Aligned Dynamic Apps list to the Unaligned Dynamic Apps list, select the Dynamic Application and then select the left-arrow button.
Automatically Assigning a Device Class to Each Component Device
Skylar One can automatically align a device class with each discovered component device. If you do not want to automatically assign all component devices to the same device class, you can use Component Identifiers (variables) to align component devices with device classes. The value of two collection objects will determine the device class for each component device.
To customize the alignment between device classes and component devices, perform the steps in the following two section.
Configuring a Device Class to Match Collected Values
- Go to the Device Class Editor page (System > Customize > Device Classes).
- When you create or edit a device class for component devices, you must define these three values:
- Device Type. Select "Component".
- Class Identifier 1. Enter a value collected by one of the collection objects in the Dynamic Application that creates the component devices. Typically, this value is the manufacturer of the device. For a component device to be assigned to a device class based on component identifiers, the value entered in this field must match the value(s) collected by the Class Identifier 1 component identifier in the collection object.
- Class Identifier 2. Enter a value collected by one of the collection objects in the Dynamic Application that creates the component devices. Typically, this value is the model of the device. If you want to assign this device class based only on the Class Identifier 1—that is, if you are creating a "fall back" device class for components that do not match specific Class Identifier 1 and Class Identifier 2 combinations—do not enter a value in this field.
NOTE: The combination of the Class Identifier 1 and Class Identifier 2 values should be unique to devices that subscribe to the device class.
Configuring Component Identifiers for the Collection Objects
When you create a Dynamic Application, you can map the value of a collection object to a component identifier. The value collected for the collection object (from each device) will populate the Component Identifier field(for that device).
Two of these component identifiers help Skylar One automatically align a device class with each component device.
- Class Identifier 1. For a component device to be assigned to a device class based on component identifiers, the value(s) collected by this collection object must match the value you entered in the Class Identifier 1 field for that device class.
- Class Identifier 2. For a component device to be assigned to a device class based on component identifiers, either the value(s) collected by this collection object must match the value you entered in the Class Identifier 2 field for that device class or the device class must not include a value for the Class Identifier 2 field.
How Does Skylar One Use Component Identifiers to Automatically Assign a Device Class to Each Component Device?
Skylar One uses the following procedure to automatically assign a device class to each new component device:
- If the values for component identifiers Class Identifier 1 and Class Identifier 2 exactly match the values specified in the device class fields Class Identifier 1 and Class Identifier 2 in an existing component device class, Skylar One will align the component device with that device class. During subsequent collections, if the value of the one or both of the collection objects changes and exactly matches a device class name and device class description, Skylar One will change the device class to match the values of Class Identifier 1 and Class Identifier 2.
- If the value for component identifier Class Identifier 1 exactly matches the device class field Class Identifier 1 in a component device class definition, but the component identifier Class Identifier 2 either does not match a device class description or is not defined, Skylar One will assign the component device to the device class with the matching value in the field Class Identifier 1 and no value defined for Class Identifier 2.
NOTE: ScienceLogic recommends that you create such a device class as a "fallback" for the specified Class Identifier 1. Skylar One can then use this device class for any component devices that have an unrecognized Class Identifier 2.
- If the Dynamic Application does not include component identifiers Class Identifier 1 and Class Identifier 2 OR the values for Class Identifier 1 and Class Identifier 2 do not match the fields in an existing component device class, Skylar One aligns the component device with the device class associated with the Dynamic Application. You can define this device class in the Device Class Editor (System > Customize > Device Classes > edit a device class > Dynamic App Alignment field) or in the Dynamic Application Editor window, in the Components tab (System > Manage > Applications > edit a Dynamic Application > Components tab).
- If the Dynamic Application does not include component identifiers Class Identifier 1 and Class Identifier 2 OR the values for Class Identifier 1 and Class Identifier 2 do not match the fields in an existing device class, AND the Dynamic Application is not aligned with a device class (either in the Device Class Editor page or in the Components tab), Skylar One automatically assigns the component device to the device class "Generic: Component".
Aligning a Default Device Class with a Dynamic Application
You can align a device class with a Dynamic Application that creates component devices. If you choose not to use the component identifiers Class Identifier 1 and Class Identifier 2 in your Dynamic Application to match a device class, Skylar One will automatically align each newly discovered component device with the default device class that you aligned with the Dynamic Application.
There are two ways to align a default device class with a Dynamic Application:
- In the Device Class Editor page (System > Customize > Device Classes), in the Dynamic app Alignment field.
- In the Dynamic Application Editor window, in the Components tab (System > Manage > Applications > Edit a Dynamic Application > Components tab).
Defining a Default Device Class in the Device Class Editor
To define a default device class for a Dynamic Application from the Device Class Editor page:
- Go to the Device Class Editor page (System > Customize > Device Classes).
- Create or edit the device class you want to align with the Dynamic Application.
- In the field Dynamic App Alignment, select a Dynamic Application.
- Select the button.
Defining a Default Device Class in the Dynamic Application
To define a default device class for a Dynamic Application from the Dynamic Application Editor window:
- Go to the Dynamic Applications Manager page (System > Manage > Dynamic Applications).
- Find the Dynamic Application that you want to associate a device class with. Select its wrench icon (). The Dynamic Applications Properties Editor page is displayed.
- Select the tab. The Dynamic Application Component Alignment page is displayed.
NOTE: The tab does not appear for Dynamic Applications that do not have dynamic component mapping enabled.
- In the Device Class Alignment field, select a device class.
- Select the button.
Variables in Dynamic Applications for Component Devices
If Dynamic Applications are aligned to component devices, Skylar One uses the following rules when performing collection:
- If the %D substitution is used in the credential aligned with the Dynamic Application, Skylar One substitutes the IP address of the root device.
- If the Dynamic Application uses cached responses from other Dynamic Applications, the Dynamic Application that caches the response can be aligned to either the component device or the root device.
In SOAP and XSLT Dynamic Applications that are aligned to component devices, you can include the following substitution characters in the SOAP Request Code, XSLT Request Code, and XSLT Parser Code fields:
- %N. Skylar One will substitute the value of the Device Name component identifier for the component device for which collection is being performed.
- %U. Skylar One will substitute the value of the Unique Identifier component identifier for the component device for which collection is being performed.
- %C. Skylar One will substitute the value of the Distinguished Name component identifier for the component device for which collection is being performed.
- %G. Skylar One will substitute the value of the GUID component identifier for the component device for which collection is being performed.
Caching and Component Mapping
Although the caching and dynamic component mapping features can be used separately, the caching feature is useful to collect performance and configuration data for component devices. For example, the following set of Dynamic Applications might be used to discover and monitor component devices:
- A Dynamic Application that requests all the information needed for all other Dynamic Applications in this set. This Dynamic Application caches the responses and is aligned to the root device.
- A Dynamic Application that creates component devices. This Dynamic Application consumes cache and is aligned to the root device.
- One or more Dynamic Applications that collect performance and/or configuration data for each component device. These Dynamic Applications consume the cached responses from the first Dynamic Application and are aligned to each component device.
To associate performance or configuration data with only the appropriate component device (that is, the component device that generated the performance or configuration data), you would use substitution characters in your requests. When the request is executed, Skylar One replaces the substitution character with a component identifier for the component device for which collection is currently being performed.
Dynamic Application Relationships
Dynamic Applications can be configured to automatically create relationships between devices. For example, the Dynamic Applications in the VMware vSphere and NetApp PowerPacks are configured to create relationships between VMware Datastore component devices and their associated NetApp Volume component devices. Relationships created by Dynamic Applications are used and visualized by Skylar One in the same manner as relationships created by topology collection, Dynamic Component Mapping, and manually in the user interface.
There are three methods for configuring Dynamic Applications to automatically create relationships:
- A single configuration Dynamic Application that collects the unique identifier (UID) for a component device. When Skylar One polls a subscriber device and collects a UID value, and that UID value matches the UID for an existing component device in the same component tree as the subscriber device, Skylar One creates a relationship between the subscriber device and the component device.
- A single configuration Dynamic Application that collects the globally unique identifier (GUID) for a component device, typically a component device that is in a different component tree than the subscriber device. When Skylar One polls a subscriber device and collects a GUID value, and that GUID matches the GUID of an existing component device that is in a different component tree than the subscriber device, Skylar One creates a relationship between the subscriber device and the component device.
- A pair of configuration Dynamic Applications collect the same data. One of these Dynamic Applications is configured to define a unique identity for subscriber devices and also references the relationship. The other Dynamic Application defines the relationship and also references the unique identity. If each Dynamic Application collects the same value for unique identity and the same value for relationship, a relationship is created between the two subscriber devices. This type of relationship is described in the section Configuring Identity-based Relationships.
Configuring Collection Objects for Relationships
To configure a collection object for the creation of relationships:
- Go to the Dynamic Applications Manager page (System > Manage > Dynamic Applications).
- Find the configuration Dynamic Application that you want to configure. Select its wrench icon (). The Dynamic Applications Properties Editor page is displayed.
- Select the tab. The Dynamic Applications | Collections Objects page is displayed.
- Select the wrench icon () for the collection object you want to edit.
- The Usage Type field specifies how this collection object is used to build relationships. The options in this field are:
- Standard. The collection object is not used to create relationships or designated as an index for the specified collection object group.
- Group Index. The collection object is configured as the index for the selected collection object Group. For more information about indexing, see the Indexing section. Additionally, if other collection objects in the same group are configured with a Usage Type of Identity Namespace or Relationship Namespace, Skylar One uses the collection object with a Usage Type of Group Index to define the unique identifier and create relationships between the subscribers of two related Dynamic Applications. See the Configuring Identity-based Relationships section for a description of how to implement this type of relationship.
- Identity Namespace. Skylar One uses the collection object to create relationships between the subscribers of two related Dynamic Applications. This collection object defines the identity portion of the relationship. If Skylar One collects this collection object from a device, Skylar One will make that device the child in a parent-child relationship. See the Configuring Identity-based Relationships section for a description of how to implement this type of relationship.
- Relationship Namespace. Skylar One uses this collection object to create relationships between the subscribers of two related Dynamic Applications. If Skylar One collects this collection object from a device, Skylar One will make that device the parent in a parent-child relationship. See the Configuring Identity-based Relationships section for a description of how to implement this type of relationship.
NOTE: Usage Type of Identity Namespace defines the child portion of an identity-based relationships. Usage Type of Relationship Namespace defines the parent portion of an identity-based relationships.
- GUID Relationship. When Skylar One collects a value for this collection object, and that value matches the GUID for a component device in the system, Skylar One creates a relationship between the subscriber device and the component device. The subscriber device will be the parent device and the component device will be the child device. The relationship will be labeled with the name of this collection object.
- Unique Identifier Relationship. When Skylar One collects a value for this collection object, and that value matches the unique identifier for a component device in the same component tree as the subscriber device, Skylar One creates a relationship between the subscriber device and the component device. The subscriber device will be the parent device and the component device will be the child device. The relationship will be labeled with the name of this collection object.
- GUID Relationship + Index. Skylar One uses this collection object to create relationships in the same manner as the GUID Relationship option. When Skylar One collects a value for this collection object, and that value matches the GUID for a component device in the system, Skylar One creates a relationship between the subscriber device and the component device. The subscriber device will be the parent device and the component device will be the child device. The relationship will be labeled with the name of this collection object. Additionally, the collection object is configured as the index for the specified collection object group.
- Unique Identifier + Index. Skylar One uses this collection object to create relationships in the same manner as the Unique Identifier Relationship option. When Skylar One collects a value for this collection object, and that value matches the unique identifier for a component device in the same component tree as the subscriber device, Skylar One creates a relationship between the subscriber device and the component device. The subscriber device will be the parent device and the component device will be the child device. The relationship will be labeled with the name of this collection object. Additionally, the collection object is configured as the index for the specified collection object group.
- Click .
Configuring Identity-Based Relationships
An identity-based relationship is created using a pair of Dynamic Applications:
- A Dynamic Application that defines a unique identity for subscriber devices. This Dynamic Application defines:
a unique ID for the device, using a collection object that usually has a Usage Type of Group Index.
the identity side of the relationship, using a collection object that usually has a Usage Type of Identity Namespace. The devices that subscribe to this Dynamic Application will be children in the parent-child relationship that is created using the unique identity.
NOTE: This identifier must be unique to this relationship, meaning no two subscribers of the same Dynamic Applicationshould collect the same identifier for the same relationship. However, both Dynamic Applicationsin the pair must collect the same identifier value for a relationship to be created.
- A Dynamic Application that defines the relationship for subscriber devices. This Dynamic Application defines:
a unique ID for the device, using a collection object that usually has a Usage Type of Group Index.
a relationship, using a collection object that usually has a Usage Type of Relationship Namespace. The devices that subscribe to this Dynamic Application will be parents in the parent-child relationship that is created using the unique identity.
A relationship is created when:
- both Dynamic Applications in a pair collect identical values for the unique identifier (the collection object with a Usage Type of Group Index.
- the value for the collection object that has a Usage Type of Identity Namespace is identical to the value for the collection object that has a Usage Type of Relationship Namespace.
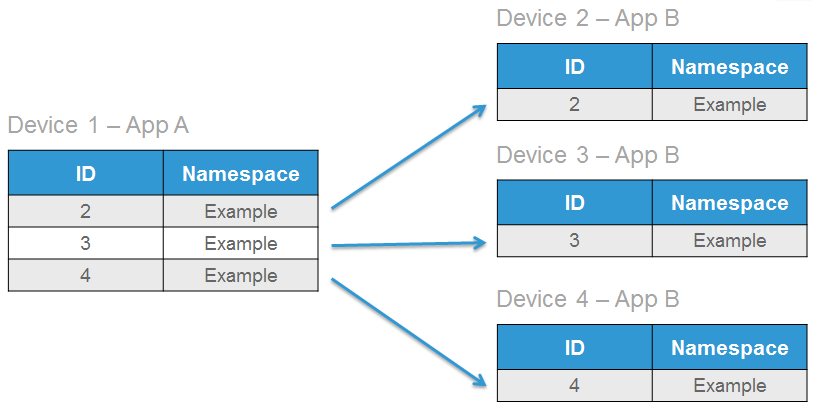
To configure a pair of Dynamic Applications to create identity-based relationships, go to the Dynamic Applications Collection Objects page:
- In both Dynamic Applications, select the collection object that collects the identifier for the relationship. In the Usage Type field, select Group Index. Select a Group for the collection object. The Group should be the same in both Dynamic Applications.
- In the Dynamic Application that defines a unique identity for subscriber devices, select the collection object that collects the namespace for the relationship. In the Usage Type field, select Identity Namespace. For this collection object, select the same Group as the Group Index collection object.
- In the Dynamic Application that defines the relationship, select the collection object that collects the namespace for the relationship. In the Usage Type field, select one of the values that includes the text "Relationship". For this collection object, select the same Group as the Group Index collection object.
NOTE: The Identity Namespace and Relationship Namespace objects must return a value for each of the indexes returned by the Group Index object. Typically, the values at each index returned by the Identity Namespace and Relationship Namespace objects are equal.
NOTE: For an example of a Dynamic Application with an Identity-Based relationship,
Viewing a Map of Component Devices
The Component Map page allows you to view devices by root node and also view the relationships between root nodes, parent components, and child components. This map makes it easy to visualize and manage root nodes and their components.
NOTE: User accounts of type "user" can view only root nodes and device components that belong to their organization(s).
Skylar One uses Dynamic Applications to retrieve data from a management device and discover each entity managed by that management device. Skylar One then uses that retrieved data to create a device for each managed entity. In some cases, the managed entities are nested.
- In Skylar One, a managed entity is called a component device. A component device is an entity that runs under the control of a physical management device.
- In Skylar One, the root device is the physical device that manages one or more component devices.
- In Skylar One, a parent device is a device that has associated entities modeled as component devices. A parent device can be either a root device or another component device.
For example, in a Cisco UCS system, Skylar One might discover a physical server that hosts the UCS manager. Skylar One might discover a chassis as a component device. The chassis is a child device to the physical server; the physical server is the root device. Skylar One might also discover a blade as a component device that is part of the chassis. The blade is a child device to the chassis. The chassis is the parent device.
Skylar One automatically updates the Component Map as new component devices are discovered. Skylar One also updates each map with the latest status and event information.
NOTE: For a user of type User, you can view only root nodes and device components that belong to your organization(s).
Viewing a Component Map
You can view a component map from the Component Map page. To view a Component Map:
- Go to the Classic Maps page (Maps > Classic Maps).
- Expand the links for Device Maps > Components and then select a root node. The Device Component Map page appears and displays the map of the root node and its component devices.
Adding Devices from Another Component Tree to the Component Map
You can add a device from another component tree to the map of the current component device.
For example, suppose you have a UCS system. Suppose you are running an ESX server and VMs on one of the blades of the UCS system:
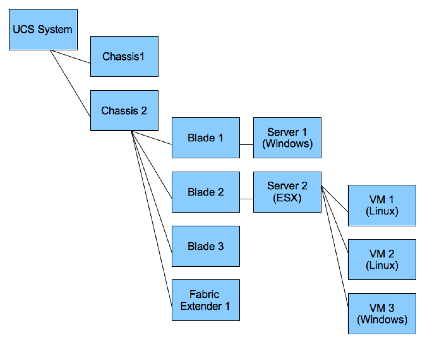
You can add the device where the ESX server resides to the map of the UCS system. To do this:
- Go to the Component Map page (Maps > Classic Maps > Device Maps > Components).
- Expand the list of maps. Find the component map to which you want to add a device.
- Select the button. Select the Add Dev icon (in the upper left).
- In the Device Browser modal page, select the root node you want to add to the component map. Select the button.
NOTE: When you complete these steps, the Skylar One system will automatically add all the child devices for the newly added node to the map.
- Select the button. Click on the parent device and then click on the newly added child device.
- The link you created is an Event Correlation Override link. If you want to manually define a parent device and child device for two devices that do not share a Layer-2 link, a Layer-3 link, a CDP link, an LLDP link, or a VMware relationship, you can create an Event Correlation Override link between the devices. Additionally, you can then define an event hierarchy for these devices.
- Select the button.
- Select the button to view the changes to the map.
Viewing Relationships Maps in the Organization View
The Organizational Map page allows you to view devices by organization. This makes it easy to visualize and manage devices in organizations. If devices in the organization include relationships created by Dynamic Applications, these relationships are displayed in the map. If devices in this organization include CDP, LLDP, layer-2, or layer-3 relationships, they are included in the map.
All elements, policies, events, tickets, and users in Skylar One are associated with an organization. An organization is a group for managing elements and user accounts. You can define organizations by geographic area, departments, types of devices, or any structure that works best for your needs. The minimum characteristics of an organization consist of:
- A unique name
- Users who are members of the organization
- Elements, such as devices, associated with the organization
Skylar One automatically updates the Organizational Maps as new devices are added to organizations and as new organizations are defined. Skylar One also updates each map with the latest status and event information.
To select an Organizational Map, go to the Classic Maps page (Maps > Classic Maps), expand the links for Device Maps > Organizational, and then select an organization. The Organizational Map page appears and displays a map of the selected organization and its devices.
Viewing an Organizational Map
You can view an organizational map from the Organizational Map page. To view an organizational map:
- Go to the Classic Maps page (Maps > Classic Maps).
- Expand the sections for Device Maps > Organizational, and then select an organization. The Organizational Map page appears and displays a map of the organization and its member devices:
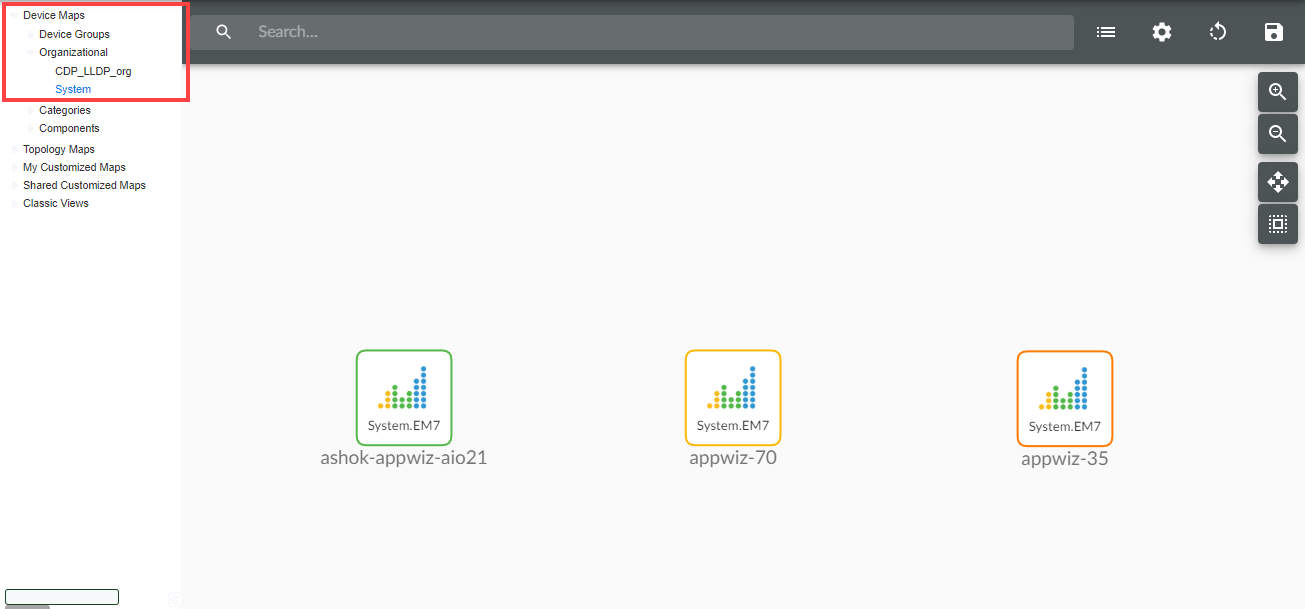
- The search field at the top allows you to find one or more devices in the map. You can enter a string, and Skylar One will highlight only the devices that have a device name that matches the string.
- Each member device appears as an icon in the map.
- The Organizational Map page for an organization also displays the relationships between devices in the organization. This includes:
- Layer-2 devices and their clients
- Layer-3 devices and layer-2 devices
- Component devices and their parents, e.g. virtual machines and their hypervisors
- Network devices that use CDP (Cisco Discovery Protocol) and devices that are specified as neighbors in the CDP tables
- Network devices that use LLDP (Link Layer Discovery Protocol) and devices that are specified as neighbors in the CDP tables
- Device relationships created with Dynamic Applications
- Manually created parent-child relationships that affect event correlation
- When the map appears, you can view and reposition the components. The map can be edited and rearranged using drag-and-drop features. Devices can be repositioned for easier reading, if necessary.
- Mousing over a device displays its name, IP address, device type, and device category.
Viewing Relationships in Customized Maps
A customized map allows you to view the devices and links that are most important to you.
When you create a customized map, you are also creating a new device group (which appears in the Device Groups page). You can add devices and other sub-device groups to the new map, just as you would to a standard device group.
If Skylar One has information about the relationships between the devices in a customized map, Skylar One automatically includes the appropriate links in the customized map. Customized maps display every type of relationship data, which includes:
- Layer-2 devices and their clients
- Layer-3 devices and layer-2 devices
- Component devices and their parents, e.g. virtual machines and their hypervisors
- Network devices that use CDP (Cisco Discovery Protocol) and devices that are specified as neighbors in the CDP tables
- Network devices that use LLDP (Link Layer Discovery Protocol) and devices that are specified as neighbors in the LLDP tables
- Device relationships created with Dynamic Applications
- Manually created parent-child relationships that affect event correlation
Customized maps appear in the following sections:
- My Customized Maps. Personalized maps that you create.
- User Customized Maps. If you are a user of type "administrator", you can navigate to the maps in this section to view and edit all customized maps in Skylar One, even if the device group associated with the map was defined with the field Shared (visible to all users) set to no.
- Shared Customized Maps. If a customized map or device group is defined as "shared", you can view the maps in this section. The maps in Shared Customized Maps require the same Access Hooks and Access Keys as device groups. Depending upon the Access Keys assigned to your account, you might be able to edit Shared Customized Maps created by other users.
NOTE: If you create a device group from the Device Groups page and set the Visibility field to include Maps/Views, the device group will appear as a map in the Custom Device Group Map page (Maps > Classic Maps > My Customized Maps). If you set the Shared field to yes, the device group will appear for view by other users as a map in the Shared Customized Maps page (Maps > Classic Maps > Shared Customized Maps).
Viewing Relationships for a Single Device
You can view all links for a single device on the Relationships tab of the Device Investigator (or on the Device Relationships page in the Device Properties panel in the classic Skylar One user interface).
To view all links for a single device:
- Go to the Relationships tab of the Device Investigator. (Alternatively, go to the Device Manager page (Devices > Classic Devices, or Registry > Devices > Device Manager in the classic user interface), click the wrench icon for a device () and then click the tab.) The Device Relationships page appears.
- The left pane of the Device Relationshipspage displays links to parent devices. The right pane of the Device Relationships page displays links to child devices. For each relationship, the Device Relationships page displays the following information:
- Type of relationship. Possible values are:
- ARP. Network devices that use ARP (Address Resolution Protocol) and devices that are specified as neighbors in ARP tables.
- CDP. Network devices that use CDP (Cisco Discovery Protocol) and devices that are specified as neighbors in CDP tables.
- Component Mapping. Relationships defined using Dynamic Applications.
- Event Correlation. Relationships defined manually by users through the user interface.
- Layer 2. Layer-2 devices and their clients.
- Layer 3. Layer-3 devices and layer-2 devices.
- LLDP. Network devices that use LLDP (Link Layer Discovery Protocol) and devices that are specified as neighbors in LLDP tables, including those devices that respond only to LLDP v2.
- VMware. Hypervisors and their virtual machines.
- Parent Device. The name of the parent device and a link to the Device Properties page for the parent device.
- Parent Interface. The name of the interface through which the parent device communicates with the child device and a link to the Interfaces Found page for the parent interface.
- Child Device. The name of the child device and a link to the Device Properties page for the child device.
- Child Interface. The name of the interface through which the child device communicates with the parent device and a link to the Interfaces Found page for the child interface.
NOTE: Clicking on a device reloads the Device Relationships page and makes the selected device the primary device.
The Device View page appears when a user clicks the Topology tab in the Device Reports panel. The Device View page displays a map of the device and all of the devices with which the device has relationships.
These relationships include:
- Layer-2 devices and their clients
- Layer-3 devices and Layer-2 devices
- Component devices and their parent devices. For example, virtual machines and their hypervisors and their virtual machines.
- Network devices that use CDP (Cisco Delivery Protocol) and devices that are specified as neighbors in CDP tables
- Links between network devices that use CDP (Cisco Discovery Protocol) and devices that are specified as neighbors in CDP tables
- Network devices that use LLDP (Link Layer Delivery Protocol) and devices that are specified as neighbors in LLDP tables
- Links between network devices that use LLDP (Link Layer Discovery Protocol) and devices that are specified as neighbors in LLDP tables
- Device relationships between root devices, parent devices, and component devices (Component Mapping)
- Device relationships created with Dynamic Applications
- Manually created parent-child relationships that affect event correlation
NOTE: Double-clicking on a device reloads the Device View page and makes the selected device the primary device.
For details on the toolbars that appear in this page,
Presentation Objects for Performance Dynamic Applications
This section describes Presentation Objects, which define how Skylar One should present data for Dynamic Applications with an archetype of Performance or Journal.
What is a Presentation Object?
Presentation Objects define how Skylar One should present data for Dynamic Applications with an archetype of Performance or Journal. For performance Dynamic Applications, a presentation object defines how Skylar One uses the collected values for the collection objects to generate graphs.
For example, a Dynamic Application that is designed to collect information about file system usage on a device might define:
- Two collection objects, one that collects the total size of each file system and one that collects the amount of space used on each file system.
- A presentation object that defines a graph. This graph displays the percentage of space used for each file system. The presentation object would include a formula that uses both collection objects.
This section describes presentation objects in performance Dynamic Applications. This section does not apply to journal Dynamic Applications with an archetype of Journal. For information on presentation objects in journal Dynamic Applications,
Viewing the Presentation Objects in a Dynamic Application
To view the presentation objects in a Dynamic Application:
- Go to the Dynamic Applications Manager page (System > Manage > Dynamic Applications).
- Find the Dynamic Application you want to view the presentation objects for. Click its wrench icon (). The Dynamic Applications Properties Editor page is displayed.
- Click the tab. The Dynamic Applications Presentation Objects page is displayed. The Presentation Object Registry pane at the bottom of the page displays a list of defined reports.
- For each report in a Dynamic Application of type Performance, the Presentation Object Registry displays the following:
- Report Name. The name of the presentation object.
- State. The state of the presentation object. Possible values are:
- Enabled. Skylar One will generate graphs for this presentation object.
- Disabled. Skylar One will not generate graphs for this presentation object.
- Abbreviation Suffix. Abbreviation for the unit of measure to display in the report.
- Label Group. Name of the Collection Group aligned with the presentation object. For more information on Collection Labels, see the section on Collection Labels.
- Label. Name of the Collection Label aligned with the presentation object. The Vitals group is available as a Collection Label and preserves the previous behavior of Vitals Link.For more information on Collection Labels, see the section on Collection Labels.
- Precedence. Weight assigned to this presentation object. For more information on Collection Labels and Precedence, see the section on Precedence.
- Show as Percent. Specifies whether the resulting graph displays percent values. If so, the y-axis of the graph will range from 0 - 100 percent.
- Enabled. The graph displays percent values.
- Disabled. The graph does not display percent values.
- ID. The unique ID assigned to the report. Skylar One automatically generates and assigns this identifier.
- Date Edit. Date and time the report definition was last edited.
Creating a Presentation Object
To add a presentation object to a performance Dynamic Application, perform the following steps:
- Go to the Dynamic Applications Manager page (System > Manage > Dynamic Applications).
- Find the performance Dynamic Application you want to add a presentation object to. Click its wrench icon (). The Dynamic Applications Properties Editor page is displayed.
- Click the tab. The Dynamic Applications Presentation Objects page is displayed.
- In the Dynamic Applications Presentation Objects page, click the button to clear values from the fields in the top pane, the Formula Editor pane, and the Guide Text pane.
- Supply values in the following fields:
- Report Name. Name of the report. Can be any combination of alpha-numeric characters. This name will appear as the name of the report.
- Summarization State. Specifies whether Skylar One should include hourly and daily summary statistics for the presentation object in the graph. Choices are:
- Enabled. Skylar One will include summary statistics for the presentation object in the graph.
- Disabled. Skylar One will not include summary statistics for the presentation object in the graph.
- Data Unit. Units used in the graph. Can be any combination of alphanumeric characters, up to 25 characters in length.
- Abbreviation/Suffix. Abbreviation for units used in the graph. Can be any combination of alphanumeric characters, up to 16 characters in length.
- Show as Percent. Specifies whether the resulting graph displays percent values. If so, the y-axis of the graph will range from 0 – 100 percent.
- Enabled. The graph displays percent values.
- Disabled. The graph does not display percent values.
- Precedence. Weight to assign to this presentation object. For more information on Collection Labels and Precedence, see the section on Precedence.
- Label Group. Name of the Collection Group to align with the presentation object. The Vitals group is available as a Collection Label and preserves the previous behavior of Vitals Link. You can click the plus-sign () to create a new Collection Group. For more information on Collection Labels, see the section on Collection Labels.
- Label. Name of the Collection Label to align with the presentation object. You can click the plus-sign () to create a new Collection Label.
- Formula Editor. The formula Skylar One will use to generate graphs for the presentation object. For a full description of this field, see the Presentation Object Formulas section.
- Guide Text. Enter optional guide text for the presentation object.
- Click the button to save the presentation object.
Presentation Object Formulas
The Formula Editor allows users to define which object value(s) that will be used to generate the graph for this presentation object and the mathematical manipulations that must be performed on those object values. The result of a defined formula must be a single numeric value.
A presentation object formula can include:
- The ID for one or more collection objects in the same Dynamic Application. All collection object IDs start with "o_" (lowercase "oh", underscore).
- The four main arithmetic operators (+, -, *, /).
- Parentheses, which set precedence for arithmetic operators.
- Braces ({ and }), which can be used to specify that an object is optional, and the formula should still be evaluated even if a value for the optional object has not been collected.
- Any PHP math function that evaluates to a numeric value. For information about PHP math functions, see http://www.php.net/math.
The operators and PHP math functions may be used in any combination and with any number of collection object IDs, provided that the result of the expression always equates to a single numeric value.
The following examples are all valid presentation formulas:
o_123
abs(o_123)
o_123 / o_124 * 100
(o_123 + o_124) * o_125
o_123 + {o_124}
The scrolling list below the Formula Editor contains a list of all objects in the Dynamic Application. To insert the ID for a collection object in to the formula, select the collection object from the list, and then select the button.
The Guide Text pane allows users to include descriptive text with each graph. When a user views the graph in the Device Performance page, the button will display the text from this pane.
Vitals Linking
When Vitals Linking is enabled for a presentation object in a Dynamic Application, Skylar One will use the presentation object to calculate and display CPU, Memory, or Swap utilization values for devices that subscribe to the Dynamic Application.
For example, suppose that a device subscribes to the default "Net-SNMP: CPU" Dynamic Application, which collects CPU data from Net-SNMP agents. The "Overall CPU" presentation object in this Dynamic Application has CPU selected in the Vitals Link field. When a user selects the tab in the Device Summary window for this device:
- The System Vitals Summary Report (Overview > System Vitals) will include the graph generated by the "Overall CPU" presentation object.
- The Overall CPU Utilization Report (Overview > CPU Utilization) will show the graph generated by the "Overall CPU" presentation object.
Additionally, Skylar One will calculate hourly CPU usage for that device using the "Overall CPU" presentation formula. The presentation formula uses collected values from the device, specified in the collection objects. The hourly CPU data is stored separately from the other Dynamic Application data.
Editing a Presentation Object
To edit a presentation object in a Dynamic Application, perform the following steps:
- Go to the Dynamic Applications Manager page (System > Manage > Dynamic Applications).
- Find the Dynamic Application you want to edit. Click its wrench icon (). The Dynamic Applications Properties Editor page is displayed.
- Click the tab. The Dynamic Applications Presentation Objects page is displayed.
- In the Presentation Object Registry pane at the bottom of the page, locate the presentation object you want to edit. Click the wrench icon () for the presentation object you want to edit.
- The fields in the top pane will be populated with the saved values for the selected presentation object. Edit the values in one or more fields. For a description of each field, see the Creating a Presentation Object section.
- Click the button to save your changes to the presentation object. Click the button to save the changes as a new presentation object.
Deleting a Presentation Object
To delete a presentation object from a Dynamic Application, perform the following steps:
- Go to the Dynamic Applications Manager page (System > Manage > Dynamic Applications).
- Find the Dynamic Application you want to edit. Click its wrench icon (). The Dynamic Applications Properties Editor page is displayed.
- Click the tab. The Dynamic Applications Presentation Objects page is displayed.
- In the Presentation Object Registry pane at the bottom of the page, locate the presentation object you want to delete. Click its delete icon (
 ). The presentation object is deleted from Skylar One. Any collected data that the presentation object used will remain in Skylar One. However, you will no longer be able to view any graphs generated using the presentation object.
Alerts and Thresholds
This section describes what an alert and threshold is and how to use them in a Dynamic Application.
What is an Alert?
An alert defines a formula that Skylar One will evaluate each time data is collected. Each formula includes collection objects. When Skylar One evaluates the alert formula, Skylar One will substitute in the most recently collected values for each collection object. If the formula evaluates to true, Skylar One generates an alert. When Skylar One generates an alert, Skylar One makes an entry in the device log. Additionally, you can define an event policy that will trigger an event if a specific alert is generated.
What is a Threshold?
A threshold defines a variable that can be used in one or more alerts. Each threshold defines a range of values for the variable and a default value. Users can change the value of the threshold on a per-device basis without having to modify the Dynamic Application.
Viewing the Thresholds in a Dynamic Application
To view the thresholds in a Dynamic Application:
- Go to the Dynamic Applications Manager page (System > Manage > Dynamic Applications).
- Find the Dynamic Application you want to view the thresholds for. Select its wrench icon (). The Dynamic Applications Properties Editor page is displayed.
- Select the tab. The Dynamic Applications Threshold Objects page is displayed. The Thresholds Object Registry pane at the bottom of the page displays the following information about each threshold:
- Name. The name of the threshold. This name will be used to label the threshold in the tab in the Device Administration panel.
- Override. Defines whether this threshold can be overridden on a per-device basis. Possible values are:
- Enabled. When the Dynamic Application that contains this threshold is aligned with a device, a user will be able to set a new value for this threshold in the tab in the Device Administration panel.
- Disabled. Users cannot set a new value for this threshold on a per-device basis.
- Type. Specifies whether the threshold will be a Percentage, Integer, or Decimal.
- Numeric Range High. When a user overrides this threshold for a device, this is the maximum value the threshold can be set to.
- Numeric Range Low. When a user overrides this threshold for a device, this is the minimum value the threshold can be set to.
- Threshold Unit. Specifies the unit of measure for the threshold value.
- Threshold Value. The default value for the threshold. If a user does not define an override for a device, Skylar One will use this threshold value for that device.
- ID. The unique ID assigned to the threshold by Skylar One. This ID is used to reference the threshold in alert formulas. The unique ID will always start with "t_".
- Date Edit. The last time a user edited this threshold.
Creating a Threshold
To add a threshold to a Dynamic Application, perform the following steps:
- Go to the Dynamic Applications Manager page (System > Manage > Dynamic Applications).
- Find the Dynamic Application you want to add a threshold to. Select its wrench icon (). The Dynamic Applications Properties Editor page is displayed.
- Select the tab. The Dynamic Applications Threshold Objects page is displayed.
- Supply values in the following fields:
- Threshold Name. The name of the threshold. This name will be used to label the threshold in the tab in the Device Administration panel.
- Override Threshold Value. Defines whether this threshold can be overridden on a per-device basis. When disabled, this threshold does not appear on the Device Thresholds page for each subscriber device and cannot be edited for each subscriber device. Choices are:
- Enabled. Threshold appears on the Device Thresholds page for each subscriber device and can be edited for each subscriber device.
- Disabled. Threshold does not appear on the Device Thresholds page for each subscriber device.
- Numeric Range High. Specifies the high end of the possible values. In the Device Thresholds page for each subscriber device, this number will appear at the high end of the slider. When a user overrides this threshold for a device (in the Device Thresholds page), this is the maximum value the threshold can be set to.
- Numeric Range Low. Specifies the low end of the possible values. In the Device Thresholds page for each subscriber device, this number will appear at the low end of the slider. When a user overrides this threshold for a device (in the Device Thresholds page), this is the minimum value the threshold can be set to.
- Threshold Type. Specifies whether the threshold will be a Percentage, Integer, or Decimal.
- Threshold Unit. Specifies the unit of measure for the threshold value.
- Threshold Value. Assigns a default value to the threshold object. If a user does not override the threshold in the Device Thresholds page for a subscriber device, Skylar One will use this threshold value for the subscriber device.
- Select the button to save the threshold.
Editing a Threshold
To edit an already-defined threshold:
- Go to the Dynamic Applications Manager page (System > Manage > Dynamic Applications).
- In the Dynamic Applications Manager page, find the Dynamic Application for which you want to edit a threshold. Select its wrench icon ().
- Select the tab for the Dynamic Application.
- In the Threshold Objects page, find the threshold in the Threshold Object Registry pane. Select its wrench icon ().
- The fields in the top pane are populated with values from the selected threshold. You can edit the value of one or more fields. For a description of each field, see the Creating a Threshold section.
- Select the button to save your changes to the threshold.
Deleting a Threshold
You can delete a threshold from a Dynamic Application. To do this:
- Go to the Dynamic Applications Manager page (System > Manage > Dynamic Applications).
- In the Dynamic Applications Manager page, find the Dynamic Application for which you want to delete a threshold. Select its wrench icon ().
- Select the tab for the Dynamic Application.
- In the Threshold Objects page, find the threshold in the Threshold Object Registry pane. Select its delete icon (). The threshold will be deleted from Skylar One. You must manually remove the threshold from all alert formulas in which that threshold appears.
Viewing the Alerts in a Dynamic Application
To view the alerts in a Dynamic Application:
- Go to the Dynamic Applications Manager page (System > Manage > Dynamic Applications).
- Find the Dynamic Application you want to view the alerts for. Select its wrench icon (). The Dynamic Applications Properties Editor page is displayed.
- Select the tab. The Dynamic Applications Alert Objects page is displayed. The Alert Object Registry pane at the bottom of the page displays the following information about each alert:
- Policy Name. The name of the alert.
- Formula. The formula that Skylar One will evaluate to determine whether to generate the alert. An alert formula can contain references to collection objects ("o_" followed by a numeric value), threshold objects ("t_" followed by a numeric value), and/or other alerts ("a_", followed by a numeric value).
- State. Specifies whether Skylar One will evaluate the alert when new data is collected for the Dynamic Application. Possible values are:
- Enabled. Skylar One will evaluate the alert when new data is collected.
- Disabled. Skylar One will not evaluate the alert when new data is collected.
- Maintain. Specifies whether Skylar One will track the status of this alert (active or inactive) for use as a condition in other alert formulas. Possible values are:
- Yes. Skylar One tracks the status of this alert. The status of this alert can be used as a condition in other alert formulas.
- No. Skylar One does not track the status of this alert. The status of this alert cannot be used as a condition in other alert formulas.
- Events. Specifies whether an event policy has been created for this alert. Possible values are:
- Yes. An event policy has been created for this alert. Selecting the event icon (
 ) will open the Event Policy Editor, where you can edit the associated event.
- No. An event policy has not been created for this alert. Selecting the gray event icon (
 ) will open the Event Policy Editor, where you can define an event policy for this alert.
- ID. The unique ID assigned to the alert by Skylar One. This ID is used to reference the alert in other alert formulas. The unique ID will always start with "a_".
- Date Edit. The last time a user edited this alert.
Creating an Alert
To add an alert to a Dynamic Application, perform the following steps:
- Go to the Dynamic Applications Manager page (System > Manage > Dynamic Applications).
- Find the Dynamic Application you want to add an alert to. Select its wrench icon (). The Dynamic Applications Properties Editor page is displayed.
- Select the tab. The Dynamic Applications Alert Objects page is displayed.
- Supply values in the following fields:
- Policy Name. Enter a name for the alert.
- Active State. Specifies whether Skylar One will evaluate the alert when new data is collected for the Dynamic Application. Possible values are:
- Enabled. Skylar One will evaluate the alert when new data is collected.
- Disabled. Skylar One will not evaluate the alert when new data is collected.
- Log Message. Enter the log message associated with the alert. When Skylar One generates this alert, this message will appear in the device logs. You can use the following substitution characters in this field. The substitution characters are populated by including certain functions in the Formula Editor for the alert:
- %V. The value returned by the result() function.
- %L. The value returned by the "label" argument in the result() function.
- %T. The value returned by the threshold() function.
- Maintain State. Specifies whether Skylar One will track the status of this alert (active or inactive) for use as a condition in other alert formulas. Possible values are:
- Yes. Skylar One tracks the status of this alert. Select this option if you want to use the status of this alert as a condition in other alert formulas.
- No. Skylar One does not track the status of this alert. Select this option if you do not want to use the status of this alert as a condition in other alert formulas.
- Trigger Alert. This is a deprecated field. Leave this field set to the default value.
- Formula Editor. Enter the formula that Skylar One will evaluate to determine whether to generate the alert. For a full description of this field, see the Alert Formulas section.
- Select the button to save the alert.
Alert Formulas
The Formula Editor field allows you to define the formula that Skylar One will evaluate for an alert. The result of a defined alert formula must be either True or False. If the formula evaluates to True, Skylar One generates an alert.
An alert formula can include:
- The ID for one or more collection objects in the same Dynamic Application. All collection object IDs start with "o_" (lowercase "oh", underscore). However, do not use a collection object of type Label: Hourly Polled in an alert formula.
- The ID for one or more thresholds in the same Dynamic Application. All threshold IDs start with "t_".
- Arithmetic operators (+, -, *, /), comparison operators (>, <, !=, ==), and/or boolean operators ("and", "or", "not").
- The result() and/or threshold() functions. The results of these functions can be included in the log message for the alert.
- One or more ScienceLogic specific functions described in this section.
- One or more ScienceLogic specific date & time variables or the tab_idx variable described in this section.
- Any standard Python function.
The "==" operator is used to test equality. The single "=" assignment operator is not supported, except when used inside some functions).
The operators, functions, and variables may be used in any combination and with any number of collection object IDs and threshold IDs, provided that the result of the expression always equates to True or False.
The scrolling list below the Formula Editor contains a list of all collection objects and thresholds in the Dynamic Application. To insert the ID for a collection object or threshold in to the formula, select the collection object or threshold from the list, then select the button.
Evaluate
To evaluate the value of a collection object, enter an expression in the Formula Editor that compares the value of the object to something else, where "something else" can be another collection object, a threshold object, a simple number, a string, the result of a function, or a combination of objects and numbers.
For example, suppose you want to generate an alert based on the value of collection object "o_15160", which contains the current temperature of a hardware component in a Dell server. You could select object "o_15160: Temp. Reading" from the scrolling list. When the object appears in the Formula Editor, you could enter the following formula:
o_15160 > 50
The formula evaluates to True if the value returned by object o_15160 is greater than 50.
Skylar One assigns each object an object ID. This is different than the object number assigned to the object in the MIB. Skylar One requires that you use the object ID when referring to an object.
If one or more of the collection objects used in an alert formula collect a list of values, Skylar One evaluates the alert formula for each entry in the list. An alert can be generated for each entry in the list. For example, suppose the following alert formula is evaluated:
o_123 / o_124 * 100 > 90
Suppose that for each poll period for a device, the collection objects (o_123 and o_124) return a list of two values. Skylar One will evaluate the alert formula twice for this device. For the first evaluation, the first value from the list of values collected for o_123 at that poll period and the first value from the list of values collected for o_124 at that poll period will be substituted into the alert formula. For the second evaluation, the second values in the list of collected values will be substituted in to the alert formula.
If you compare a collection object to a string or an integer, be careful to use quotation marks consistently. The collection object and the comparison string or comparison integer must use the same quotation marks. Either both the collection object and the comparison value must be surrounded by single quotation marks or neither the collection object nor the comparison value should be surrounded by single quotation marks. For example:
- o_1346 == '5' is incorrect syntax (notice no single quotation marks around o_1346 but single quotation marks around 5)
- 'o_1346' == '5' is correct
- o_1346 == 5 is correct
For more details, see the section on Using Quotes in an Alert.
You can use == '--' in your alert formula to alert when the Dynamic Application reports "NO DATA". For example:
o_100 == '--' or o_101 != 100
Operators
The Formula Editor accepts only arithmetic operators (+, -, *, /), comparison operators (>, <. !=, ==) and Boolean operators (and, or, not). Parentheses are used to group and set precedence for operators.
The comparison operators are those commonly used in many modern programming languages. It is important to note that the '==' operator is used to test equality.
The single '=' assignment operator is not supported (except when passing optional arguments to the result() function, see below).
The operators may be used in any combination and with any number of object IDs, provided that the result of the expression always equates to TRUE or FALSE.
The following examples are all valid formulas:
o_123 / 100 > 3
o_123 > 3 and o_123 < 7
o_123 == 5
o_123 == 2 or o_123 == 4
Valid examples using multiple objects:
o_123 == o_124
o_123 / o_124 > 2.5
(o_123 + o_124) > (o_125 + 6)
Dividing Integers
When you divide two integers, sometimes the result is a number that includes a decimal point. For example, if you divide 3/2, the result is 1.5. A value with a decimal point is called a floating-point number.
In Skylar One, only if the divisor is a float can the resulting quotient be a float. If an integer is divided by another integer, the result is an integer. For example, if "3/2" is evaluated in an alert formula, the result will be 1, not 1.5. If you are dividing two numbers in Skylar One, you can use the python float() function to ensure that the divisor is converted to a floating-point number. This will ensure that the resulting quotient is also a floating-point number
For example, suppose your Dynamic Application includes two objects, o_123 and o_456. Suppose you want to divide the value of o_123 by the value of o_456. You should use the float() function like this:
o_123/float(o_456)
Because the divisor is a floating-point number, the resulting quotient can be a floating-point number.
Using Quotes in an Alert
Some alert functions accept either a string or a number as an argument. Some alert functions also require quotes around the arguments. When using quotes with alert functions, follow these guidelines:
- If you want to perform string operations on the object (such as find()), put the collection object ID in quotes.
- If you want to perform numeric operations on the object, do not put the collection object ID in quotes.
- You can use single quotes or double quotes – either work, but they must be paired (you cannot start with ' and end with ").
- For consistency, ScienceLogic recommends that you always use single quotes around strings in formulas.
- Take care if you are copying and pasting text from a text editor – the Python interpreter that evaluates alert formulas requires specific quote characters. These are valid quote characters: ' ", these are not: ‘ ’ “ ”.
The result() Function
The result() function passes a value for use in the alert message or event message associated with the alert. The passed value is available in the %V substitution. The expression defined in the result() function can be any combination of object IDs, numeric values, and strings allowed in the normal alert formula logic. The syntax is:
result(expression)
For example, if temperature is provided via object ID o_126, the following formula would return the temperature value for use in the alert message or the event message associated with the alert:
result(o_126) > 35
If the temperature is returned in Celsius, and you want it displayed in the alert message or event message in Fahrenheit, you could use the following formula:
result((o_126 * 1.8) + 32) > 120
The expression passed to the result() function can also refer to multiple objects. For example, suppose you wanted to determine the total number of IP DHCP addresses in a subnet. You could add together the following example objects:
- o_5678 = number of addresses in use.
- o_8910 = number of addresses free.
- o_1112 = number of addresses pending.
The result() function would look like this:
result(o_5678 + o_8910 + o_1112)
There are two optional arguments to the result function: enums and label. These provide for further descriptive text to be substituted into the alert message or event message associated with the alert. The syntax is:
result((expression), enums={number:'value',…}, label='label object')
The enums argument specifies a list of substitution characters that Skylar One should use to translate the value passed by the result() function. In general, this argument is used only if the expression refers to a collection object that is of type Config Enum. This argument must be contained within curly braces {} and is formatted with the value and substitution characters separated by a colon, and each element separated by commas.
For example, suppose you want to monitor a status object, o_987. Suppose this status object is of type Config Enum and can return integer values 3, 4, 5, or 6. These integer values map to the following states:
- 3 = OK
- 4 = nonCritical
- 5 = critical
- 6 = nonRecoverable
If collection object o_987 is passed using the result() function, the integer value of o_987 is stored in the %V variable. By using the enums argument, you can pass the string value instead:
result(o_987, enums = {3:'OK',4:'nonCritical', 5:'critical', 6:'nonRecoverable'})
The label argument passes an additional value for use in the alert message or event message associated with the alert. The passed label value is available in the %L substitution variable.
For example, suppose you have multiple temperature probes and you want to capture which temperature probe is generating the alert. If collection object o_5678 contains the name of the temperature probe, you could supply the following value in the label argument (again using a conversion from Celsius to Fahrenheit):
result(((1.8 * o_1234)+32), label='o_5678')
The value of the label argument can now be used in an event definition using the %L substitution.
The value of the label argument must be in single quotes.
The threshold() Function
Like the result() function, the threshold() function passes a value for use in the alert message or event message associated with the alert. The passed value is available in the %T substitution variable. The syntax is:
threshold(expression)
The threshold() function is intended to make the value of a threshold that triggered an alert visible in the corresponding log message and/or event.
As with the result() function, the threshold() function can contain a combination of object IDs and numeric values.
For example, suppose you are monitoring temperature. The object o_1234 contains temperature in Celsius. The threshold t_99 contains the maximum allowable temperature. You could enter the following formula to convert the temperature values to Fahrenheit and generate an alert when the temperature reading exceeded the allowable maximum:
result((1.8 * o_1234)+32) > threshold((1.8 * o_t_99)+32)
If an alert used the result() function with the label argument and the threshold() function, the alert message might look like this:
%L reporting temperature of %V F, threshold is %T F
The values substituted in to replace %L, %V and %T are the actual values captured in the alert formula definition by the result() and threshold() functions. If the alert is generated, the alert message might look like this:
Backplane-probe reporting temperature of 130 F, threshold is 120 F
The items in bold are the substituted values.
The active() Function
The active() function checks the state of another alert in the same Dynamic Application. If the alert is active, the active() function returns the value TRUE. The active() function can be used in combination with other expressions. When used in combination with other expressions, if the entire expression resolves to TRUE, a new alert is generated. The syntax is:
active(alert_ID)
To use the active() formula to check the state of an alert, the alert being checked must have the Maintain State set to Yes.
For example, suppose you are monitoring a circuit for failed authentications. You could define two alerts:
The first alert is assigned ID a_175 by Skylar One. In the first alert, the object o_16060 contains the number of failed authentications. The object o_16056 contains the name of the circuit being monitored for failed authentication.
result(o_16060, label='o_16056') > threshold(13)
In this expression, a high-end threshold is defined. In this expression, if more than 13 failed authentications occur on the circuit specified in o_16056, an alert is triggered. This alert defines the problem. For this alert, the Maintain State drop-down list is set to Yes.
The second alert is assigned ID a_176 by Skylar One. In the second alert, we define a low-end threshold for failed authentications.
result(o_16060, label='o_16056') < threshold(7) and active(a_175)
In this expression, if less than seven failed authentications occur on the circuit specified in o_16056, AND alert a_175 is still active, a new alert is triggered. The second alert defines the "healthy" criteria.
Suppose we had defined a critical event policy based on alert a_175. This event would warn that too many failed authentications occurred on circuit o_16056.
Now suppose we wanted to clear that critical event when failed authentications fall back to an acceptable number. We could create a healthy event policy based on alert a_176. We could define this event to auto-clear the previous critical event. The new event would inform you that failed authentications were back within acceptable levels.
The avg() Function
The avg() function calculates and returns the average of all values returned by a collection object when that collection object returns a list of values. When a collection object returns a single value, the avg() function will return that single value. The syntax is:
avg(object_ID)
For example, suppose a device has three network interfaces. Now suppose the object o_1234 contains the value for "octets in".
On our example device, we would have three separate instances of object o_1234. We could use the avg() function to calculate and return the average of ALL instances of object o_1234. If that average is greater than 1,000,000 octets, an alert is triggered:
avg(o_1234) > 1000000
The deviation() Function
The deviation() function allows you to define alerts that are triggered when an object has a value that is outside the "normal" range for the current hour on the current day of the week. The syntax is:
deviation(object_ID)
The deviation() function allows you to compare the current value of a collection object to a specified number of standard deviations outside the "normal" value for the object. You can specify that you want to trigger an alert if the current value falls outside the specified number of standard deviations from "normal".
To use the deviation() function, you must configure Skylar One to store and calculate the mean values and standard deviations for a collection object. You do this by selecting the Enable Deviation Alerting field on the Collection Objects page. You then specify the minimum and maximum number of weeks to collect deviation data for the object.
Skylar One must have already collected at least the minimum number of weeks' worth of data for an object before Skylar One will evaluate alerts that use the deviation() function.
To use the deviation() function, you must specify a minimum value of at least two weeks. This value is not configured by default, and in some cases a PowerPack upgrade can overwrite this value. You are responsible for making sure that the min/max week settings are properly configured on the Collection Objects page with your preferred defaults.
Make sure that the raw data retention settings for your Dynamic Application performance data being is correct, as the deviation() function is dependent on this data. The system default in most cases is 7 days, and the deviation alerting feature will require you to either increase this at the system level or go in manually to each Dynamic Application for a device and set the window to something large. For example, 30 days is ideal in cases with 4 weeks in the max window settings. ScienceLogic recommends that you do not set your maximum week value too high' in most cases, a minimum of 2 weeks and maximum of 4 weeks will be sufficient.
Skylar One evaluates the deviation() function against the aggregated values collected for multiple weeks. The number of weeks used during the evaluation depends on the amount of data available and is at least the minimum number of weeks specified for the collection object.
After Skylar One has collected the minimum number of weeks' worth of data for an object, Skylar One calculates the mean value for that object at every hour of every day and then calculates the standard deviations from that mean value.
The deviation function uses the following formula to examine the value of an object:
(current value of a collection object -mean value for current hour on current day of week) / (standard deviation for current hour at current day of week)
The deviation() function converts the value of (current value of a collection object -mean value for current hour on current day of week) to a positive value. Therefore, you should always compare the results of the deviation function to zero ("0") or to a positive number.
The actual substitution will come out as "False and 0" in cases where:
- There is not enough data, such as when you only have 7 days of data and you need 2 weeks (14 days).
- Nothing deviated.
"False and 0" might cause some confusion, but it was a strategic way to get an entire deviation formula to return false."
The deviation() function sends data to the collector in the form of upserts to calculate the standard deviation. In cases where a collector failover might happen, or if a device moves collector groups, the standard deviation data is re-upserted on the new collector.
Also, when enabling deviation alerting on a collector, if you set the raw data retention threshold and the standard deviation minimum weeks alerting window, any time that the deviation alerting window is higher than the raw data retention threshold, deviation alerting will not be available after a collector failover. Deviation alerting will be available only when Skylar One has gathered enough new raw data to meet the minimum weeks specified by standard deviation.
Some possible uses for the deviation function are:
- Determining if an application is functioning properly. For example, if a log file for an application begins to grow at a rate outside the "normal" range, you can trigger an alert to determine if there is a problem with the application.
- Monitoring security. For example, if bandwidth usage exceeds the normal activity, you can trigger an alert that indicates that your network might have been compromised.
Example 1
For example:
- Suppose Skylar One has already collected four weeks' worth of data for an object (o_123).
- Suppose that for the last four weeks, every Monday between 09:00 and 10:00, the mean value for o_123 is "50".
- Suppose that 68% of all values on Monday between 09:00 and 10:00 fall within +/- "10" of the mean value (that is, between 40 and 60).
- For o_123 on Mondays between 09:00 and 10:00, a standard deviation of "1" is +/- "10".
Suppose we specify the following alert formula:
deviation(o_123) > 1
This alert formula specifies that if o_123 collected a value outside "1" standard deviation of the "normal" value, Skylar One should trigger an alert.
If on Monday at 09:30, the value of o_123 is "45", the deviation function performs the following calculation:
(45-50)/10 > 1
This evaluates to FALSE, therefore Skylar One would not trigger an alert.
Example 2
For another example:
- Suppose Skylar One has already collected four weeks' worth of data for a collection object (o_789).
- Suppose that on Monday, between 09:00 and 10:00, the value of o_789 is always "50" and has not varied at all during the entire four weeks.
- The mean value of o_789 on Mondays, between 09:00 and 10:00 is "50".
- 68% of all values on Mondays between 09:00 and 10:00 will fall within +/- "0" of the mean.
- For o_789 on Monday between 09:00 and 10:00, a standard deviation of "1" is +/- "0".
Suppose on Monday at 09:15, the value of o_789 is "50". If this is the expected behavior, we could specify:
deviation(o_789) >1
The deviation function performs the following calculation:
(50-50)/0 > 1
This evaluates to FALSE, therefore Skylar One would not trigger an alert.
Now suppose that on Monday at 09:30, the value of o_789 is "45", the deviation function performs the following calculation:
(45-50)/0 > 1
In this case, the deviation function would return "infinity". The formula will evaluate to TRUE, and trigger an alert. If we did not expect to repeatedly collect the same value every Monday between 09:00 and 10:00, this formula might be appropriate to monitor object o_789.
In the alert editor, you can specify infinity as float("inf")
If you do expect the first standard deviation to be "+/- 0", that is, if you expect the value of an object to never fluctuate, you can test for this with the following:
deviation(o_789) == float("inf")
Because (45-50)/0 does equal infinity, this will evaluate to TRUE and trigger an alert. We can define this alert to provide details about a standard deviation of “0”.
The 68-95-99.7 rule
Statistically, 99.7% of all values lie within three standard deviations from the mean.
In theory, if an alert formula uses a standard deviation of "1" as the threshold, such as the one in Example 1, the alert will trigger for 32% of the collected values.
Using the 68-95-99.7 rule, the following list indicates the percentage of collected values that will trigger an alert for different standard deviation thresholds:
- 1 (one) standard deviation. 32% of collected values will fall outside this range. Therefore, an alert that compares an object's value to a value of :1 (one) standard deviation will be triggered 32% of the time.
- 2 (two) standard deviations. 5% of collected values will fall outside this range.
- 3 (three) standard deviations. 0.3% of collected values will fall outside this range.
For example:
deviation(o_123)> 1
will trigger an alert on 32% of the values of o_123.
The find() Function
The find() function searches a collection object for a specific alpha-numeric string. The syntax is:
object_ID.find('alpha-numeric string')
If the collection object contains the sting, the find() function returns the location of the string in the collection object, where 0 is the first character of the collection object. If the collection object does not contain the string, the find() function returns -1 (negative one).
For example, suppose you want to trigger an alert if inbound bandwidth-usage drops below a certain level. Suppose collection object o_4567 collects "inbound octets". Suppose collection object o_4568 returns the type of interface. Now suppose you don't want to trigger an alert if this condition occurs on a loopback interface. You could write an alert like this:
result(o_4567) < 500 and o_4568.find('loopback') = -1
This logic says "if object o_4557 is less than 500 and object o_4558 does not contain the text "loopback" (that is, the find function cannot find the string "loopback", so returns "-1"), trigger an alert.
The global() Function
The global( ) function returns the collected value (or, for list objects that are not collected at each collection, the last collected value) of a collection object regardless of the group or index that is currently being evaluated for the alert formula.
The syntax is:
global(object_ID)
When you include multiple collection objects in an alert, those collection objects must be in the same group. If a list or table of values is returned by a collection object, the platform evaluates the alert for each index in that group.
You can use the global( ) function to include a collection object that returns a single value in an alert formula that also includes collection objects that return lists.
For example:
Suppose that you have a group, Group 1, that contains the following two collection objects:
- o_123. Contains file system utilization in percent.
- o_124. Contains name of file system.
Suppose that you have an additional collection object that is not aligned with any group:
- o_125. Contains a single value - the file system that is used for data storage for the primary application.
Suppose you want to trigger an event when a file system is over 80% utilized:
- Suppose that you want to trigger a Major event for all file systems except the one used for data storage for the primary application.
- Suppose you want to trigger a Critical event for the file system used for data storage for the primary application.
To do this, you can create two alerts:
- An alert for the file system for data storage for the primary application
- An alert for all other file systems.
In the alert, the object o_125 will be compared to o_124 to determine whether this is the file system for data storage for the primary application.
Because o_125 is a single value in a different group/index than the other collection objects, we use the global() function to return the value for o_125.
The two alerts would look like this:
o_123 > 80 and 'o_124'.find('global(o_125)') > -1
o_123 > 80 and 'o_124'.find('global(o_125)') = -1
The first alert will trigger only for the file system for data storage (file system name is the same name as contained in o_125).
The second alert will trigger for all other file systems (file system name is not the same as in o_125).
NOTE: If the collection object specified in the global() function is a string, the Skylar One system will automatically substitute the value surrounded by single quote characters.
The log() Function
The log() function calculates and returns the logarithm of a specified number to the specified base. If base is not specified, the log function uses base e to return the natural logarithm. The syntax is:
log(number, base)
For example:
log(o_123, 10)
This example would calculate the base-10 logarithm of the value of collection object o_123.
The prior() Function
The prior() function returns the previous value of a collection object (from the previous polling session). The syntax is:
prior(object_ID)
For example:
o_123 > prior(o_123)
This example evaluates to true if the value of object o_123 is now greater than it was during the last polling session.
Suppose you have defined a polling frequency of five minutes for a Dynamic Application. Every five minutes, Skylar One will retrieve the value from object o_123. The example above could be used to trigger an alert if the value of object o_123 is now greater than it was five minutes ago.
The round() Function
The round() function rounds the value of a collection object to a specified number of digits. The round() function returns a floating point value.
The syntax is
round(object ID, number_of_digits)
- The round() function rounds values to the closest multiple of 10 to the negative n.
- round (0.5) returns 1.0
- round (-0.5) returns -1.0
- If you omit the optional number_of_digits argument, the function defaults to a whole number and ".0:, like "2.0"
For example, suppose object o_567 contains the value "4.688".
round(o_567, 2)
would return the value
4.67
The sum() Function
The sum() function calculates and returns the sum of all values returned by a collection object when that collection object returns a list of values. When a collection object returns a single value, the sum() function will return that single value. The syntax is:
sum(object_ID)
For example, suppose a device has three network interfaces. Now suppose the object o_1234 contains the value for "octets in".
On our example device, we would have three separate instances of object o_1234. We could use the sum() function to calculate and return the sum of ALL instances of object o_1234. If that sum is greater than 1,000,000 octets, an alert is triggered:
sum(o_1234) > 1000000
Date & Time Variables
You can use the time and date variables to define alerts that occur only during specified dates or times.
Values starting with the word “local” refer to the local date and time, specified in System Timezone field in the Behavior Settings page (System > Settings Behavior).
For every “local” value there is a “utc” equivalent that uses values based on UTC.
The following is a list of time and date variables that can be used in alerts:
- localyear. The year, in local date and time, as specified in the System Timezone field in the Behavior Settings page. Values can be any four-digit year. For example, 2007.
- localmonth. The month, in local date and time, as specified in the System Timezone field in the Behavior Settings page. Values can be 01 – 12, with 01 being January and 12 being December.
- localmonthday. The day of the month, in local date and time, as specified in the System Timezone field in the Behavior Settings page. Value can be 01 – 31.
- localhour. The hour, in local date and time, as specified in the System Timezone field in the Behavior Settings page. Values can be 0 – 23, with 0 being midnight and 23 being 11PM.
- localminute. The minutes, in local date and time, as specified in the System Timezone field in the Behavior Settings page. Values can be 0 -59, with 0 being 0 minutes after the hour and 59 being 59 minutes after the hour.
- localsecond. The seconds, in local date and time, as specified in the System Timezone field in the Behavior Settings page. Values can be 0 – 61. 60 is used for leap seconds; 61 is used for double leap-seconds.
- localweekday. Day of the week, in local date and time, as specified in the System Timezone field in the Behavior Settings page. Values can be 0 – 6, with 0 being Monday and 6 being Sunday.
- localyearday. Day of the year, in local date and time, as specified in the System Timezone field in the Behavior Settings page. Values can be 1 – 366.
- utcyear. The year, in UTC date and time. Values can be any four-digit year. For example, 2007.
- utcmonth. The month, in UTC date and time. Values can be 01 – 12, with 01 being January and 12 being December.
- utcmonthday. The day of the month, in UTC date and time. Value can be 01 – 31.
- utchour. The hour, in UTC date and time. Values can be 0 – 23, with 0 being midnight and 23 being 11 PM.
- utcminute. The minutes, in UTC date and time. Values can be 0 -59, with 0 being 0 minutes after the hour and 59 being 59 minutes after the hour.
- utcsecond. The seconds, in UTC date and time. Values can be 0 – 61. 60 is used for leap seconds; 61 is used for double leap-seconds.
- utcweekday. Day of the week, in UTC date and time. Values can be 0 – 6, with 0 being Monday and 6 being Sunday.
- utcyearday. Day of the year, in UTC date and time. Values can be 1 – 366.
Example 1
For example, you could define an alert that is triggered only when both the following are TRUE:
- the value of o_999 falls to zero
- the condition occurs during business hours (between 8AM and 6 PM)
To define the alert, you could use the localhour variable:
result(o_999) == 0 and localhour >= 8 and localhour <= 18
Example 2
You could also define an alert that excludes weekend days. The alert would be triggered only when both the following are TRUE:
- the value of o_999 falls to zero
- the condition occurs during weekdays
To define the alert, you could use the localweekday variable. The days of the week are numbered from 0 to 6, with Saturday being 5 and Sunday being 6. To exclude weekends you could define the alert to trigger only when the “localweekday” number is less than 5
result(o_999) == 0 and localweekday < 5
Example 3
You could also define an alert that is triggered only on the first day of the month. The alert would be triggered only when both the following are TRUE:
- the value of o_999 falls to zero
- the condition occurs when the day of the month is “1”
To define the alert, you could use the localmonthday variable:
result(o_999) == 0 and localmonthday == 1
The tab_idx Variable
The tab_idx variable allows you to apply an alert only to specific indexes when a collection object returns a list of values. For SNMP Dynamic Applications, the tab_idx variable returns the SNMP index that corresponds to the collection object values that are currently being evaluated. For other Dynamic Applications, the tab_idx variable returns the location in the list of values that corresponds to the collection object values that are currently being evaluated.
For example:
- Suppose that in a list of values representing device state, there may be six potential indexes in the list of values, but only 1, 3, 4, and 6 are used.
- Suppose that the object o_999 represents the device state, with 0 being healthy.
You could define the alert to check when object o_999 does not equal zero (is not healthy). But you could limit the alert to check only indexes 1, 3, 4, and 6. For an SNMP Configuration or SNMP Performance Dynamic Application, the alert formula would be:
o_999 != 0 and tab_idx in ['.1','.3','.4','.6']
For all other types of Dynamic Applications, the alert formula would be:
o_999 != 0 and tab_idx in ['1','3','4','6']
Notice the syntax for the tab_idx variable. You must use the syntax as it appears in the example:
- Include the text "in" after the tab_idx variable
- Surround the list of index numbers with square brackets
- Surround each index with single-quotation marks (')
- For SNMP Configuration and SNMP Performance Dynamic Applications, precede each index with a period (.)
- Separate the list of index numbers with commas (,)
Creating an Event Policy for an Alert
When Skylar One generates an alert for a device, the log message associated with that alert is inserted into the device logs. Optionally, you can associate an alert with an event policy. When Skylar One generates an alert that is associated with an event policy and all the conditions defined in the event policy are met, Skylar One will generate an event. In addition to appearing in the device logs, the event will appear:
- On the Events page, as well as on the Event Console page (Events > Classic Events, or the Events tab in the classic user interface).
- On the Events panel of the Device Investigator.
- On the tab of the Device Investigator.
- In the tab in the Device Reports panel.
- In the tab in the Device Reports panel.
To create an event policy for an alert:
- Go to the Dynamic Applications Manager page (System > Manage > Dynamic Applications).
- Find the Dynamic Application you want to add an event policy for. Click its wrench icon (). The Dynamic Applications Properties Editor page is displayed.
- Click the tab. The Dynamic Applications Alert Objects page is displayed.
- In the Dynamic Applications Alert Objects page, find the alert in the Alert Object Registry pane. Click its event icon ().
- The Event Policy Editor page is displayed. The following fields in the Event Policy Editor are populated with information about the alert
- Event Source. This field is set to Dynamic, which tells Skylar One that this event policy matches alerts generated using Dynamic Applications.
- Policy Name. This field is populated with the value you specified in the Policy Name field for the alert.
- Link-Alert. This field appears on the tab in the Event Policy Editor. This field is populated with a link to the alert, which tells Skylar One that the alert you selected can trigger this event policy.
- Before you save the event policy, you must supply a value in the following fields:
- Operational State. Specifies whether Skylar One should trigger this event if the associated alert is generated and all the conditions defined in the event policy are met. Choices are:
- Enabled. Skylar One will trigger this event if the associated alert is generated and all the conditions defined in the event policy are met.
- Disabled. Skylar One will never trigger this event. Selecting this option does not stop Skylar One from generating the associated alert.
- Event Severity. The severity value to associate with events created with this event policy. Choices are:
- Healthy
- Notice
- Minor
- Major
- Critical
- Event Message. The event message that Skylar One will associate with instances of this event. If you want to use the message generated by the alert that triggers this event, enter "%M" in this field.
- You can optionally specify values in the additional fields, including the Policy Description field and the fields that appear in the tab. For more information about the Event Policy Editor,
- The Event Source field in the tab.
- The Link-Alert field in the tab.
- Click the button to save the event policy.
Editing an Alert
To edit an already-defined alert:
- Go to the Dynamic Applications Manager page (System > Manage > Dynamic Applications).
- In the Dynamic Applications Manager page, find the Dynamic Application for which you want to edit an alert. Click its wrench icon ().
- Click the tab for the Dynamic Application.
- In the Dynamic Applications Alert Objects page, find the alert in the Alert Object Registry pane. Click its wrench icon ().
- The fields in the top pane are populated with values from the selected alert. You can edit the value of one or more fields. For a description of each field, see the Creating an Alert section.
- Click the button to save your changes to the alert.
Deleting an Alert
You can delete an alert from a Dynamic Application. To do this:
- Go to the Dynamic Applications Manager page (System > Manage > Applications).
- In the Dynamic Applications Manager page, find the Dynamic Application for which you want to delete an alert. Click its wrench icon ().
- Click the tab for the Dynamic Application.
- In the Dynamic Applications Alert Objects page, find the alert in the Alert Object Registry pane. Click its delete icon (). The alert will be deleted from Skylar One. If an event policy was associated with the alert, you must manually delete the event in the Event Policy Manager page (Registry > Events > Event Manager).
Validating an Alert
After you have created an alert formula, you can use a command line interface (CLI) tool to validate that the alert works as intended. This tool enables Dynamic Application developers to validate alerts by directly inserting data into the Alerting module without using a full Skylar One System.
Running the Alert Validator Command Line Tool
The alert_validator.py Python CLI tool enables Dynamic Application developers to validate the alert formulas that are included in Dynamic Applications using shell sessions at the command line. This tool is located in the following folder:
/opt/em7/backend/alert_validator.py
The alert_validator.py tool can be run only from a Data Collector or All-In-One Appliance.
The alert_validator.py tool checks an alert formula to validate that the following are all true:
- All collection object and device threshold object references are structured correctly and are valid for the specified Dynamic Application.
- Any collection objects that are referenced outside of global(), sum(), and avg() all belong to the same group of metrics.
- The following functions are structured correctly and contain a valid collection object reference:
- sum
- avg
- global
- prior
- changed
- deviation
- The active() function alert reference is structured correctly and is valid for the specified Dynamic Application, with an alert formula that belongs to the same group as the alert being tested.
- The result() and threshold() functions are used correctly (including optional result arguments).
- The alert formula contains no syntax errors.
To run the alert_validator.py tool, you must first run a command to create JSON files that capture data about the Dynamic Application. This command uses the following structure, and must always end with the device ID and Dynamic Application ID:
sudo -u s-em7-core python /opt/em7/backend/alert_validator.py --capture-data [Device ID Dynamic Application ID]
Replace [Device ID Dynamic Application ID] with the Device ID and Dynamic Application ID, respectively. Do not include the brackets. The Device ID and Dynamic Application ID should be separated by a space and no other characters.
When you run this command, a folder containing all of the generated JSON files is created in the /tmp/ folder. The folder name includes the Dynamic Application ID.
After the folder with the JSON files has been created, you can then run a separate command to evaluate the alert formulas. This command uses the following structure:
sudo -u s-em7-core python /opt/em7/backend/alert_validator.py -j AlertInternalState.json -j DynamicAppAlert_[Alert ID].json -j DynamicAppThreshold_[Threshold ID].json -j DynamicAppObjects_[Object ID].json -j DynamicAppObjectSchema_[Dynamic Application ID].json
Replace [Alert ID], [Threshold ID], [Object ID], and Dynamic Application ID with the Alert ID, Threshold ID, Object ID, and Dynamic Application ID, respectively. Do not include the brackets.
ScienceLogic recommends running the command from the folder in which the JSON files are stored so you do not need to include the path for each JSON file.
If the alert validation is successful, a detailed report will display indicating that the specified alerts were successfully triggered.
If the alert validation fails, a message will display that specifies the reason why it failed.
Example
The following example creates JSON files to capture data for device ID 3, Dynamic Application ID 1429:
sudo -u s-em7-core python /opt/em7/backend/alert_validator.py --capture-data 3 1429
After the JSON files have been created, you can then use them to evaluate the alert formulas. For example:
sudo -u s-em7-core python /opt/em7/backend/alert_validator.py -j AlertInternalState.json -j DynamicAppObjects_3.json -j DynamicAppThreshold_651.json -j DynamicAppAlert_2111.json -j DynamicAppObjectSchema_1429.json
Indexing
This section describes describes how Dynamic Applications handle and organize data when a single collection object collects multiple instances or values.Dynamic Application indexing determines how Skylar One creates unique identifiers for each instance, how those instances are displayed in configuration tables and performance graphs, and how they are referenced in alert formulas.
This section covers the default indexing methods, explains how instance value creation differs across protocols (SNMP, Snippet, and others), describes how to designate a custom index, and explains the system settings that affect indexing behavior.
What is Dynamic Application Indexing?
When Skylar One performs collection for a collection object, the response might contain a list of values for that collection object instead of a single value.
For example, suppose a collection object collects the amount of space used in a file system. For that single collection object, a device might respond with a list of values. Each value in the list is the amount of space used for each of the file systems on that device.
When a collection object returns multiple values, Skylar One uses Indexing to track each of the values. Each of the values in the list is given an index, which is a numerical value that allows Skylar One to:
- Maintain associations between collection objects in the same Dynamic Application. For example, suppose a collection object collects the amount of space used in a file system and a device responds with multiple values. Suppose a second collection object returns the names of those file systems. The lists of values for each collection object should be assigned the same index, so that the values for space used are associated with the correct file system name in graphs and reports. The first value in the list of amount of space used values is associated with the first value in the list of names, etc.
- Maintain an association between values collected at different times for the same collection object. Every time Skylar One collects a list of values for a collection object, each value that is associated with a value in the previously collected list should have the same index value as the previous value. For example, suppose a collection object collects the amount of space used in a file system and a device responds with multiple values. Suppose that during the first collection, the amount of space used for the file system called "C:\" is assigned index "1". The next time Skylar One collects the list of values, the amount of space used for the file system called "C:\" should again be associated with index "1". When Skylar One generates a graph of data, each line on the graph is drawn using values with the same index.
Index values are unique and maintain association only for each group of collection objects in each Dynamic Application for each device. For example:
- In a single Dynamic Application, a collection object in group 1 can have the same index values as a collection object in group 2, but the collected values for these collection objects are not associated with each other.
- In a single Dynamic Application, for each group of collection objects, Skylar One maintains separate sets of indexes for each aligned device. A collection object in group 1 might have different index values for device A and for device B.
Skylar One has a default method to assign index values. For some Dynamic Applications, the default method is not sufficient and might create incorrect associations between values. Typically, this is caused when the list of values for a collection object changes order from one collection to the next. If the default indexing method is not sufficient, you can designate a collection object that will control the indexing behavior.
Index values are internal to Skylar One and are typically not displayed to users. Skylar One displays index values as the labels for performance graphs only when collected labels are not available.
How Indexing Affects Configuration Tables
For each group of collection objects defined in a configuration Dynamic Application, Skylar One displays a table in the configuration report for that Dynamic Application:
- Each collection object is assigned its own column in the table.
- Each index is assigned its own row in the table.
If a given collection object does not have a collected value for an index, an empty field will be displayed for that row and column.
How Indexing Affects Performance Graphs
For each presentation object defined in a Dynamic Application, Skylar One generates a graph that includes one line for each index.
For example, suppose a presentation formula in a Dynamic Application includes a single collection object:
o_123
Suppose that when this Dynamic Application is aligned to a device, Skylar One collects a list of three values for o_123.
- The graph for this presentation object will display three lines, one for each index.
- When new data is collected, the new poll time will be included on the x-axis of the graph.
- For each of the three lines, the data point (y-axis) for the new poll time will be the collected value for that index.
For example, suppose Skylar One assigns indexes 0, 1, and 2 to the lists of collected values for o_123. Suppose Skylar One then performs three polls at 00:00, 00:05, and 00:10. Suppose the indexed collected values look like this:
| Index | 00:00 | 00:05 | 00:10 |
| 0 | 6 | 8 | 7 |
| 1 | 15 | 30 | 20 |
| 2 | 50 | 60 | 55 |
When Skylar One generates the performance graph:
- One graph line will include the values 6, 8, and 7.
- One graph line will include the values 15, 30, and 20.
- One graph line will include the values 50, 60, and 55.
Now suppose that during the 00:15 poll, a list of three values is returned for the collection object, but the values are assigned the indexes 1, 2, and 3:
| Index | 00:00 | 00:05 | 00:10 | 00:15 |
| 0 | 6 | 8 | 7 | - |
| 1 | 15 | 30 | 20 | 9 |
| 2 | 50 | 60 | 55 | 25 |
| 3 | - | - | - | 70 |
The graph will now include four lines:
- One graph line will include the values 6, 8, and 7. This line will not include a data point for the 00:15 poll.
- One graph line will include the values 15, 30, 20, and 9.
- One graph line will include the values 50, 60, 55, and 25.
- One graph line will not include data points for the 00:00, 00:05, and 00:10 polls, and will include the value 70 for the 00:15 poll.
For presentation formulas that contain multiple collection objects, Skylar One evaluates the formula for the values at each index. A graph line is drawn for each index for which there are enough collected values to calculate a result. For example, suppose a presentation object has the following formula:
o_123 + o_321
If Skylar One collects the following lists of values for o_123 and o_321 and assigns the following index values:
| Index | o_123 | o_321 |
| 0 | 100 | - |
| 1 | 1000 | 750 |
| 2 | 100 | 30 |
| 3 | - | 80 |
Skylar One will evaluate the presentation formula for each of the four indexes. However, there are only enough collected values to calculate a result for two indexes (1 and 2). Therefore, two graph lines will appear on the graph.
Suppose the presentation formula was changed to make o_123 optional:
o_123 + {o_321}
For the same set of collected values, the graph would include three graph lines, which would correspond to indexes 0, 1, and 2. Index 3 would not be included, because object o_123 is not optional and does not include a value at index 3.
The indexes assigned to collected values are also used to label the lines in the graph key that appears in the lower right of the Performance page. When a graph line is drawn for an index, Skylar One looks for a collected value that matches the following criteria:
- Was collected for a collection object in the Dynamic Application that has a Class Type of 101 Label (Hourly Polled) or 104 Label (Always Polled).
- Has the same group value as the collection objects that were used to draw the graph line.
- Has the same index value as the values used to draw the graph line.
If Skylar One finds a collected value that matches the criteria, that value is displayed in the graph key for that graph line. If Skylar One does not find a collected value that matches the criteria, the graph line is labeled "Index X", where X is the assigned index for the values used to generate the graph line.
The poll time for the collected value is not considered when Skylar One chooses a label for a graph line. For collection objects that have a Class Type of 101 Label (Hourly Polled) or 104 Label (Always Polled), Skylar One stores only the last collected value.
How Indexing Affects Alerts
When Skylar One evaluates an alert, the formula is evaluated separately for each index assigned to the collected values.
For example, suppose an alert formula in a Dynamic Application uses one collection object:
o_123 > 0
Suppose that when this Dynamic Application is aligned to a device, Skylar One collects a list of three values for o_123. Skylar One will evaluate the alert formula three times, once for each collected value.
Suppose another alert formula uses two collection objects:
(o_123 / 100) * o_321 > 90
Suppose Skylar One collects the following lists of values for o_123 and o_321 and assigns the following index values:
| Index | o_123 | o_321 |
| 0 | 100 | 80 |
| 1 | 1000 | 750 |
| 2 | 100 | 30 |
During each poll period, Skylar One will evaluate the alert formula three times, once for each pair of values for each index.
Now suppose that for a different device, Skylar One collects a list of three values for each collection object, but the indexes assigned to the collected values do not match:
| Index | o_123 | o_321 |
| 0 | 200 | - |
| 1 | 300 | 160 |
| 2 | 100 | 30 |
| 3 | - | 80 |
For this set of collected values, the alert formula will be evaluated four times, once for each index assigned to the collected values. However, the evaluation for indexes 0 and 3 will fail because not all the collection objects have a value for that index.
The Default Indexing Method
For each group of collection objects in each Dynamic Application associated with a single device, Skylar One maintains a list of index values. When a list of values is collected for a collection object, Skylar One uses the following information about each value in the list to determine the index for that value:
- The ID for the device the data was collected from.
- The ID for the Dynamic Application the data was collected using.
- The ID for the group the collection object is included in.
- Where in the list of values the value appears, called the instance.
Each index in the list of indexes maintained by Skylar One has the same four attributes (device ID, Dynamic Application ID, group ID, and instance). During collection, Skylar One attempts to match each value in the list of collected values with an index in the list of indexes. If a match is found, i.e. the device ID, Dynamic Application ID, group ID, and instance are all identical, Skylar One associates the matching index with the collected value. If a match is not found, Skylar One creates a new record in the list of indexes for that device ID, Dynamic Application ID, group ID, and instance and assigns a new index value.
Instance Values and Index Creation for SNMP Dynamic Applications
For collection objects in Dynamic Applications that use the SNMP protocol, the instance of a value in a list of collected values is the SNMP index associated with the value. For example, suppose the SNMP OID used in a collection object is ".1.3.6.1.2.1.25.2.3.1.6". This OID represents the amount of storage space used (as reported by the Host Resources MIB). Suppose a device responds to this OID in the following way:
HOST-RESOURCES-MIB::hrStorageUsed.1 = INTEGER: 6097420
HOST-RESOURCES-MIB::hrStorageUsed.3 = INTEGER: 6097420
HOST-RESOURCES-MIB::hrStorageUsed.6 = INTEGER: 472112
HOST-RESOURCES-MIB::hrStorageUsed.7 = INTEGER: 1984116
The SNMP indexes for the returned values are ".1", ".3", ".6", and ".7". These SNMP indexes are used as the instance for each value when Skylar One assigns an index.
If Skylar One needs to create a new index record for an SNMP collection object, that is, the device ID, Dynamic Application ID, group ID, and instance do not match an existing index record, Skylar One will first attempt to use the numeric equivalent of the instance as the index. In the example above, Skylar One will attempt to create indexes 1, 3, 6, and 7.
If Skylar One tries to add an index record and determines that the index already exists for the same device ID, Dynamic Application ID, and group ID, Skylar One will create the new record with an index equal to one more than the current highest index value for that device ID, Dynamic Application ID, and group ID.
In the example above, suppose that Skylar One has already created index records for an instance other than ".1", ".3", ".6", and ".7" for the same device ID, Dynamic Application ID, and group ID. Suppose that it is the only instance that has an existing index record. Suppose that instance has been assigned index 7. When Skylar One attempts to create index records for the four instances in the example above, index records for instances ".1", ".3", and ".6" are successfully created with indexes 1, 3, and 6. Because index 7 is already taken for this device ID, Dynamic Application ID, and group ID, the index record for instance ".7" is created with index 8, which is one more than the current highest index value (7).
Instance Values and Index Creation for Snippet Dynamic Applications
For collection objects in Snippet Dynamic Applications, the instance of a value in a list of collected values is defined by the snippet code that collects that collection object. Collection objects are passed back to Skylar One by snippet code in a tuple. The first value in the tuple is the instance, the second value in the tuple is the collected value.
Skylar One creates index records for Snippet Dynamic Application collection objects with a method similar to that used for SNMP Dynamic Applications:
- If Skylar One needs to create a new index record for a snippet collection object, Skylar One will first attempt to use the value of the instance as the value of the index.
- If Skylar One tries to add a record for an index value that already exists for the same device ID, Dynamic Application ID, and group ID, Skylar One will create the new record with an index equal to one more than the current highest index value for that device ID, Dynamic Application ID, and group ID.
Instance Values and Index Creation for Other Dynamic Applications
For collection objects in Dynamic Applications that use a protocol of Database, SOAP, WMI, XML, and XSLT, the instance of a value in a list of collected values is the location at which that value appears in the response. The first value in the list is instance "0", the second value in the list is instance "1", and so on.
For example, suppose a collection object for a Database Dynamic Application runs a query that selects the column "speed" from a database table. Suppose the following list of data is returned:
| speed |
| 1000 |
| 500 |
| 1200 |
| 700 |
The instance values would be:
| speed | instance |
| 1000 | 0 |
| 500 | 1 |
| 1200 | 2 |
| 700 | 3 |
To create a new index record for a Database, SOAP, WMI, XML, or XSLT collection object, Skylar One will create the new record with an index equal to one more than the current highest index value for that device ID, Dynamic Application ID, and group ID. The first created index for a device ID, Dynamic Application ID, and group ID is 0.
Designating an Index
In cases where the order or size of the list of values for a collection object might change, the default method of assigning indexes is not sufficient to maintain the associations between collected values.
For example, consider the initial instance values that were assigned to the list of "speed" values in the previous example:
| speed | instance |
| 1000 | 0 |
| 500 | 1 |
| 1200 | 2 |
| 700 | 3 |
Now suppose that the list of values changes order during the next poll:
| speed |
| 1000 |
| 500 |
| 700 |
| 1200 |
The "700" and "1200" values are now matched to different instance values:
| speed | instance |
| 1000 | 0 |
| 500 | 1 |
| 700 | 2 |
| 1200 | 3 |
This means that when Skylar One stores the new values "700" and "1200", they are associated with different index values than the previously stored data. If these values are used in a performance graph, the new value of "700" will appear in the graph line for index 2 (which has "1200" as the previous data points), and the new value of "1200" will appear in the graph line for index 3 (which has "700" as the previous data points). If these values are used in a configuration table, Skylar One will detect a change from "700" to "1200" for index 2 and a change from "1200" to "700" for index 3.
When the default method of assigning indexes is not sufficient, you can designate a collection object in a group of collection objects as the index. When you designate a collection object as an index, Skylar One still uses the same information about each value in the list to determine the index for that value:
- The ID for the device the data was collected from.
- The ID for the Dynamic Application the data was collected using.
- The ID for the group the collection object is included in.
- The instance associated with the value.
When you designate a collection object as an index, Skylar One uses the value and location of the "index" collection object to define the instance. The collected values for the "index" collection object are recorded as the instances. For the collected values for the other collection objects in the same group, the instance is the collected value for the "index" collection object that appears at the same location in the list for that poll period.
For example, suppose that a group contains two collection objects:
- A collection object that collects the storage space used as reported by the Host Resources MIB (SNMP OID .1.3.6.1.2.1.25.2.3.1.6)
- A collection object that collects the storage description as reported by the Host Resources MIB (SNMP OID .1.3.6.1.2.1.25.2.3.1.3).
Suppose that the collection object that collects the storage description is designated as the index for the group. Suppose the first time this Dynamic Application collects data from "Device A", the device responds to the storage description OID in the following way:
HOST-RESOURCES-MIB::hrStorageDescr.1 = STRING: C:\
HOST-RESOURCES-MIB::hrStorageDescr.3 = STRING: D:\
HOST-RESOURCES-MIB::hrStorageDescr.6 = STRING: Virtual Memory
HOST-RESOURCES-MIB::hrStorageDescr.7 = STRING: Physical Memory
For this group of collection objects in this Dynamic Application for this device, Skylar One will create the following record of instances to internal indexes:
| instance | index |
| C:\ | 1 |
| D:\ | 3 |
| Virtual Memory | 6 |
| Physical Memory | 7 |
Skylar One will still attempt to use the numeric equivalent of the SNMP index as the index.
For the same first poll of the device, suppose the device responds to the storage used OID in the following way:
HOST-RESOURCES-MIB::hrStorageUsed.1 = INTEGER: 6097420
HOST-RESOURCES-MIB::hrStorageUsed.3 = INTEGER: 0
HOST-RESOURCES-MIB::hrStorageUsed.6 = INTEGER: 24863
HOST-RESOURCES-MIB::hrStorageUsed.7 = INTEGER: 27257
To determine the internal index to associate with the value at SNMP index ".1", 6097420:
- Skylar One determines the value for the designated index (the storage description) at the same location (SNMP index ".1"). This value is "C:\".
- Skylar One uses "C:\" as the instance value to match against the record of internal indexes for this group, Dynamic Application, and device.
- The instance value of "C:\" matches to internal index 1. When Skylar One stores the value "6097420", Skylar One associates the value with index 1.
Skylar One repeats this process for the other values returned for the storage used OID. For the first poll of the device, the following table shows the values returned for the storage used OID, the instance value Skylar One used, and the internal index that is associated with the stored values:
| collected value | instance | index |
| 6097420 | C:\ | 1 |
| 0 | D:\ | 3 |
| 24863 | Virtual Memory | 6 |
| 27257 | Physical Memory | 7 |
Every time Skylar One uses this Dynamic Application to collect data from the device, Skylar One determines the instance values using this method. Suppose that during the next poll, the device responds to the storage description OID in the following way:
HOST-RESOURCES-MIB::hrStorageDescr.1 = STRING: C:\
HOST-RESOURCES-MIB::hrStorageDescr.6 = STRING: Virtual Memory
HOST-RESOURCES-MIB::hrStorageDescr.7 = STRING: Physical Memory
HOST-RESOURCES-MIB::hrStorageDescr.8 = STRING: D:\
And responds to the storage used OID in the following way:
HOST-RESOURCES-MIB::hrStorageUsed.1 = INTEGER: 6097420
HOST-RESOURCES-MIB::hrStorageUsed.6 = INTEGER: 24863
HOST-RESOURCES-MIB::hrStorageUsed.7 = INTEGER: 27257
HOST-RESOURCES-MIB::hrStorageUsed.8 = INTEGER: 0
Notice that the values for the "D:\" drive have moved from SNMP index ".3" to SNMP index ".8".
To determine the internal index to associate with the values at SNMP index ".8":
- Skylar One determines the value for the designated index (the storage description) at SNMP index ".8". This value is "D:\".
- Skylar One uses "D:\" as the instance value to match against the record of internal indexes for this group, Dynamic Application, and device.
- The instance value of "D:\" matches to internal index 3. When Skylar One stores the value "D:\" and "0", Skylar One associates the values with index 3.
Therefore, the storage description and storage used values for the "D:\" drive are associated with the same internal index as was associated with the previous values for the storage description and storage used.
System Settings that Affect Indexing
By default, Skylar One throttles surges of multi-index Dynamic Application alerts on individual devices.
To this end, it ignores Dynamic Application alert messages when those messages spike beyond 25 alerts per second. This is done to prevent potential system outages in scenarios where a very large number of alerts are occurring more rapidly than the Data Collector can process them.
The "Skylar One Default Internal Events" PowerPack that is included in Skylar One contains an event policy, "System: Dynamic App Alert Surge," that notifies the system administrator when alerts for a device exceed that 25-per-second threshold and discards the current batch of messages.
You can adjust this default behavior in the Dynamic Alert per-device field on the System Threshold Defaults page (System > Settings > Thresholds > System).
To edit the threshold for Dynamic Application alert throttling:
- Go to the System Threshold Defaults page (System > Settings > Thresholds > System).
- In the Dynamic Alert per-device field, drag the slider or enter a new value in the text box to edit the threshold for incoming alerts for a Dynamic Application on a given device.
- Click .
Grouping Dynamic Application Data Using Collection Labels
This section describes how to use collection labels to view and manage collected data when multiple Dynamic Applications collect the same type of performance data from different devices or sources.
Collection labels enable you to consolidate similar data across Dynamic Applications into unified views, reports, and dashboards.
This section covers creating collection groups and labels, viewing and filtering existing labels, managing data normalization and handling duplicate values, understanding precedence rules for label alignment, and aligning presentation objects with collection labels so that data from different Dynamic Applications can be displayed and reported together.
What are Collection Labels and Collection Groups?
Collection Labels and Collection Groups allow you to group and view data from multiple performance Dynamic Applications in a single dashboard widget.
For example:
- Suppose you monitor phone systems from multiple vendors.
- Suppose you want to create a dashboard that displays the ten phone systems that drop the most calls.
- You could create a Collection Group called "Dropped Calls".
- You could create two Collection Labels: "Average Dropped Calls", and "Raw Dropped Calls".
- For each vendor, you could edit the appropriate performance Dynamic Application and align a collected value with "Average Dropped Calls" and align another collected value with "Raw Dropped Calls".
- You could then create a dashboard that displays the ten phone systems with the highest values for "Raw Dropped Calls" and also displays the ten phone systems with the highest values for "Average Dropped Calls".
Viewing the List of Collection Labels
The Collection Labels page (System > Manage > Collection Labels) displays a list of all the existing Collection Labels. By Default, Skylar One includes the following Collection Groups:
- Vitals. Includes the Collection Labels "CPU", "Memory", and "Swap".
- Video Performance. Includes Collection Labels for common performance metrics associated with video endpoint devices.
The Collection Labels page displays the following about each existing Collection Label:
- Label Name. Name of the Collection Label.
- Label Description. Description of the Collection Label. This field is optional.
- Group Name. Collection Group that contains this Collection Label.
- Frequent Data. Specifies whether frequently rolled up data is calculated for the Collection Label.
- Aligned Presentations. Presentation Objects aligned with this Collection Label.
- Aligned Devices. Devices that currently populate the Collection Label.
- Duplicates. Number of devices for which two or more Presentation Objects are aligned with the same Collection Label.
You can sort the list by a column's values by clicking on its column heading. You can also filter the items on the page by typing or selecting filter options in one or more of the filters found above the columns. For more information, see the topic on Filtering Inventory Pages.
Creating a Collection Group
You cannot create a Collection Group separately from creating a Collection Label. When you create a Collection Label, you can specify a new Collection Group or specify an existing Collection Group. If you specify a new Collection Group, Skylar One saves the new Collection Group when it saves the new Collection Label.
Creating a Collection Label
You can create a new Collection Label from the Collection Labels page (System > Manage > Collection Labels). To do so:
- Go to the Collection Labels page (System > Manage > Collection Labels).
- Click the plus-sign in the lower left of the page.
- Enter values in the following columns:
- Label Name. Name of the Collection Label. This field is required.
- Label Description. Description of the Collection Label. This field is optional.
- Group Name. Collection Group to align with the Collection Label. You can select from a list of existing Collection Groups or enter the name of a new Collection Group. This field is required.
- Frequent Data. Specifies whether frequently rolled up data is calculated for the Collection Label. If the Collection Label will include data that is collected every five minutes or more frequently, and you require that dashboard data be updated every 15 minutes or 20 minutes, select Yes in this field. This data is available immediately for use in a collection label.
- Save icon (
 ). Select this icon to save your new Collection Label.
- The new Collection Label appears in the page.
What is Normalization?
Normalization and roll-up are the processes by which Skylar One manages collected performance data for display and storage.
- Raw data is the data exactly as it was collected from a device or application.
- Normalized and rolled up data is data for which Skylar One has performed calculations, usually averaging raw data over a period of time.
Dynamic Applications can collect raw performance data from a device at the following intervals:
- 1 minute
- 2 minutes
- 3 minutes
- 5 minutes
- 10 minutes
- 15 minutes
- 30 minutes
- 1 hour
- 2 hours
- 6 hours
- 12 hours
- 24 hours
For performance Dynamic Applications, you specify this interval in the Poll Frequency field, in the Properties Editor page (System > Manage > Dynamic Applications).
Skylar One rolls up data so that reports with a larger timespan do not become difficult to view and to save storage space on the ScienceLogic database. When Skylar One rolls up data, Skylar One groups data into larger sets and calculates the average value for the larger set.
There are two types of roll up:
- Hourly. Way to group and average data that is collected at intervals of less than or equal to 60 minutes. Skylar One rolls up data and calculates an average hourly value for each metric. Hourly samples include samples from the top of the hour to the end of the hour. For example, for an hourly rollup of data collected at 1-minute intervals between 1 am and 2 am, the first data point would be the one collected at 01:00:00 and ending at 01:59:00.
- Daily. Way to group and average all data. Skylar One rolls up data and calculates an average daily value for each metric. Daily samples include samples from the beginning of the day until the end of the day. For example, for a daily roll-up of data collected at 1-minute intervals, the first data point is collected at 00:00:00 and the last data point is collected at 23:59:00.
Skylar One rolls up raw performance data as follows:
| Frequency of Raw Collection | Roll-up |
|---|---|
Every 1 minute | 60 minutes, 24 hours |
Every 2 minutes | 60 minutes, 24 hours |
Every 3 minutes | 60 minutes, 24 hours |
Every 5 minutes | 60 minutes, 24 hours |
Every 10 minutes | 60 minutes, 24 hours |
Every 15 minutes | 60 minutes, 24 hours |
Every 30 minutes | 60 minutes, 24 hours |
Every 60 | 60 minutes, 24 hours |
| Every 120 minutes or longer | 24 hours |
Before Skylar One normalizes data, Skylar One transforms the data. To transform data, Skylar One:
- For bandwidth data and data from Dynamic Applications of type "Performance", Skylar One derives rates from counter metrics.
- The rate from counter metrics are expressed in units-per-polling_interval. For example, rates for 5-minute collections are expressed as units-per-5-minutes.
- For data from Dynamic Applications of type "Performance", Skylar One evaluates presentation formulas. Counter metrics are first transformed into rates before evaluation.
NOTE: During the data transform steps, Skylar One does not directly roll up the raw data in the database tables.
When Skylar One rolls up data, Skylar One must normalize that data. To normalize data, Skylar One:
- groups and orders the data
- determines the sample size
- calculates count
- determines the maximum value
- determines the minimum value
- calulcates the mean value
- calculates the average value
- calculates the sum
- determines the standard deviation
NOTE: In Skylar One, normalized data does not include polling sessions that were missed or skipped. So for normalized data, null values are not included when calculating sample size, maximum values, minimum values, or average values.
Example
For example, suppose that every five minutes, Skylar One collects data about file system usage on the device named my_device. When Skylar One normalizes and rolls up the collected data for file system usage for my_device, Skylar One will:
- Apply any necessary data transforms (mentioned above).
- Repeat the following step for both hourly normalization and daily normalization:
- If this is the first data point for an hourly normalization or a daily normalization, insert summary statistics for that one data point:
- Sample size = 1
- Average = value of new data point
- Max = value of new data point
- Min = value of new data point
- Sum = value of new data point
- Standard Deviation = 0
- For all subsequent data points for an hourly normalization or a daily normalization, Skylar One will update the summary statistics for the already existing data points in the data set (either hourly data set or daily data set).
- If there are no gaps in collection, the summary statistics for hourly normalization will represent 12 data points, and the summary statistics for daily normalization will represent 288 data points.
What are Duplicates and How Does Skylar One Manage Them?
Multiple presentation objects can be aligned with a single Collection Label. For example, suppose that a Dynamic Application includes a presentation object for "memory used", and another Dynamic Application includes a presentation object for "memory usage". Suppose that both of these presentation objects are aligned with the Collection Label named "Memory".
Suppose that one of the devices monitored by Skylar One subscribes to both of those Dynamic Applications (for example, a Dynamic Application that monitors OEM hardware and a Dynamic Application that monitors the operating system). For that device, Skylar One will collect values for both presentation objects that are aligned with the Collection Label named "Memory".
When this situation arises, Skylar One uses precedence and some internal rules to assign a single presentation object to the Collection Label for that device. However, you can manually assign a different presentation object to the Collection Label after discovery.
If a device has a duplicate, Skylar One uses the following rules to determine which presentation object to use for that Collection Label for that device:
- If a manually defined Collection Label-presentation object pair exists, use that pair.
- If Skylar One cannot find a manually defined Collection Label-presentation object pair, use the pair with the lowest precedence value.
- If Skylar One finds more than one Collection Label-presentation object pair with the same precedence value, Skylar One will create a pair using the presentation object with the lowest presentation ID.
What is Precedence?
Skylar One performs discovery (during initial discovery and during nightly updates) and aligns Dynamic Applications with devices. During discovery, Skylar One will also align Collection Labels with devices. For devices with duplicates, Skylar One evaluates precedence to automatically align a single presentation object with each Collection Label. For devices with duplicates, Skylar One assigns the Collection Label-presentation object pair with the lowest precedence value.
Skylar One evaluates precedence:
- During nightly update discovery.
NOTE: If you have manually defined a Collection Label-presentation object pair for one or more devices, nightly update discovery will not change the Collection Label-presentation object pair.
- When a Dynamic Application is manually aligned with a device in the Dynamic Application Collections page
- When devices are manually merged.
Aligning a Presentation Object with a Collection Label
You can align one or more presentation objects with a collection label. This allows Skylar One to compare and display reports on data from multiple performance Dynamic Applications.
To align a presentation object with a collection label:
- Go to the Dynamic Applications Manager page (System > Manage > Dynamic Applications).
- Find the performance Dynamic Application that contains the presentation object you are interested in. Select the wrench icon () for that Dynamic Application.
- In the Dynamic Application panel, select the Presentations tab.
- In the Presentation Objects page, go to the Presentation Object Registry pane and find the presentation object you want to align with a Collection Label. Select the wrench icon () for that presentation object.
- The top pane is populated with values from the selected presentation object. Select values for the following fields:
- Precedence. Set the global precedence for this Collection Label-presentation object pair. For more information, see the section on Precedence.
- Label Group. Select from a list of existing Collection Groups or click on the plus-sign icon () and enter the value for a new Collection Group. The current presentation object will be a member of the specified Collection Group.
- Label. Select from a list of existing Collection Labels or click on the plus-sign icon () and enter the value for a new Collection Label. The current presentation object will be aligned with the specified Collection Label.
- When you generate reports on the selected Collection Label, this presentation object will be included in the report.
Viewing and Managing the List of Presentation Objects Aligned with a Collection Label
From the Collection Labels page, you can view information about each Collection Label. For each Collection Label, you can view a list of presentation objects aligned with that Collection Label. To view this information:
- Go to the Collection Labels page (System > Manage > Collection Labels).
- Find the Collection Label you are interested in. In the Aligned Presentations column, select the pencil icon (). The Aligned Presentations modal page appears.
- In the Aligned Presentations modal page, you can view information about the presentation objects aligned with the current Collection Label and perform actions to manage those presentation objects. You can also unalign a presentation object from a Collection Label and change the precedence for one or more Collection Label-presentation object pairs.
To globally unalign a presentation object from a Collection Label:
- In the Aligned Presentations modal page, find the presentation object that you want to unalign from the Collection Label and select its checkbox.
- From the Select Action field in the lower right, select Unalign from Label. Select the button.
- The selected presentation object will no longer be associated with the Collection Label.
For each Collection Label-presentation object pair, you can define precedence. For example, suppose that both the "Cisco: CPU" Dynamic Application and the "Host Resource: CPU" include a presentation object that is aligned with the CPU Collection Label. You can define precedence to specify priority for each presentation object associated with a Collection Label.
| Collection Group / Collection Label | Presentation Object | Dynamic Application |
| Vitals / CPU | CPU Average | Host Resource: CPU |
| Vitals / CPI | CPU 5 minutes average percent | Cisco: CPU |
To set the precedence for the Collection Label (in our example, "CPU"):
- The Aligned Presentations modal page displays all the presentation objects associated with the selected Collection Label. By default, each presentation object has a precedence of 50.
- In the Aligned Presentations modal page, you can edit precedence in two ways:
- In the Precedence column, use the up arrow and down arrow to change the value for a single presentation object. Repeat for each presentation object for which you want to edit precedence.
- Select the checkbox of one or more presentation objects. In the Select Action field, select Change Precedence and a value. Select the button. Each selected presentation object will be assigned the new (and identical) precedence value.
- Repeat step 2 for each Presentation Object for which you want to edit the precedence value.
NOTE: The precedence values you define in the Aligned Presentations modal page override the precedence value you set per presentation object in the Presentation Objects page.
Viewing and Editing Duplicate Presentation Objects by Collection Label
You can view a list of devices where duplicates occur, view how Skylar One assigned the Collection Label-presentation object pair, and edit the Collection Label-presentation object pair for one or more devices. When you manually define a Collection Label-presentation object pair for a device, Skylar One will not edit or change that pair.
- Go to the Collection Labels page (System > Manage > Collection Labels).
- Find the Collection Label you are interested in. In the Duplicates column, select the pencil icon (). The Duplicates modal page appears.
- In the Duplicates modal page, you can view a list of devices for which there are multiple possible Collection Label-presentation object pairs. You can view which pair is currently assigned to the device.
- To change the pair for a device, click on the pair's radio button.
- Repeat step #4 for each device on which you want to edit the duplicate.
- In the Select Action field (in the lower right), select Align Presentation for Device. Select the button.
- Each edited device will now use the selected Collection Label-presentation object pair.
Viewing and Managing the List of Devices Aligned with a Collection Label
From the Collection Labels page, you can view information about each Collection Label. For each Collection Label, you can view a list of devices from which Skylar One is collecting values. To view this information:
- Go to the Collection Labels page (System > Manage > Collection Labels).
- Find the Collection Label you are interested in. In the Aligned Devices column, select the pencil icon ().
- In the Aligned Devices modal, you can view information about the devices that are aligned with the current Collection Label and perform actions to manage those devices.
For devices that include duplicates, you can reset the presentation object for one or more devices. When you manually define a Collection Label-presentation object pair for a device, Skylar One will not edit or change that pair.
- In the Aligned Devices modal, select the checkbox for one or more devices for which you want to change the Collection Label-presentation object pair.
- In the menus in the lower right, select Set Collection Presentation and then select the presentation object. Select the button.
For devices that include duplicates, you can clear all current settings, including manual settings. Skylar One will then automatically evaluate the precedence for each possible presentation object and assign the Collection Label-presentation object pair with the lowest precedence.
To clear the current Collection Label-presentation object pair for one or more devices:
- In the Aligned Devices modal page, select the checkbox for one or more devices for which you want to clear the aligned presentation object.
- In the menus in the lower right, select Recalculate Presentation Alignment. Select the button.
- Skylar One will evaluate the precedence of each possible presentation object and assign the presentation object with the lowest precedence.
Editing Duplicate Presentation Objects by Device
You can view a list of devices where duplicates occur, view how Skylar One assigned the Collection Label-presentation object pair, and edit the Collection Label-presentation object pair for one or more selected devices. When you manually define a Collection Label-presentation object pair for a device, Skylar One will not edit or change that pair:
- Go to the Device Manager page (Devices > Classic Devices, or Registry > Devices > Device Manager in the classic user interface).
- Select the checkbox for each device you are interested in.
- If you want to view a list of duplicates for all possible devices, select the checkbox at the top of the page to select all devices.
- In the Select Action field (lower right), select FIND Collection Label Duplicates. Select the button.
- The Current Duplicates page is displayed. For each device, you can edit the presentation object that is aligned with a Collection Label.
- To select a Collection Label, use the drop-down list in the upper left.
- To change the aligned presentation object for one or more devices:
- Click on the radio button for the desired presentation object for the device.
- For each additional device you want to edit, click on the radio button for the desired presentation object.
- In the Select Action menu (lower right), select Align Presentation for Device. Select the button.
Editing Duplicate Presentation Objects for a Single Device
You can edit the Collection Label-presentation object pair for a single device. If a single device includes duplicate Collection Label-presentation object pairs, you can specify which one Skylar One should use for that device.
To edit the Collection Label-presentation object pairs for a single device:
- Go to the Device Manager page (Devices > Classic Devices, or Registry > Devices > Device Manager in the classic user interface).
- Find the device you want to edit. Select its wrench icon ().
- Select the tab. In the Dynamic Application Collections page, click on the plus signs () to expand each Dynamic Application.
- You will notice that some presentation objects include the chart icon in the Label column. These presentation objects are duplicates that are not currently aligned with a Collection Label. If you want to align one of these presentation objects with the Collection Label (instead of the current alignment), click on the chart icon.
- You will be prompted before Skylar One aligns the presentation object with the Collection Label. After approving, you will notice that a new presentation object now displays a chart icon in its Label column. This is because this presentation object is no longer associated with a Collection Label.
Editing a Collection Label
You can edit a Collection Label from the Collection Labels page (System > Manage > Collection Labels). To do so:
- Go to the Collection Labels page (System > Manage > Collection Labels).
- Find the Collection Label you want to edit. Select its wrench icon ().
- You can edit one or more of the following:
- Label Name. Name of the Collection Label. This field is required.
- Label Description. Description of the Collection Label. This field is optional.
- Group Name. Collection Group to align with the Collection Label. You can select from a list of existing Collection Groups or enter the name of a new Collection Group. This field is required.
- Frequent Data. Specifies whether frequently rolled up data is calculated for the Collection Label. If the Collection Label will include data that is collected every five minutes or more frequently, and you require that dashboard data be updated every 15 minutes or 20 minutes, select Yes in this field. This data is available immediately for use in a collection label.
- Save icon (). Select this icon to save your changes.
Deleting a Collection Label
You can delete a Collection Label from the Collection Labels page (System > Manage > Collection Labels) only if the Collection Label has no Aligned Presentations. To delete a Collection Label:
NOTE: You can delete a Collection Label only if no presentation objects are aligned with that label.
- Go to the Collection Labels page (System > Manage > Collection Labels).
- Find the Collection Label you want to delete.
- Select its delete icon (). The Collection Label will be deleted from Skylar One.
Viewing Reports About Collection Labels on a Single Device
For each device in Skylar One, the Device Performance page displays time-series graphs about the data collected from that device.
If a device subscribes to a Dynamic Application that includes Collection Labels, Skylar One will display the Collection Group in the left pane of the Device Performance page. You can expand the Collection Group and select a Collection Label.
The graph for a Collection Label displays collected values on the Y-axis and time on the X-axis.
Viewing Dashboards About Collection Labels
You can use the following dashboard widgets to include data associated with Collection Labels in a dashboard:
- Multi-Series Performance Widget
- Leaderboard / Top-N Widget
- Gauge / Meter