![]()
This
Use the following menu options to navigate the Skylar One user interface:
- To view a pop-out list of menu options, click the menu icon (
 ).
). - To view a page containing all of the menu options, click the Advanced menu icon (
 ).
).
What are Credentials?
Credentials are access profiles that allow Skylar One to retrieve information from devices and from software applications on devices. Credentials typically include information such as a username and password, as well as any additional information required for accessing and monitoring devices. Dynamic Applications in Skylar One use credentials to retrieve SNMP information, database information, SOAP information, XML information, XSLT information, and WMI information.
Using Multiple Credentials
If necessary, a single device can use multiple credentials. If more than one agent or application is running on the device, each agent or application can be associated with its own credential. During discovery, Skylar One will use the appropriate credential for each agent.
For example, suppose you want Skylar One to discover a device that supports SNMP v2. To retrieve SNMP data from that device, Skylar One must use a valid SNMP v2 read-only community string. So we would first go to the device and define the SNMP read-only community string. Then we would return to Skylar One and create a credential in the Skylar One system, using that community string. This new credential would allow discovery to retrieve SNMP data from the device.
Now suppose this same device also includes a MySQL database. Suppose you want Skylar One to use a Dynamic Application to monitor that database. To retrieve data from the database, Skylar One must use a valid username and password for that database. So we would first go to the device that hosts the MySQL database and create a database username and database password for Skylar One to use. Then we would return to Skylar One and create a credential in the Skylar One system. The credential would include the database username and database password for the MySQL database. This credential would allow the Dynamic Application to retrieve data about the MySQL database.
What are Credential Types?
A credential is created based on a specific credential type. A credential type is a template or schema that defines what authentication information is required to connect to a specific kind of system or device. For example, SNMP requires community strings and the SNMP version for authentication, so you must provide those when creating an SNMP credential. Similarly, while SSH requires a username and a key or password for authentication, so SSH/Key credentials require them as well.
In Skylar One, there are two categories of credential type: Core and universal. Both are described in greater detail below.
Core Credential Types
Skylar One includes several core credential types that can be configured to access and monitor most device types:
- Discovery uses SNMP credentials to retrieve SNMP information during initial discovery and nightly auto-discovery. If Skylar One can connect to a device with an SNMP credential, Skylar One deems that device "manageable" in Skylar One.
- Basic/Snippet credentials are not bound to a specific authentication protocol. You can use this type of credential for Dynamic Applications of type "WMI", of type "snippet", and when defining system backups. Basic/Snippet credentials can also be used for monitoring Windows devices using PowerShell.
- Database Credentials allow Skylar One to access data on a database on a managed device. Skylar One uses database credentials when collecting data for Database Dynamic Applications.
- LDAP credentials allow Skylar One to communicate with an LDAP or Active Directory system.
- PowerShell credentials allow Dynamic Applications to retrieve data from Windows devices. If you align a Dynamic Application for PowerShell with a PowerShell credential, Skylar One assumes that you want to use its built-in agentless transport to communicate with Windows devices.
- SOAP/XML credentials allow Skylar One to access a web server on a managed device, and are used for SOAP, XML, XSLT, and snippet Dynamic Application types. With snippet Dynamic Applications, the snippet code must define the authentication protocol.
- SSH credentials allow Snippet-type Dynamic Applications in Skylar One to use SSH to communicate with a remote device.
While these core credential types can be configured to monitor most device types, they use generic field labels that are not unique to each device type they might be used to access.
Core credentials can be used in guided, unguided, and classic discovery workflows.
Universal Credential Subtypes
Skylar One also includes several universal credential types that are tailored to monitoring specific types of devices. These credential types use field names that align with the terminology and data structures used by those technologies. By default, Skylar One includes universal credentials for the following device types:
- Aliyun
- AWS, including credentials specific to Assume Role, EC2, and IAM
- Azure
- Citrix Xen
- IBM
- VMware
There are also several universal credential types that are used for Skylar One configuration and administration, rather than to monitor specific device types. These include SL Service Connection and S3 Backup credential types.
Additionally, in version 12.5.1 and later, you can create new universal credential types to supplement the ones already provided in Skylar One. This enables you to create credentials for additional systems you want to monitor while customizing those credentials' fields and layouts.
Universal credentials can be used only in guided discovery workflows.
Viewing Information about Credentials and Credential Types
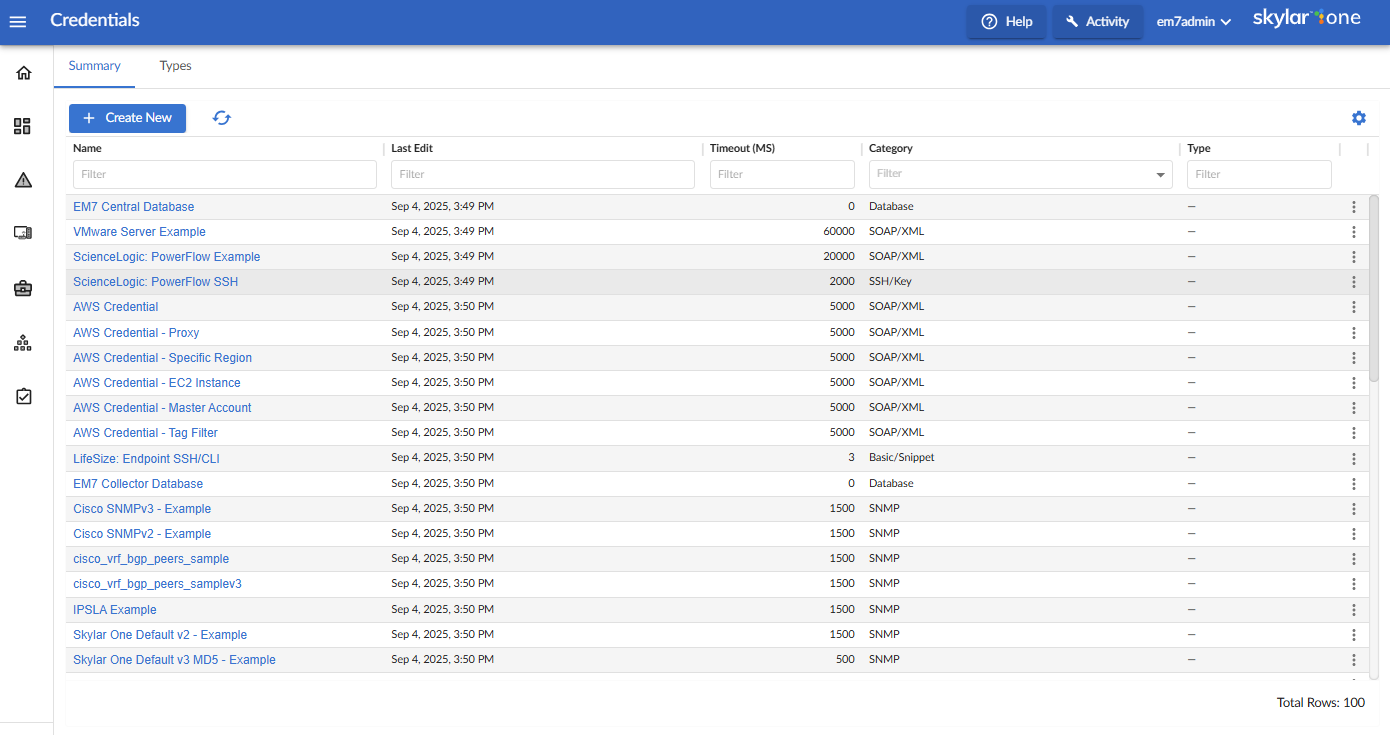
The Credentials page (Manage > Credentials) allows you to view a list of all ScienceLogic credentials. From this page, you can also create new credentials and edit, duplicate, test, or delete existing credentials. The Credentials page contains two tabs:
Summary Tab
For each credential on the tab, the Credentials page displays the following information:
- ID. Unique numeric ID, automatically assigned by Skylar One to each credential.
- Name. Name of the credential.
- Last Edit. Date and time the credential was created or last edited.
- Timeout (ms). Time, in milliseconds, after which Skylar One will stop trying to communicate with the external device or application.
- Category. Category of the credential. Possible categories are SNMP, Database, SOAP/XML, LDAP, Basic/Snippet, SSH/Key, PowerShell., and Universal.
- Type. Type of credential for vendor-specific universal credentials.
If you do not see one of these columns, click the gear icon (![]() ) and then select Column Preferences to add or remove columns. You can also drag columns to different locations on the page or click on a column heading to sort the list by the values in that column. Skylar One retains any changes you make to the columns that appear on the page and will automatically recall those changes the next time you visit the page. For more information,
) and then select Column Preferences to add or remove columns. You can also drag columns to different locations on the page or click on a column heading to sort the list by the values in that column. Skylar One retains any changes you make to the columns that appear on the page and will automatically recall those changes the next time you visit the page. For more information,
You can filter the items on this inventory page by typing filter text or selecting filter options in one or more of the filters found above the columns on the page. For more information, see
You can adjust the size of the rows and the size of the row text on this inventory page. For more information, see the section on
From the tab, you can perform the following actions:
-
Click the SNMPv3 Trap Configuration Reset icon (
 ) to automatically configure your Skylar One Data Collector, Message Collector, or All-In-One Appliance to accept traps from monitored devices and communicate with those devices. For more information, see
Types Tab
The tab displays a list of your credential types along with their respective categories. For each credential type on the tab, the Credentials page displays the following information:
- Type. Type of credential. Possible types are SNMP, Database, SOAP/XML, Basic/Snippet, SSH/Key, Powershell, or any vendor-specific universal credential types.
- Category. Category of the credential. Possible categories are either Core or Universal.
If you do not see one of these columns, click the gear icon (![]() ) and then select Column Preferences to add or remove columns. You can also drag columns to different locations on the page or click on a column heading to sort the list by the values in that column. Skylar One retains any changes you make to the columns that appear on the page and will automatically recall those changes the next time you visit the page. For more information,
) and then select Column Preferences to add or remove columns. You can also drag columns to different locations on the page or click on a column heading to sort the list by the values in that column. Skylar One retains any changes you make to the columns that appear on the page and will automatically recall those changes the next time you visit the page. For more information,
You can filter the items on this inventory page by typing filter text or selecting filter options in one or more of the filters found above the columns on the page. For more information, see
You can adjust the size of the rows and the size of the row text on this inventory page. For more information, see the section on
From the tab, you can do the following:
Managing Credential Types
In Skylar One version 12.5.1 and later, you can create new universal credential types as needed to supplement the ones that are provided by default. This enables you to create credentials for additional systems you want to monitor while customizing the credentials' fields and layouts.
You can also edit, duplicate, and delete existing universal credential types.
You cannot edit, duplicate, or delete core credential types that are included in Skylar One by default. Instead, you can view them and copy their JSON definitions, which you can then paste into a new universal credential type.
Creating a New Universal Credential Type
You can create new universal credential types from the tab. New credential types are defined using JSON.
To create a new credential type:
-
Go to the Credentials page (Manage > Credentials).
-
Click the tab.
-
Click .
-
In the Type Name field, enter a name for the new credential type. The name must not already exist in the system.
-
In the JSON Definition field, enter the definition schema for the new credential type. The definition should adhere to the following guidelines:
-
The definition must be in valid JSON format.
-
The fields array contains any number of field objects that define the various properties in the universal credential type. These field objects specify the different data inputs that are required to connect to this content type. Each field propName must be unique and a valid React component that uses camel case and is appropriately descriptive. For a list of properties that you can include when defining a field object, see Defining Fields in a Universal Credential Type.
-
The layout object tells the user interface how to render the field objects from the fields array. It refers to each field object by its propName. If a field does not appear in the layout object, it will not appear in the user interface. For a list of properties that you can include when defining a layout object, see Defining the Layout of a Universal Credential Type.
-
-
Click .
Defining Fields in a Universal Credential Type
When creating or editing universal credential types, you can use the following properties to define field objects within the fields array of the credential's JSON Definition:
| Property | Type | Description | Example Value |
|---|---|---|---|
|
propName |
String |
The key value that is used in the database to refer to the associated field value. This value must be unique within the definition, be a valid React component, utilize camel case, and be appropriately descriptive. You cannot use timeout as a propName, as it will conflict with the predefined cred_timeout field that is used in core credentials. |
proxyHost |
|
displayName |
String |
The field name that displays in the user interface. |
Proxy Hostname |
|
helperText |
String |
Optional helper text you can add to the user interface to explain the field and help users know how to populate it. This is applicable only to Number and String type fields. |
(Optional) |
|
description |
String |
A text description of the field that displays in the user interface. |
The hostname/IP of your proxy server (optional) |
|
type |
Enum (String) |
The field's value type. Valid options include:
|
string { "propName": "httpHeaders", "displayName": "HTTP Headers", "description": "Add a header", "type": "list<string>", } { "propName": "curlOptions", "displayName": "CURL Options", "description": "The list of extra curl options.", "type": "list<option>", "values": [ { "propName": "CAINFO", "description": "CAINFO", "type": "string" } ] } |
|
defaultValue |
String or Number |
The default value to use for the field if the user does not populate it. |
proxy.sciencelogic.com |
|
values |
Object |
A list of values to display in a drop-down list for enum field types. |
{ "foo": "Foo", "bar": "Bar" } |
|
values.prop |
Property |
The prop name is what ends up as a value associated with an option in the drop-down. The value assigned to the prop is what gets displayed in the user interface. |
Using the values example above, this HTML snippet would be created: <option name="foo">Foo</option> <option name="bar">Bar</option> |
|
validationExpression |
String (RegEx) |
A JavaScript Regular Expression (RegEx) that is used in the user interface to validate the user input. Because of the way MariaDB handles strings, you must escape a backslash (\) if you include one in the RegEx. |
[a-zA-Z0-9.-]{0,} |
|
numberMin |
Number |
A minimum value used to validate a number input. |
0 |
|
numberMax |
Number |
A maximum value used to validate a number input. |
10 |
|
required |
Boolean |
If true, requires the user to input a value into the field while populating the credential. Fields that can be hidden due to their dependency on other fields can be required, but they must have a default value. An empty string is not an accepted default value. |
true |
|
encryption |
Boolean |
If true, the user-provided values in string-type fields are encrypted when stored in the database. |
true |
|
[nameOfHiddenProperty] |
String |
Any lowercase property value can be passed along to the underlying document object model (DOM) element, if needed. |
[a static value] |
Defining the Layout of a Universal Credential Type
When creating or editing universal credential types, you can specify the credential's layout. Doing so tells the user interface exactly how to render the field objects included in the credential's JSON Definition based on sections. A section defines a distinct area of the credential modal in the user interface. Use the following properties to define the layout object in the credential's JSON Definition:
If a field is not included in the layout object, it will not appear in the user interface.
| Property | Type | Description | Example Value |
|---|---|---|---|
|
border |
boolean |
If true, the section will include a border around it when rendered in the user interface. |
true |
|
lines |
Array [Objects] |
An array of ordered lines. Each line contains one or more fields that were defined in the fields array. They are represented by their propName values. |
"lines":[ { "fields":[ "dbType", "dbName" ] }, { "fields":[ "user", "password" ] }, { "fields":[ "host", "port" ] } ] |
|
dependency |
Object | Array [Objects] |
A dependency allows a section or field to render conditionally depending on a predefined set of selections:
A section or field can be dependent on multiple other fields, but the framework currently only supports the use of AND for the driving fields. |
"dependency": { "field": "snmpVersion", "value": 3, "state": "visible" },
"dependency": [ { "field": "dbType", "value": 3, "state": "visible" }, { "field": "foodType", "value": "beans", "state": "visible"} ], |
Editing a Universal Credential Type
You can edit an existing universal credential type from the tab. Doing so overwrites the existing credential type definition, unless you choose to save the edited credential type with a new name.
To edit a universal credential type:
-
Go to the Credentials page (Manage > Credentials).
-
Click the tab.
-
Click the Actions icon (
 ) of the credential that you want to edit and then select Edit. The Edit Credential Type modal appears.
 -
In the JSON Definition field, update the definition schema as needed for the new credential type. For more information, see the sections on Defining Fields in a Universal Credential Type and Defining the Layout of a Universal Credential Type.
When editing a credential type, you cannot change a field's propName or required status. If you do so, you must save the changes as a new credential type.
-
After making your updates, do one of the following:
-
Click to save your changes to the existing credential type, overwriting it.
-
Click to save your changes as a new credential type. If you do so, the Type Name field becomes editable. Type a new name for the credential type, and then click .
-
Duplicating a Universal Credential Type
You can duplicate existing universal credential types on the tab. Duplicating a credential type makes a copy of an existing credential type and allows you to update it, give it a new name, and save it as a new credential type.
To duplicate a universal credential type:
-
Go to the Credentials page (Manage > Credentials).
-
Click the tab.
-
Click the Actions icon (
) of the credential that you want to edit and then select Duplicate. The Create Credential Type from Template modal appears. -
In the Type Name field, enter a name for the new credential type. The name must not already exist in the system.
-
In the JSON Definition field, update the definition schema as needed for the new credential type. For more information, see the sections on Defining Fields in a Universal Credential Type and Defining the Layout of a Universal Credential Type.
-
Click .
Deleting a Universal Credential Type
You can delete custom universal credential types on the tab, so long as they have not been used to create credentials.
To delete a custom universal credential type:
-
Go to the Credentials page (Manage > Credentials).
-
Click the tab.
-
Click the Actions icon (
) of the credential that you want to edit and then select Delete. The Delete Credential Type modal appears. -
To confirm that you want to delete the credential type, click .
Defining Credentials
To define a credential in Skylar One:
- Collect the information you need to create each credential (usually username and password).
- Go to the Credentials page (Manage > Credentials).
- Click the button and then select the type of credential you want to create from the drop-down list of options that appears. Your choices are:
- Core Types:
- Universal Types:
You can enter terms into the search bar that appears at the top of the list to search for a specific credential type, or to narrow down the list of credentials that appears in the drop-down options.
- The Create Credential modal page appears. In this page, you can define the new credential. The following sections explain how to create each type of credential.
- Click the button to save the new credential and close the window.
Defining a Basic/Snippet Credential
Dynamic Applications of type "snippet" are not required to use only the Basic/Snippet Credential. In Dynamic Applications of type "snippet", the snippet code must define the authentication protocol. Therefore, Dynamic Applications of type "snippet" can use any type of credential.
Basic/Snippet credentials define standard authentication parameters, but are not tied to a specific authentication protocol. Basic/Snippet credentials are used in several places in Skylar One, including:
- With Dynamic Applications of type "snippet". The snippet code must define the authentication protocol.
- With Dynamic Applications of type "WMI". The authentication protocol is specific to WMI and is specified by Skylar One when the Dynamic Application is executed. To access WMI information on a Windows server, ensure that the Username you specify is allowed access to the server and to the WMI namespace.
- With Dynamic Applications of type "PowerShell". For information about configuring your environment for PowerShell collection, see the
- When defining external backups. The authentication protocol is defined in the Backup Management page (System > Settings > Backup).
To create a Basic/Snippet credential:
- Go to the Credentials page (Manage > Credentials).
- Click the button and then select Create Basic/Snippet Credential. The Create Credential modal page appears:

- Supply values in the following fields:
- Name. Name of the credential. Can be any combination of alphanumeric characters, up to 64 characters. This field is required.
- All Organizations. Toggle on (blue) to align the credential to all organizations, or toggle off (gray) and then select one or more specific organizations from the What organization manages this service? drop-down field to align the credential with those specific organizations. This field is required.
To learn more about credentials and organizations, see the section Aligning Organizations With a Credential.
- Timeout (ms). Time, in milliseconds, after which Skylar One will stop trying to communicate with the device from which you want to retrieve data.
- Username. Username for a user account on the device.
- Password. Password for a user account on the device.
- Hostname/IP. Hostname or IP address of the device from which you want to retrieve data. This field is required.
- You can include the variable %D in this field. Skylar One will replace the variable with the IP address of the current device (device that is currently using the credential).
- You can include the variable %N in this field. Skylar One will replace the variable with the hostname of the current device (device that is currently using the credential). If Skylar One cannot determine the hostname, Skylar One will replace the variable with the primary management IP address for the current device.
- Port. Port number associated with the data you want to retrieve. This field is required.
- Click .
If you would like to test your credential using the Credential Tester panel, click . For detailed instructions on using the Credential Tester panel, see the Using the Credential Tester Panel section.
Defining a Database Credential
Database credentials allow Skylar One to access data on a database on a managed device. Skylar One uses database credentials when collecting data for Database Dynamic Applications.
To create a database credential:
- Go to the Credentials page (Manage > Credentials).
- Click the button and then select Create Database Credential. The Create Credential modal page appears:

- Supply values in the following fields:
- Name. Name of the credential. Can be any combination of alphanumeric characters, up to 64 characters. This field is required.
- All Organizations. Toggle on (blue) to align the credential to all organizations, or toggle off (gray) and then select one or more specific organizations from the What organization manages this service? drop-down field to align the credential with those specific organizations. This field is required.
To learn more about credentials and organizations, see the section Aligning Organizations With a Credential.
- Timeout (ms). Time, in milliseconds, after which Skylar One will stop trying to communicate with the database.
- Database Type. Type of database that will be accessed with the credential. Select from a list of databases supported by Skylar One. This field is required. Choices are:
- MySQL
- MS SQL Server
- Oracle and *SQLNet
- PostgreSQL
- IBM DB2
- Sybase ASE
- Informix
For information about monitoring Informix databases, see the Monitoring Informix Databases section.
- Database Name. Name of the database that will be accessed with the credential.
- Database User. Username associated with a valid account on the database.
- Password. Password associated with a valid account on the database.
- Hostname/IP. Hostname or IP address where the database resides. This field is required.
- You can include the variable %D in this field. Skylar One will replace the variable with the IP address of the current device (device that is currently using the credential).
- You can include the variable %N in this field. Skylar One will replace the variable with the hostname of the current device (device that is currently using the credential). If Skylar One cannot determine the hostname, Skylar One will replace the variable with the primary management IP address for the current device. This field is required.
NOTE: To use the localhost, in the Hostname/IP field, enter the IP address 127.0.0.1. The credential will not work if you enter the string localhost in the Hostname/IP field.
- Port. Port number associated with the database you want to access with this credential. This field is required.
- For DB Type of MySQL, the default value is 3306.
- For DB Type of MS SQL Server, the default value is 1433.
- For DB Type of Oracle and *SQLNet, the default value is 1521.
- For DB Type of PostgreSQL, the default value is 5432.
- For DB Type of IBM DB2, the default value is 523.
- For DB Type of Sybase ASE, the default value is 4100.
- For DB Type of Informix, see the 9088 section.
Skylar One's Database Servers include a MySQL database running on port 7706. Data Collectors and Message Collectors include a MySQL database running on port 7707.
Oracle Settings
These fields should be completed only if you selected Oracle & *SQLNet in the Database Type field.
- Oracle Connect Type. Specifies the method Skylar One should use to connect to the Oracle database. The choices are:
- Oracle System Identifier (SID)
- Oracle Real Application Clusters (SERVICE)
- Oracle Server Direct Connection (SERVER)
In Oracle 11g, the "Oracle Server Direct Connection" option is deprecated. If you select this Oracle Connect Type for an Oracle 11g database, you must edit the file listener.ora and add the line "DEFAULT_SERVICE_LISTENER=<SID>", where <SID> is the SID value.
- Oracle Database SID (if required). Enter the value for the Oracle Connect Type (either Oracle SID, Oracle RAC, or Oracle Server) selected in the Oracle Connect Type field.
- Click .
If you would like to test your credential using the Credential Tester panel, click . For detailed instructions on using the Credential Tester panel, see the Using the Credential Tester Panel section.
Monitoring Informix Databases
For Skylar One to connect to an Informix database:
- The Informix database server must have a DRDA listener configured on a separate port than the current listener(s).
- The DRDA listener must be configured to share data with other listeners using a DBSERVERALIASES entry in the server's onconfig file.
- For servers that host multiple databases, multiple DRDA listeners are required with different port assignments.
For example Informix configuration files, please contact ScienceLogic Support.
Defining an LDAP Credential
LDAP or Active Directory credentials allow Skylar One to access data on an LDAP server or an Active Directory server.
Authentication is the method by which Skylar One determines if a user can access the Skylar One system. For user accounts that are to be authenticated with LDAP or Active Directory, Skylar One uses the LDAP or Active Directory credential to establish communication with the LDAP or Active Directory server. Skylar One will then query the Active Directory or the LDAP server to determine if the username and password are legitimate and accurate.
Additionally, Skylar One can automatically create accounts for one or more LDAP or Active Directory users. Skylar One uses the LDAP or Active Directory credential to communicate with Active Directory or the LDAP server and:
- Determine if the username and password are legitimate and accurate.
- Gather information to populate fields in the user's automatically-created account.
To create an LDAP credential:
- Go to the Credentials page (Manage > Credentials).
- Click the button and then select Create LDAP Credential. The Create Credential modal page appears:

- Supply values in the following fields:
- Name. Name of the credential. Can be any combination of alphanumeric characters, up to 64 characters. This field is required.
- All Organizations. Toggle on (blue) to align the credential to all organizations, or toggle off (gray) and then select one or more specific organizations from the What organization manages this service? drop-down field to align the credential with those specific organizations. This field is required.
To learn more about credentials and organizations, see the section Aligning Organizations With a Credential.
- Timeout (ms). Time, in milliseconds, after which Skylar One will stop trying to communicate with the directory server.
- LDAP Type. Specifies the type of LDAP running on the directory server. Choices are LDAP or Active Directory.
- Hostname/IP. Hostname or IP address of the LDAP or Active Directory server. This field is required.
- Secure. Specifies whether you are using LDAP over SSL.
- Port. Port number on the LDAP or Active Directory server to which Skylar One will send requests. This field is required.
- RDN (Bind DN / bind user). Bind DN. The bind DN is a user on the LDAP or Active Directory server who is permitted to search the directory within the specified search base.
- In many LDAP or AD configurations, each user has read-access to his/her own account. Therefore, you might find it most useful to include the %u variable in this field. When an LDAP or AD user logs in to Skylar One, Skylar One stores the username in the %u variable. Skylar One then uses the %u variable to build the bind DN, uses the bind DN to communicate with the LDAP or AD server, and then authenticates the current user.
- An example entry in the RDN field might be:
uid=%u, ou=People, dc=sciencelogic, dc=com
This creates a DN using the current login name as the uid.
- You can also include the %d variable in this field. The %d variable represents the name of the LDAP domain, as specified in the LDAP Domain field.
If you have configured Skylar One to automatically create accounts when a user logs in with an LDAP/AD username, you must include the %u variable in the RDN field.
- LDAP Domain. If your LDAP or Active Directory configuration includes multiple domains, specify the domain components to bind to in this field. For example, you could specify:
dc=reston, dc=sciencelogic, dc=com.
This would bind to the sub-domain "reston", in the domain "sciencelogic", in the domain "com".
- Bind Password. Password that allows access to the LDAP or Active Directory server. In most cases, when you specify a bind password in a credential, you are creating a "write" credential (that is, a credential that allows Skylar One to make changes to the LDAP or AD server).
- User Search Base. In this field, you specify the area in the directory where users to be authenticated reside, using RDN notation. For example, if you want to authenticate five users from the ou called "people", you could specify the RDN that includes that ou.
ou=People, dc=sciencelogic, dc=com.
This would allow Skylar One to authenticate users in the ou called "people." In the User Search Scope field, you can specify whether Skylar One should also authenticate all users in any ou underneath "people".
- User Search Scope. In this field, you specify whether Skylar One should search only the directory specified in User Search Base or whether Skylar One should search the directory specified in User Search Base and all its child branches. Choice are:
- Subtree. Skylar One should search the directory specified in User Search Base and also search all its child branches.
- One Level. Skylar One should search only the directory specified in User Search Base.
- Click .
If you would like to test your credential using the Credential Tester panel, click . For detailed instructions on using the Credential Tester panel, see the Using the Credential Tester Panel section.
Defining a PowerShell Credential
Dynamic Applications can include PowerShell commands that collect data from Windows devices. If you want to use Skylar One's built-in transport agent (that is, run "agentless" on the Windows device), you can align a PowerShell credential with those Dynamic Applications.
To define a PowerShell credential in Skylar One, you will need the following information:
- The username and password for a user on the Windows device.
- If the user is an Active Directory account, the hostname or IP address of the Active Directory server and the domain.
- Determine if an encrypted connection should be used.
- If you are using a Windows Management Proxy, the hostname or IP address of the proxy server.
To create a PowerShell credential:
- Go to the Credentials page (Manage > Credentials).
- Click the button and then select Create Powershell Credential. The Create Credential modal page appears:

- Supply values in the following fields:
- Name. Name of the credential. Can be any combination of alphanumeric characters, up to 64 characters. This field is required.
- All Organizations. Toggle on (blue) to align the credential to all organizations, or toggle off (gray) and then select one or more specific organizations from the What organization manages this service? drop-down field to align the credential with those specific organizations. This field is required.
To learn more about credentials and organizations, see
- Timeout (ms). Time, in milliseconds, after which Skylar One will stop trying to communicate with the authenticating server. For collection to be successful, Skylar One must connect to the authenticating server, execute the PowerShell command, and receive a response within the amount of time specified in this field.
- Hostname/IP. Hostname or IP address of the device from which you want to retrieve data. This field is required.
- You can include the variable %D in this field. Skylar One will replace the variable with the IP address of the device that is currently using the credential.
- You can include the variable %N in this field. Skylar One will replace the variable with the hostname of the device that is currently using the credential. If Skylar One cannot determine the hostname, Skylar One will replace the variable with the primary, management IP address for the current device.
- You can include the prefix HOST or WSMAN before the variable %D in this field if the device you want to monitor uses a service principal name (for example, "HOST://%D" or "WSMAN://%D"). Skylar One will use the WinRM service HOST or WSMan instead of HTTP and replace the variable with the IP address of the device that is currently using the credential.
- Port. Type the port number used by the WinRM service on the Windows device. This field is required.
- Username. Type the username for an account on the Windows device to be monitored or on the proxy server. This field is required.
NOTE: The user should not include the domain name prefix in the username for Active Directory accounts. For example, use "em7admin" instead of "MSDOMAIN\em7admin".
- Password. Type the password for the account on the Windows device to be monitored or on the proxy server. This field is required.
- Account Type. Type of authentication for the username and password in this credential. Choices are:
- Active Directory. On the Windows device, Active Directory will authenticate the username and password in this credential.
- Local. Local security on the Windows device will authenticate the username and password in this credential.
- Use SSL (HTTPS) / Encrypted. Select whether Skylar One will communicate with the device using an encrypted HTTP or HTTPS connection:
- Toggle on (blue) if Skylar One will communicate with the device using an encrypted connection over HTTPS. If toggled on, when communicating with the Windows server, Skylar One will use a local user account with authentication of type "Basic Auth". You must then use HTTPS and can use a Microsoft Certificate or a self signed certificate.
In Skylar One versions prior to 12.3.7, this field is labeled Encrypted. In versions 12.3.7 and above, it is labeled Use SSL (HTTPS).
In Skylar One versions 11.3.0 and later, a newer Kerberos library is used that allows for message encryption over HTTP. This feature is on by default and may eliminate the need for you to configure an HTTPS certificate depending on your security requirements.
- Toggle off (gray) . The credential is encrypted over HTTP rather than HTTPS.
- Toggle on (blue) if Skylar One will communicate with the device using an encrypted connection over HTTPS. If toggled on, when communicating with the Windows server, Skylar One will use a local user account with authentication of type "Basic Auth". You must then use HTTPS and can use a Microsoft Certificate or a self signed certificate.
- Validate Certificate (when HTTPS is used). This field is visible when the Use SSL (HTTPS) toggle field is enabled for the connection and allows you to select whether a certificate is validated for the credential. Choices are:
- Ignore. Skylar One will not validate a certificate for the credential. This is the default setting.
- Validate. Skylar One will require a validated certificate for the credential. If you select Validate, then the target device must include a non-expired certificate issued from a certificate authority.
- Active Directory Host/IP. If you selected Active Directory in the Account Type field, type the hostname or IP address of the Active Directory server that will authenticate the credential.
- Active Directory Domain. If you selected Active Directory in the Account Type field, type the domain where the monitored Windows device resides.
- Message Encryption Setting. If you selected Active Directory in the Account Type field, select whether Kerberos packages sent over PowerShell Remoting Protocol (PSRP) or Windows Remote Management (WinRM) are encrypted. Choices are:
- Auto. Encryption is enabled if the package supports it; otherwise, encryption is disabled. This is the default setting.
- Never. Messages are never encrypted. If selected, the target device must support this option.
- Always. Messages are always encrypted. If selected, the target device must support this option.
- PowerShell Proxy Hostname/IP. If you use a proxy server in front of the Windows devices you want to communicate with, type the fully-qualified domain name or the IP address of the proxy server in this field.
- Click .
If you would like to test your credential using the Credential Tester panel, click . For detailed instructions on using the Credential Tester panel, see the Using the Credential Tester Panel section.
Defining an SNMP Credential
SNMP credentials allow Skylar One to access SNMP data on a managed device. Skylar One uses SNMP credentials to perform discovery, run auto-discovery, and gather information from SNMP Dynamic Applications.
To create an SNMP credential:
- Go to the Credentials page (Manage > Credentials).
- Click the button and then select Create SNMP Credential. The Create Credential modal page appears:

- Supply values in the following fields:
- Name. Name of the credential. Can be any combination of alphanumeric characters, up to 64 characters. This is a required field.
- All Organizations. Toggle on (blue) to align the credential to all organizations, or toggle off (gray) and then select one or more specific organizations from the What organization manages this service? drop-down field to align the credential with those specific organizations. This field is required.
To learn more about credentials and organizations, see the section Aligning Organizations With a Credential.
- Timeout (ms). Time, in milliseconds, after which Skylar One will stop trying to communicate with the device. The default value is 1500.
- SNMP Version. SNMP version. Choices are SNMP V1, SNMP V2, and SNMP V3. The default value is SNMP V2.
- Port. The port Skylar One will use to communicate with the external device or application. The default value is 161. This field is required.
- SNMP Retries. Number of times Skylar One will try to authenticate and communicate with the external device. The default value is 1.
SNMP V1/V2 Settings
If you selected SNMP V1 or SNMP V2 in the SNMP Version field, complete these fields. These fields are inactive if you selected SNMP V3.
- SNMP Community (Read-Only). The SNMP community string (password) required for read-only access of SNMP data on the remote device or application. For SNMP V1 and SNMP V2 credentials, you must supply a community string, either in this field or in the SNMP Community (Read/Write) field.
- SNMP Community (Read/Write). The SNMP community string (password) required for read and write access of SNMP data on the remote device or application. For SNMP V1 and SNMP V2 credentials, you must supply a community string, either in this field or in the SNMP Community (Read Only) field.
SNMP V3 Settings
If you selected SNMP V3 in the SNMP Version field, complete these fields. These fields are inactive if you selected SNMP V1 or SNMP V2.
- Security Name. Name for SNMP authentication. This field is required.
- Security Passphrase. Password to authenticate the credential. This value must contain at least 8 characters. This value is required if you use a Security Level that includes authentication.
In addition to alphanumeric characters, you can also use the following special characters in an SNMP V3 security passphrase: ? - _ = , . : # + % $ [ ] { } & ! ( ) | /
You cannot use the following special characters in an SNMP V3 security passphrase: " ' \
- Authentication Protocol. Select an authentication algorithm for the credential. This field is required. Choices are:
- MD5. This is the default value.
- SHA
- SHA-224
- SHA-256
- SHA-384
- SHA-512
The SHA option is SHA-128.
- Security Level. Specifies the combination of security features for the credentials. This field is required. Choices are:
- No Authentication / No Encryption.
- Authentication Only. This is the default value.
- Authentication and Encryption.
- Engine ID. The unique engine ID for the SNMP agent you want to communicate with. (SNMPv3 authentication and encryption keys are generated based on the associated passwords and the engine ID.) This field is optional.
- Context. A context is a mechanism within SNMPv3 (and AgentX) that allows you to use parallel versions of the same MIB objects. For example, one version of a MIB might be associated with SNMP Version 2 and another version of the same MIB might be associated with SNMP Version 3. For SNMP Version 3, specify the context name in this field. This field is optional.
- Privacy Protocol. The privacy service encryption and decryption algorithm. This field is required. Choices are:
- DES. This is the default value.
- AES-128
- AES-192
- AES-256
- AES-256-C. This option is for discovering Cisco devices only.
- Privacy Protocol Passphrase. Privacy password for the credential. This field is optional.
- Click .
If you would like to test your credential using the Credential Tester panel, click . For detailed instructions on using the Credential Tester panel, see the Using the Credential Tester Panel section.
Defining a SOAP/XML Credential
SOAP/XML credentials allow Skylar One to access a web server on a managed device. SOAP/XML credentials are used in several places in Skylar One, including:
- With Dynamic Applications of type "SOAP".
- With Dynamic Applications of type "XML".
- With Dynamic Applications of type "XSLT".
- With Dynamic Applications of type "snippet". The snippet code must define the authentication protocol. Dynamic Applications of type "snippet" can use any type of credential.
To create a SOAP/XML credential:
- Go to the Credentials page (Manage > Credentials).
- Click the button and then select Create SOAP/XML Credential. The Create Credential modal page appears:

- Supply values in the following fields:
- Name. Name of the credential. Can be any combination of alphanumeric characters, up to 64 characters. This field is required.
- All Organizations. Toggle on (blue) to align the credential to all organizations, or toggle off (gray) and then select one or more specific organizations from the What organization manages this service? drop-down field to align the credential with those specific organizations. This field is required.
To learn more about credentials and organizations, see the section Aligning Organizations With a Credential.
- Timeout (ms). Time, in milliseconds, after which Skylar One will stop trying to communicate with the web service.
- Content Encoding. Tells the SOAP server or XML data-store how the content is encoded, so the SOAP server or XML data-store knows how to decode the message. Select the encoding that is appropriate for your request and response.
- Method. HTTP method to use to exchange credential data from the managed device. Choices are GET or POST.
Typically, Dynamic Applications of type "XML" use GET methods. Dynamic Applications of type "SOAP" and of type "XSLT" use POST methods.
- HTTP Version. Version of HTTP to use. Choices are 1.0 or 1.1.
- URL. Address of the SOAP server, HTML document, or XML document. This field is required and should be of the following format:
https://IP address:port/full path to desired SOAP, HTML, or XML document
The port is stored if it is specified in the URL; otherwise, Skylar One uses the default port values 80 for HTTP and 43 for HTTPS.
- You can include the variable %D in this field. Skylar One will replace the variable with the IP address of the current device (device that is currently using the credential).
For component devices, Skylar One will replace %D with the IP address of the root device.
- You can include the variable %N in this field. Skylar One will replace the variable with the hostname of the current device (device that is currently using the credential). If Skylar One cannot determine the hostname, Skylar One will replace the variable with the primary management IP address for the current device.
- HTTP Auth User. Username with which to log in to the web server.
- HTTP Auth Password. Password with which to access the web server.
Proxy Settings
If you use a proxy server in front of the SOAP server(s) or XML data-store(s) you want to communicate with, enter values in these fields. Otherwise, you can skip these fields.
- Hostname/IP. The host name or IP address of the proxy server.
- Port. Port on the proxy server to which you will connect.
- User. Username to use to access the proxy server.
- Password. Password to use to access the proxy server.
SOAP Options
These fields are optional. When a SOAP/XML credential is aligned with a SOAP or XSLT Dynamic Application, the requests defined in the Dynamic Application can use the values defined in these fields. To use a value defined in one of these fields, the request must include the substitution character associated with that value. For example, suppose a Dynamic Application request includes the XML tag <high_value=%1>. Suppose you specified "100" in the Embed Value [%1] field in the credential aligned with that Dynamic Application. The request will be sent with the XML tag <high_value=100>.
- Embedded Password [%P]. Specifies a password value to include in a request. The value defined in this field is substituted in to the %P substitution character. The value will be encrypted in the request, will be masked in the Credential Editor, and will be stored in an encrypted form in the database.
- Embed Value [%1]. The value defined in this field is substituted in to the %1 substitution character.
- Embed Value [%2]. The value defined in this field is substituted in to the %2 substitution character.
- Embed Value [%3]. The value defined in this field is substituted in to the %3 substitution character.
- Embed Value [%4]. The value defined in this field is substituted in to the %4 substitution character.
HTTP Headers
- If you require custom HTTP headers to communicate with the SOAP server, you can build the custom header here. To add a header, click the button
cURL Options
- You can include the cURL command and various options in your credential. The list of cURL options lists all the options you can include in your credential. To include a cURL option in the credential, click the Add CURL Option drop-down and then select it from the list. You can then supply arguments in the blank text field to the right of the option.
- For more information on cURL commands, see the cURL manpage at http://curl.haxx.se/docs/manpage.html.
- Click .
If you would like to test your credential using the Credential Tester panel, click . For detailed instructions on using the Credential Tester panel, see the Using the Credential Tester Panel section.
Defining an SSH/Key Credential
Secure Shell (SSH) is a network protocol that enables users to securely access a command-line shell on a remote computer or server over an unsecured network. SSH provides strong encryption and authentication capabilities, making it an ideal method for securely administering commands or transferring data between a client and server.
To make SSH even more secure, you can use SSH keys instead of a simple password to log in to a server. SSH keys consist of two long strings of characters, called a public/private key pair, that are much less susceptible than passwords are to brute force attacks. The public key is placed on the server you want to access, while the private key resides on the client. When you use SSH to log in to the server from the client, the key pair is used to authenticate the session.
In Skylar One, some Dynamic Applications of type "Snippet" use SSH to communicate with a remote device. To use these Dynamic Applications, you must define an SSH credential. This credential specifies the hostname or IP address of the system you want to monitor, the port number used to access that system, and the private key used for authentication.
Consult the documentation associated with the PowerPack that contains the Dynamic Application of type "Snippet" to find detailed directions on configuring the remote device and generating a private key for Skylar One to use.
To create an SSH/Key credential:
- Go to the Credentials page (Manage > Credentials).
- Click the button and then select Create SSH/Key Credential. The Create Credential modal page appears:

- Supply values in the following fields:
- Name. Name of the credential. Can be any combination of alphanumeric characters, up to 64 characters. This field is required.
- All Organizations. Toggle on (blue) to align the credential to all organizations, or toggle off (gray) and then select one or more specific organizations from the What organization manages this service? drop-down field to align the credential with those specific organizations. This field is required.
To learn more about credentials and organizations, see the section Aligning Organizations With a Credential.
- Timeout (ms). Time, in milliseconds, after which Skylar One will stop trying to communicate with the device from which you want to retrieve data.
- Hostname/IP. Hostname or IP address of the device from which you want to retrieve data. This field is required.
- You can include the variable %D in this field. Skylar One will replace the variable with the IP address of the current device (device that is currently using the credential).
- You can include the variable %N in this field. Skylar One will replace the variable with hostname of the current device (device that is currently using the credential). If Skylar One cannot determine the hostname, Skylar One will replace the variable with the primary, management IP address for the current device.
- Port. Port number associated with the data you want to retrieve. This field is required.
The default TCP port for SSH servers is 22.
- Username. Username for an SSH or user account on the device to be monitored.
- Password. Password for an SSH user account on the device to be monitored.
- Private Key (PEM Format). Enter the SSH private key that you want Skylar One to use, in PEM format.
The Private Key (PEM Format) field is only required in the current Skylar One user interface. The Private Key (PEM Format) field is not required if you are using the classic Skylar One user interface to define a credential.
The private key can have a maximum of 64 characters per line. Therefore, you cannot use keys in the OpenSSH format, because that format uses 70 characters per line. When you attempt to save the credential, Skylar One will validate that the private key entered is in the correct format. You will be able to save the credential only if the private key is correctly formatted.
- Click .
If you would like to test your credential using the Credential Tester panel, click . For detailed instructions on using the Credential Tester panel, see the Using the Credential Tester Panel section.
Defining an Aliyun Credential
To configure Skylar One to monitor Aliyun's Alibaba Cloud service, you must first create an Aliyun credential. This credential allows the Dynamic Applications in the Alibaba Cloud: Aliyun PowerPack to connect with the Aliyun service.
Skylar One includes an Aliyun credential type that you can use to connect with the Aliyun service during guided discovery. This credential type uses field names and terminology that are specific to the Aliyun service.
Alternatively, you could monitor Aliyun using a generic SOAP/XML credential that does not include Aliyun-specific fields. For more information, see
To create an Aliyun-specific credential:
- Go to the Credentials page (Manage > Credentials).
- Click the button and then select Create Aliyun Credential. The Create Credential modal page appears:

- Supply values in the following fields:
- Name. Name of the credential. Can be any combination of alphanumeric characters, up to 64 characters. This field is required.
- All Organizations. Toggle on (blue) to align the credential to all organizations, or toggle off (gray) and then select one or more specific organizations from the What organization manages this service? drop-down field to align the credential with those specific organizations. This field is required.
To learn more about credentials and organizations, see the section Aligning Organizations With a Credential.
- Timeout (ms). Time, in milliseconds, after which Skylar One will stop trying to communicate with the device from which you want to retrieve data.
- Account access key for Aliyun service (minimum 20 characters). The account access key ID for the Aliyun service. This field is required.
- Account access key password for Aliyun service (minimum 20 characters). The account access key password for the Aliyun service. This field is required.
Proxy Settings
If you use a proxy server in front of the Aliyun services you want to communicate with, enter values in these fields. Otherwise, you can skip these fields.
- Proxy Hostname/IP. The host name or IP address of the proxy server.
- Proxy Port. Port on the proxy server to which you will connect.
- Proxy User. Username to use to access the proxy server.
- Proxy Password. Password to use to access the proxy server.
- Click .
If you would like to test your credential using the Credential Tester panel, click . For detailed instructions on using the Credential Tester panel, see the Using the Credential Tester Panel section.
Defining an AWS Credential
To use the Amazon Web Services (AWS) Dynamic Applications, you must configure a credential that allows Skylar One to connect to the AWS REST API.
Skylar One includes an AWS credential type that you can use to connect with the AWS service during guided discovery. This credential type uses field names and terminology that are specific to the AWS service.
Alternatively, you could monitor AWS using a generic SOAP/XML credential that does not include AWS-specific fields. For more information, see
To define an AWS-specific credential:
- Go to the Credentials page (Manage > Credentials).
- Click the button and then select Create AWS Credential. The Create Credential modal page appears:

- Supply values in the following fields:
- Name. Name of the credential. Can be any combination of alphanumeric characters, up to 64 characters. This field is required.
- All Organizations. Toggle on (blue) to align the credential to all organizations, or toggle off (gray) and then select one or more specific organizations from the What organization manages this service? drop-down field to align the credential with those specific organizations. This field is required.
To learn more about credentials and organizations, see the section Aligning Organizations With a Credential.
- Timeout (ms). Time, in milliseconds, after which Skylar One will stop trying to communicate with the device from which you want to retrieve data.
- AWS Access Key ID (minimum 20 characters). The Access Key ID for an account on the AWS device to be monitored. This field is required.
- Cloud Type. Type of cloud that will be accessed with the credential. Select from a list of AWS clouds supported by Skylar One. Choices are:
- Standard. Select this option if you want to connect to a standard AWS account.
- GovCloud. Select this option if you want to connect to an AWS GovCloud account.
- Beijing. Select this option if you want to connect to AWS regions in China.
- AWS Secret Access Key (minimum 20 characters). The Secret Access Key for an account on the AWS device to be monitored. This field is required.
Proxy Settings
If you use a proxy server in front of the AWS devices you want to communicate with, enter values in these fields. Otherwise, you can skip these fields.
- Proxy Hostname/IP. The host name or IP address of the proxy server.
- Proxy Port. Port on the proxy server to which you will connect.
- Proxy User. Username to use to access the proxy server.
- Proxy Password. Password to use to access the proxy server.
- Click .
If you would like to test your credential using the Credential Tester panel, click . For detailed instructions on using the Credential Tester panel, see the Using the Credential Tester Panel section.
Defining an AWS Assume Role Credential
To use the Amazon Web Services (AWS) Dynamic Applications, you must configure a credential that allows Skylar One to connect to the AWS REST API.
Skylar One includes an AWS Assume Role credential type that you can use to connect with the AWS service during guided discovery using the Assume Role discovery method. The Assume Role discovery method provides an automated mechanism to discover all your AWS accounts within an organization using a single IAM key. This credential type uses field names and terminology that are specific to the AWS service.
For more information about monitoring AWS using Assume Role, see
To define an AWS Assume Role credential:
- Go to the Credentials page (Manage > Credentials).
- Click the button and then select Create AWS Assume Role Credential. The Create Credential modal page appears:

- Supply values in the following fields:
- Name. Type a unique name for the credential. Can be any combination of alphanumeric characters, up to 64 characters.
- All Organizations. Toggle on (blue) to align the credential to all organizations, or toggle off (gray) and then select one or more specific organizations from the Select the organizations the credential belongs to drop-down field to align the credential with those specific organizations.
To learn more about credentials and organizations, see the section Aligning Organizations With a Credential.
- Timeout (ms). Type the time, in milliseconds, after which Skylar One will stop trying to communicate with the device from which you want to retrieve data.
- AWS Access Key ID. Type the Access Key ID for an account on the AWS device to be monitored.
- AWS Secret Access Key. Type the Secret Access Key for an account on the AWS device to be monitored.
- Cloud Type. Select the AWS cloud type that will be accessed with the credential. This field is required. Choices are:
- Standard. Select this option if you want to connect to a standard AWS account.
- GovCloud. Select this option if you want to connect to an AWS GovCloud account.
- Beijing. Select this option if you want to connect to AWS regions in China.
- Assume Role. Type the AWS Role you created in each account. The default name is "ScienceLogic-Monitor".
- Assume Role Session. Optional. The default value is "Skylar One".
- Organization Creation. Auto-creates a Skylar One organization for accounts using AssumeRole. You can type one of the following options:
- NAME. The name of the organization will contain the name of the user.
- ID. The name of the organization will contain the ID of the user.
- ID:NAME. The name of the organization will contain both the ID and name of the user, in that order.
- NAME:ID. The name of the organization will contain both the name and ID of the user, in that order.
- Configuration. Select the method used to control what AWS devices are discovered and monitored. Choices are:
- Default. The default AWS discovery method.
- AwsConfig. Select this option if your accounts have the AWS Config service enabled.
- AwsCloudwatch. Select this option to discover only the AWS regions that are reporting CloudWatch metrics.
- Regions. Type the AWS regions that you want to discover. For example, entering "ap-southeast-2, us-east-2" will discover two regions. If left blank, all regions will be discovered. The default value is "ALL".
- Filter by Tags. To discover AWS devices and filter them by tags, type the tag operation, tag key, and tag value, in the following format: <operation>#<tag name>#<tag value>. For example, if you want to filter by Tag Name, you would type the following:
Tags:equals#Name#Example
Valid operations include:
- equals
- notEquals
- contains
- notContains
You can chain together multiple filters separating them by a comma. For example:
Tags:equals#Name#Example,contains#Owner#Someone
- Proxy Hostname/IP. Type the host name or IP address of the proxy server.
- Proxy Port. Type the port number on the proxy server to which you will connect.
- Proxy User. Type the username to use to access the proxy server.
- Proxy Password. Type the password to use to access the proxy server.
If you use a proxy server in front of the AWS devices you want to communicate with, enter values in the proxy fields. Otherwise, you can skip these fields.
- Click .
If you would like to test your credential using the Credential Tester panel, click . For detailed instructions on using the Credential Tester panel, see the Using the Credential Tester Panel section.
Defining an AWS EC2 Credential
To use the Amazon Web Services (AWS) Dynamic Applications, you must configure a credential that allows Skylar One to connect to the AWS REST API.
Skylar One includes an AWS EC2 credential type that you can use to connect with the AWS service during guided discovery when your Data Collectors are EC2 instances. This credential type uses field names and terminology that are specific to the AWS service.
For more information about monitoring AWS accounts within an organization when your Data Collectors are EC2 instances, see
To define an EC2 credential:
- Go to the Credentials page (Manage > Credentials).
- Click the button and then select Create AWS EC2 Credential. The Create Credential modal page appears:

- Supply values in the following fields:
- Name. Type a unique name for the credential. Can be any combination of alphanumeric characters, up to 64 characters.
- All Organizations. Toggle on (blue) to align the credential to all organizations, or toggle off (gray) and then select one or more specific organizations from the Select the organizations the credential belongs to drop-down field to align the credential with those specific organizations.
To learn more about credentials and organizations, see the section Aligning Organizations With a Credential.
- Timeout (ms). Type the time, in milliseconds, after which Skylar One will stop trying to communicate with the device from which you want to retrieve data.
- Cloud Type. Select the AWS cloud type that will be accessed with the credential. This field is required. Choices are:
- Standard. Select this option if you want to connect to a standard AWS account.
- GovCloud. Select this option if you want to connect to an AWS GovCloud account.
- Beijing. Select this option if you want to connect to AWS regions in China.
- Organization Arn. Type the Amazon Resource Name (ARN) for the Assume Role. This is the ARN of the role created in the master billing account.
- Assume Role. Type the AWS Role you created in each account. The default name is "ScienceLogic-Monitor".
- Assume Role Session. Optional. The default value is "Skylar One".
- Organization Creation. Auto-creates a Skylar One organization for accounts using AssumeRole. You can type one of the following options:
- NAME. The name of the organization will contain the name of the user.
- ID. The name of the organization will contain the ID of the user.
- ID:NAME. The name of the organization will contain both the ID and name of the user, in that order.
- NAME:ID. The name of the organization will contain both the name and ID of the user, in that order.
- Configuration. Select the type of method used to control what AWS devices are discovered and monitored. Choices are:
- Default. The default AWS discovery method.
- AwsConfig. Select this option if your accounts have the AWS Config service enabled.
- AwsCloudwatch. Select this option to discover only the AWS regions that are reporting CloudWatch metrics.
- Regions. Type the AWS regions that you want to discover. For example, entering "ap-southeast-2, us-east-2" will discover two regions. If left blank, all regions will be discovered. The default value is "ALL".
- Filter by Tags. To discover AWS devices and filter them by tags, type the tag operation, tag key, and tag value, in the following format: <operation>#<tag name>#<tag value>. For example, if you want to filter by Tag Name, you would type the following:
Tags:equals#Name#Example
Valid operations include:
- equals
- notEquals
- contains
- notContains
You can chain together multiple filters separating them by a comma. For example:
Tags:equals#Name#Example,contains#Owner#Someone
- Proxy Hostname/IP. Type the host name or IP address of the proxy server.
- Proxy Port. Type the port number on the proxy server to which you will connect.
- Proxy User. Type the username to use to access the proxy server.
- Proxy Password. Type the password to use to access the proxy server.
If you use a proxy server in front of the AWS devices you want to communicate with, enter values in the proxy fields. Otherwise, you can skip these fields.
- Click .
If you would like to test your credential using the Credential Tester panel, click . For detailed instructions on using the Credential Tester panel, see the Using the Credential Tester Panel section.
Defining an AWS IAM Credential
To use the Amazon Web Services (AWS) Dynamic Applications, you must configure a credential that allows Skylar One to connect to the AWS REST API.
You can use IAM policies in AWS to restrict which regions and services Skylar One will monitor. To do this, you can create another IAM policy and apply that along with the Skylar One monitoring policy to the applicable user or role(s).
Skylar One includes an AWS IAM credential type that you can use to connect with the AWS service during guided discovery using the IAM discovery method. This credential type uses field names and terminology that are specific to the AWS service.
For more information about monitoring AWS using IAM permissions, see
To define an AWS IAM credential:
- Go to the Credentials page (Manage > Credentials).
- Click the button and then select Create AWS IAM Credential. The Create Credential modal page appears:

- Supply values in the following fields:
- Name. Type a unique name for the credential. Can be any combination of alphanumeric characters, up to 64 characters.
- All Organizations. Toggle on (blue) to align the credential to all organizations, or toggle off (gray) and then select one or more specific organizations from the Select the organizations the credential belongs to drop-down field to align the credential with those specific organizations.
To learn more about credentials and organizations, see the section Aligning Organizations With a Credential.
- Timeout (ms). Type the time, in milliseconds, after which Skylar One will stop trying to communicate with the device from which you want to retrieve data.
- AWS Access Key ID. Type the Access Key ID for an account on the AWS device to be monitored.
- AWS Secret Access Key. Type the Secret Access Key for an account on the AWS device to be monitored.
- Cloud Type. Select the AWS cloud type that will be accessed with the credential. This field is required. Choices are:
- Standard. Select this option if you want to connect to a standard AWS account.
- GovCloud. Select this option if you want to connect to an AWS GovCloud account.
- Beijing. Select this option if you want to connect to AWS regions in China.
- Configuration. Select the method used to control what AWS devices are discovered and monitored. Choices are:
- Default. The default AWS discovery method.
- AwsConfig. Select this option if your accounts have the AWS Config service enabled.
- AwsCloudwatch. Select this option to discover only the AWS regions that are reporting CloudWatch metrics.
- Regions. Type the AWS regions that you want to discover. For example, entering "ap-southeast-2, us-east-2" will discover two regions. If left blank, all regions will be discovered. The default value is "ALL".
- Filter by Tags. To discover AWS devices and filter them by tags, type the tag operation, tag key, and tag value, in the following format: <operation>#<tag name>#<tag value>. For example, if you want to filter by Tag Name, you would type the following:
Tags:equals#Name#Example
Valid operations include:
- equals
- notEquals
- contains
- notContains
You can chain together multiple filters separating them by a comma. For example:
Tags:equals#Name#Example,contains#Owner#Someone
- Proxy Hostname/IP. Type the host name or IP address of the proxy server.
- Proxy Port. Type the port number on the proxy server to which you will connect.
- Proxy User. Type the username to use to access the proxy server.
- Proxy Password. Type the password to use to access the proxy server.
If you use a proxy server in front of the AWS devices you want to communicate with, enter values in the proxy fields. Otherwise, you can skip these fields.
- Click .
If you would like to test your credential using the Credential Tester panel, click . For detailed instructions on using the Credential Tester panel, see the Using the Credential Tester Panel section.
Defining an Azure Credential
To configure Skylar One to monitor Microsoft Azure, you must first create an Azure credential. This credential allows the Dynamic Applications in the Microsoft: AzurePowerPack to connect with the Azure Active Directory Application.
Skylar One includes an Azure credential type that you can use to connect with the Azure service during guided discovery. This credential type uses field names and terminology that are specific to the Azure service.
Alternatively, you could monitor Azure using a generic SOAP/XML credential that does not include Azure-specific fields. For more information, see
To define an Azure-specific credential:
- Go to the Credentials page (Manage > Credentials).
- Click the button and then select Create Azure Credential. The Create Credential modal page appears:

- Supply values in the following fields:
- Name. Name of the credential. Can be any combination of alphanumeric characters, up to 64 characters. This field is required.
- All Organizations. Toggle on (blue) to align the credential to all organizations, or toggle off (gray) and then select one or more specific organizations from the What organization manages this service? drop-down field to align the credential with those specific organizations. This field is required.
To learn more about credentials and organizations, see the section Aligning Organizations With a Credential.
- Timeout (ms). Time, in milliseconds, after which Skylar One will stop trying to communicate with the device from which you want to retrieve data.
- Azure AD application endpoint token URL (OAuth2.0). The AD application endpoint token URL for the Azure Active Directory application. This field is required.
- Application ID for Azure AD application. The Application ID for the Azure Active Directory application. This field is required.
- Tenant ID for Azure AD application. The Tenant ID for the Azure Active Directory application. This field is required.
- Azure subscription ID (if single subscription). The subscription ID for the Azure Active Directory application. This field is required only if you are monitoring a single Azure subscription.
- Secret key for Azure AD application. The secret key for the Azure Active Directory application. This field is required.
Proxy Settings
If you use a proxy server in front of the Azure Active Directory applications you want to communicate with, enter values in these fields. Otherwise, you can skip these fields.
- Proxy Hostname/IP. The host name or IP address of the proxy server.
- Proxy Port. Port on the proxy server to which you will connect.
- Proxy User. Username to use to access the proxy server.
- Proxy Password. Password to use to access the proxy server.
- Click .
If you would like to test your credential using the Credential Tester panel, click . For detailed instructions on using the Credential Tester panel, see the Using the Credential Tester Panel section.
Defining a Citrix XenServer Credential
To use the Dynamic Applications in the Citrix: Xen PowerPack, you must first define a credential in Skylar One that enables Skylar One to communicate with your XenCenter system and XenServer devices.
Skylar One includes a Citrix Xen credential type that you can use to connect with your XenServer devices during guided discovery. This credential type uses field names and terminology that are specific to XenServer.
Alternatively, you could monitor Citrix XenServer using a generic Basic/Snippet credential that does not include XenServer-specific fields. For more information, see
To define a XenServer-specific credential:
- Go to the Credentials page (Manage > Credentials).
- Click the button and then select Create Citrix Xen Credential. The Create Credential modal page appears:

- Supply values in the following fields:
- Name. Name of the credential. Can be any combination of alphanumeric characters, up to 64 characters. This field is required.
- All Organizations. Toggle on (blue) to align the credential to all organizations, or toggle off (gray) and then select one or more specific organizations from the What organization manages this service? drop-down field to align the credential with those specific organizations. This field is required.
To learn more about credentials and organizations, see the section Aligning Organizations With a Credential.
- Timeout (ms). Time, in milliseconds, after which Skylar One will stop trying to communicate with the device from which you want to retrieve data.
- XenServer username. The username for an account on the XenServer device to be monitored.
- XenServer password. The username for an account on the XenServer device to be monitored.
- Hostname/IP of the Xen server. The Hostname or IP address of the XenServer device from which you want to retrieve data. This field is required.
- Port. The port number associated with the data you want to receive. This field is required.
- Click .
If you would like to test your credential using the Credential Tester panel, click . For detailed instructions on using the Credential Tester panel, see the Using the Credential Tester Panel section.
Defining an IBM Cloud Credential
To configure Skylar One to monitor an IBM Cloud/SoftLayer account, you must create an IBM credential. This credential allows the Dynamic Applications in the SoftLayer: Cloud PowerPack to communicate with your IBM Cloud/SoftLayer account.
Skylar One includes an IBM credential type that you can use to connect with your IBM Cloud/SoftLayer service during guided discovery. This credential type uses field names and terminology that are specific to IBM Cloud/SoftLayer.
Alternatively, you could monitor IBM Cloud/SoftLayer using a generic Basic/Snippet credential that does not include IBM-specific fields. For more information, see
To define an IBM-specific credential:
- Go to the Credentials page (Manage > Credentials).
- Click the button and then select Create IBM Credential. The Create Credential modal page appears:

- Supply values in the following fields:
- Name. Name of the credential. Can be any combination of alphanumeric characters, up to 64 characters. This field is required.
- All Organizations. Toggle on (blue) to align the credential to all organizations, or toggle off (gray) and then select one or more specific organizations from the What organization manages this service? drop-down field to align the credential with those specific organizations. This field is required.
To learn more about credentials and organizations, see the section Aligning Organizations With a Credential.
- Timeout (ms). Time, in milliseconds, after which Skylar One will stop trying to communicate with the device from which you want to retrieve data.
- IBM/SoftLayer account username. The IBM/SoftLayer username for an account on the IBM device to be monitored.
- IBM/SoftLayer account API key. The IBM/SoftLayer API key for an account on the IBM device to be monitored.
- Hostname/IP. The Hostname or IP address of the IBM device from which you want to retrieve data. The default value is %D. Skylar One will replace the variable with the IP address of the device that is currently using the credential. This field is required.
- Port. The port number associated with the data you want to receive. This field is required.
The default TCP port for IBM devices is 80.
- Click .
If you would like to test your credential using the Credential Tester panel, click . For detailed instructions on using the Credential Tester panel, see the Using the Credential Tester Panel section.
Defining an S3 Backup Credential
You can use an S3 storage service to store configuration backups for Skylar One. To do so, you will need to create a credential that enables Skylar One to connect to the S3 service. Skylar One includes an S3 Backup credential type, which uses field names and terminology specific to S3 services, that you can use to connect with your S3 service.
Skylar One supports the use of Amazon Web Services (AWS) or MinIO for S3 backup storage.
For more information about configuration backups, see
To define an S3 backup credential:
- Go to the Credentials page (Manage > Credentials).
- Click the button and then select Create S3 Backup Credential. The Create Credential modal page appears:

- Supply values in the following fields:
- Name. Type a unique name for the credential. Can be any combination of alphanumeric characters, up to 64 characters.
- All Organizations. Toggle on (blue) to align the credential to all organizations, or toggle off (gray) and then select one or more specific organizations from the What organization manages this service? drop-down field to align the credential with those specific organizations.
To learn more about credentials and organizations, see the section Aligning Organizations With a Credential.
- Timeout (ms). Type the time, in milliseconds, after which Skylar One will stop trying to communicate with the S3 storage service.
- Provider. Select the S3 storage provider you want to use to store the backup. Choices are Amazon Web Services (AWS) S3 and Minio Object Storage.
- Access Key ID. Type the Access Key ID for the S3 account on which you want to store the backup.
- Secret Access Key. Type the Secret Access Key for the S3 account on which you want to store the backup.
- Endpoint. Type the URL of the S3 endpoint. The endpoint URL should not include the bucket name.
- Region. Select the region of the S3 endpoint.
- Bucket. Type the name of the S3 bucket on which you want to store the backup.
- Encryption Password. Type the encryption password for the backup file.
- Encryption Salt. Type the encryption salt used to safeguard the backup file encryption password.
- Click .
If you would like to test your credential using the Credential Tester panel, click . For detailed instructions on using the Credential Tester panel, see the Using the Credential Tester Panel section.
Defining a VMware Credential
Skylar One includes a VMware credential type that you can use to connect with the VMware web service during guided discovery. This credential type uses field names and terminology that are specific to VMware vSphere.
Alternatively, you could monitor VMware using a generic SOAP/XML credential that does not include VMware-specific fields. For more information, see
To define a VMware-specific credential:
-
Go to the Credentials page (Manage > Credentials).
-
Click the button and then select Create VMware Credential. The Create Credential modal page appears:


- Supply values in the following fields:
-
Name. Name of the credential. Can be any combination of alphanumeric characters, up to 64 characters. This field is required.
-
All Organizations. Toggle on (blue) to align the credential to all organizations, or toggle off (gray) and then select one or more specific organizations from the What organization manages this service? drop-down field to align the credential with those specific organizations. This field is required.
To learn more about aligning credentials and organizations, see Aligning Organizations With a Credential.
- Timeout (ms). Time, in milliseconds, after which Skylar One will stop trying to communicate with the device from which you want to retrieve data.
- VMware web service username. The VMware username for the VMware web service account. This field is required.
- VMware web service password. The VMware password for the VMware web service account. This field is required.
- URL. The URL of the VMware web service that you want to monitor. This field is required.
- You can include the variable %D in this field. Skylar One will replace the variable with the IP address of the device that is currently using the credential. For component devices, Skylar One will replace %D with the IP address of the root device.
- You can include the variable %N in this field. Skylar One will replace the variable with the hostname of the device that is currently using the credential. If Skylar One cannot determine the hostname, Skylar One will replace the variable with the primary management IP address for the current device.
Click the URL field for a set of options for formatting the URL: http(s)://Host:Port/Path | %D = Aligned Device IP | %N = Aligned Device Name. For example: https://%D:433/<sample path>.
- Click .
If you would like to test your credential using the Credential Tester panel, click . For detailed instructions on using the Credential Tester panel, see the Using the Credential Tester Panel section.
Testing a Credential
You can test a credential using a predefined credential test. For more information about creating and managing credential tests, see the
Using the Credential Tester Panel
When defining or editing a credential in Skylar One, you can test the credential using the Credential Tester panel.
To test a credential using the Credential Tester panel:
-
From the Credentials page (Manage > Credentials) or from the Credential Selection page during guided or unguided discovery, click to create a new credential or click the Actions icon () of a credential that you want to test and then select Edit/Test.
- While defining or editing the credential, supply values in the required fields. Required fields may vary depending on the type of credential you create.
- Click the button. This activates the Credential Tester fields.
- In the Credential Tester panel, supply values in the following fields:
- Select Credential Test. Select a credential test to run. This drop-down list includes the ScienceLogic Default Credential Tests, credential tests included in any PowerPacks that have been optionally installed on your system, and credential tests that users have created on your system.
- Select Collector. Select the All-In-One Appliance or Data Collector that will run the test.
- IP or Hostname to test. Type a hostname or IP address that will be used during the test. For example, if you are testing an SNMP credential, the hostname/IP address you supply will be used to perform a test SNMP request.
- Click the button to run the credential test. The Testing Credential window appears.
- Step. The name of the step.
- Description. A description of the action performed during the step.
- Log Message. The result of the step for this execution of the credential test.
- Status. Whether the result of this step indicates the credential and/or the network environment is configured correctly (Passed) or incorrectly (Failed).
- Step Tip. Mouse over the question mark icon (
 ) to display the tip text. The tip text recommends what to do to change the credential and/or the network environment if the step has a status of "Failed".
The Testing Credential window displays a log entry for each step in the credential test. The steps performed are different for each credential test. The log entry for each step includes the following information:
Specifying Credentials For Discovery and Devices
Discovery is the process by which Skylar One discovers what types of hardware and applications exist on the network and then retrieves data from the discovered hardware and applications.
Before running discovery, you must:
- Determine the SNMP credentials for the devices and applications in your network. Define correlating credentials in Skylar One, to allow discovery to retrieve as much information as possible.
- If you want Skylar One to immediately start collecting data from devices using Dynamic Applications, you should also define any additional credentials required for those Dynamic Applications. For example, if you want Skylar One to immediately start monitoring all MySQL databases in your network, you should define credentials that allow Skylar One to communicate with each MySQL database in your network. During discovery, Skylar One will determine which devices can be monitored with a Dynamic Application for MySQL. After discovery, Skylar One will use the database credential to collect data about each MySQL database in your network.
Use the previous sections to define credentials for your network.
When you run discovery, you must specify one or more of these credentials to use. The more credentials you align with a discovery session, the more access Skylar One will have to devices and their data during discovery.
- For information about specifying credentials during guided discovery, see the section on Adding Devices Using Universal or Guided Discovery.
- For information about specifying credentials during unguided discovery, see the section on Adding Devices Using Unguided Discovery.
- For information about specifying credentials during initial classic discovery, see the section on Specifying Credentials During Initial Classic Discovery.
Specifying Credentials for a Device/Dynamic Application Pair
After a device has been discovered by Skylar One and one or more Dynamic Applications have been aligned with the device, you can manually assign the credential to use for each Dynamic Application.
The manually assigned credential will be used by Skylar One only for this specific Dynamic Application associated with this specific device. For all other devices, Skylar One will use the default credential associated with each device, or will use the credential defined on the Collections tab for each device.
To manually associate a credential with a Dynamic Application aligned to a device:
- Go to the Devices page by clicking the Devices icon (
 ).
). - Find the device for which you want to define a credential. Click its hyperlink in the Device Name column.
- On the Device Investigator, click the tab.
- Find the Dynamic Application for which you want to define a credential. Click its radio button and then click .

- In the information pane for the Dynamic Application, click the Edit icon (
 ) next to the Credential field.

- From the Choose Credential modal page, select the credential that you want to align to the Dynamic Application, and then click the [Select] button.
Your organization membership(s) might affect the list of credentials you can see on the Choose Credential modal page. To learn more about credentials and organizations, see the section Aligning Organizations With a Credential.
If this Dynamic Application has already been aligned with a credential to which you do not have access, the Credential field will display the value Restricted Credential. If you align the Dynamic Application with a different credential, you will not be able to re-align the device with the Restricted Credential.
- The selected Dynamic Application will now use the manually selected credential when collecting data from this device. You should see your change reflected in the Credential field in the information pane for the Dynamic Application on the tab.
For more information about the tab, see the
Aligning One or More Organizations With a Credential
To support multi-tenancy, Skylar One allows you to align each credential with one, multiple or all organizations in Skylar One. You can also align a credential with no organizations.
When you align an organization with a credential, you control who can view details about the credential, who can view the name of the credential, and who can apply the credential in Skylar One.
NOTE: When you align an organization with a credential, you are restricting only the users who can view and assign the credential. You are not restricting the devices and actions that can be associated with the credential. For example, you can align a credential only with the organization "Operations" but assign the credential to a device in the "Finance" organization.
By default, newly created credentials are aligned to all organizations. However, when defining a new credential, you can opt to align the credential with one or more specific organizations rather than all credentials. To do so, toggle off the All Organizations field on the Create Credential modal and then select one or more specific organizations from the What organization manages this service? drop-down field.
Credentials that are aligned with an organization have the following behavior:
- For each credential that is aligned with an organization, only administrators and users who are members of the aligned organization can view the credential on the Credentials page.
- When aligning credentials to devices or Dynamic Applications, non-administrator users can view and align only those credentials that are assigned to organizations common to both the user and the device’s collector group, plus those credentials that are assigned to all organizations or otherwise required for that collector group.
- Users can change the organization setting of only those credentials that are not currently aligned to any devices.
- In any field or column that displays the name of the credential, users who are not members of the aligned organization will not see the credential name. Instead, these users will see either a dash character (-) or the text "Restricted Credential".
- In any list from which users can select a credential, users who are not members of the aligned organization will not see the credential as an entry in the list.
- In any page where the credential has already been assigned, users who are not members of the aligned organization will see only the name "Restricted Credential".
- In any page where the credential has already been assigned, users who are not members of the aligned organization can save the page and maintain the credential. The credential will still appear to that user as "Restricted Credential".
- In any page where the credential has already been assigned, users who are not members of the aligned organization can change the credential to a credential aligned with their organization(s). However, those users cannot change the credential again and re-assign the "Restricted Credential". The entry for "Restricted Credential" is removed from the list of possible credentials.
- If you attempt to run a discovery session where the devices, collector group, and credentials do not all belong to the same organization, you will receive an error and will not be able to save or execute the discovery session.
To understand the behavior of a credential aligned with an organization, consider the following example:
- Suppose you have a user account of type "Administrator". Suppose you create an SNMP credential called "ops_cred". Suppose you align that credential with the organization "Operations".
- In the Credentials page, only administrators and users who are members of the organization "Operations" will be able to see the credential "ops_cred" in Skylar One.
- In Skylar One, in any field or column that displays the name of the credential, users who are not members of the organization "Operations" will not see the "ops_cred" name displayed. Instead, these users will see either a dash character (-) or the text "Restricted Credential".
- In Skylar One, in any list from which users can select a credential, users who are not members of the organization "Operations" will not see the "ops_cred" credential as an entry in the field.
- In Skylar One, in any page where the credential "ops_cred" has already been assigned, users who are not members of the organization "Operations" will see only the name "Restricted Credential".
- In Skylar One, in any page where the credential "ops_cred" has already been assigned, users who are not members of the organization "Operations" can save the page and maintain the "ops_cred" credential. The credential will still appear to that user as "Restricted Credential".
- In Skylar One, in any page where the credential "ops_cred" has already been assigned, users who are not members of the organization "Operations" can change the credential to a credential aligned with their organization. However, that user cannot change the credential again and re-assign the "Restricted Credential". The entry for "Restricted Credential" is removed from the list of possible credentials.
Editing a Credential
The Credentials page allows you to edit credentials from Skylar One.
To edit a credential:
- Go to the Credentials page (Manage > Credentials).
- Click the Actions icon () of the credential you want to edit and then select Edit/Test. The Edit Credential page appears.
- After editing the fields in the Edit Credential modal page, click the button.
Editing a credential and saving it overwrites the existing credential; it does not create a new credential. To create a new credential from an existing credential, see the section on Duplicating a Credential.
When editing a credential, the current password displays as a masked string of characters. If you make any changes to this field, Skylar One completely removes the previous credential password and replaces it with what you type; therefore, you must either completely replace the password or leave it unchanged. If you accidentally type anything in the password field but do not actually want to change the password, you should close the Edit Credential modal page without saving your changes to avoid overwriting the current password.
Duplicating a Credential
The Credentials page allows you to create a duplicate of an existing credential. When you do so, Skylar One copies all of the original credential's values into the new credential. You can then edit the new credential to make changes as needed while still retaining the values that you want to keep from the original credential.
To duplicate a credential:
- Go to the Credentials page (Manage > Credentials).
- Click the Actions icon () of the credential you want to duplicate and then select Duplicate.
- A copy of the credential appears on the Credentials page.
- To edit the copied credential, click its Actions icon () and then select Edit/Test. The Edit Credential modal appears.
- After editing the fields in the Edit Credential modal, click the button.
Deleting a Credential
The Credentials page allows you to delete one or more credentials from Skylar One.
Skylar One displays an error message if you attempt to delete a credential that is currently assigned to one or more devices.
To delete a credential:
- Go to the Credentials page (Manage > Credentials).
- Click the Actions icon () of the credential you want to delete and then select Delete.
- The credential is deleted.
Using Credentials in the Classic Skylar One User Interface
This section describes how to view, define, and manage credentials using the Credential Management page in the classic Skylar One user interface.
Viewing Information about Credentials in the Classic Skylar One User Interface
The Credential Management page (System > Manage > Credentials) allows you to view a list of all ScienceLogic credentials. From this page, you can also create new credentials and editing existing credentials.
To sort the list of credentials, click on a column heading. The list will be sorted by the column value, in ascending order. To sort by descending order, click the column heading again. The Last Edited column sorts by descending order on the first click; to sort by ascending order, click the column heading again.
For each credential, the page displays:
- Profile Name. Name of the credential.
- Organization. If you have an account of type "User" and are a member of only one ScienceLogic organization, this field will not appear in the Credential Management page. The Credential Management page will display only credentials that are aligned with your organization. For all other users, this column specifies the organization(s) aligned with the credential. Possible values are all orgs, multiple orgs, a single organization name, or none. For details, see the section Aligning One or More Organizations with a Credential.
- RO Use. Specifies the number of devices that Skylar One can retrieve read-only information from, using the credential.
- RW Use. Specifies the number of devices that Skylar One can both read from and write to, using the credential.
- DA Use. Specifies the number of Dynamic Applications aligned with this credential.
- Type. Type of credential. Possible types are SNMP, Database, SOAP/XML, LDAP/AD, Basic/Snippet, SSH/Key, and PowerShell.
- Credential User. Username associated with the credential.
- Host. Hostname or IP address that Skylar One will use the credential to communicate with.
- Port. Port used by the credential to communicate with the external device or application.
- Timeout. Time, in milliseconds, after which Skylar One will stop trying to communicate with the external device or application.
- ID. Unique numeric ID, automatically assigned by Skylar One to each credential.
- Last Edited. Date and time the credential was created or last edited.
- Edited By. ScienceLogic user who created or last edited the credential.
Filtering the List of Credentials in the Classic Skylar One User Interface
To filter the list of credentials in the Credential Management page, use the search fields at the top of each column. The search fields are find-as-you-type filters; as you type, the page is filtered to match the text in the search field, including partial matches. Text matches are not case-sensitive. Additionally, you can use the following special characters in each filter:
- , (comma). Specifies an "or" operation. For example:
"dell, micro" would match all values that contain the string "dell" OR the string "micro".
- & (ampersand). Specifies an "and" operation. For example:
"dell & micro" would match all values that contain the string "dell" AND the string "micro".
- ! (exclamation mark). Specifies a "not" operation. For example:
"!dell" would match all values that do not contain the string "dell".
- ^ (caret mark). Specifies "starts with." For example:
"^micro" would match all strings that start with "micro", like "microsoft".
"^" will include all rows that have a value in the column.
"!^" will include all rows that have no value in the column.
- $ (dollar sign). Specifies "ends with." For example:
"$ware" would match all strings that end with "ware", like "VMware".
"$" will include all rows that have a value in the column.
"!$" will include all rows that have no value in the column.
- min-max. Matches numeric values only. Specifies any value between the minimum value and the maximum value, including the minimum and the maximum. For example:
"1-5" would match 1, 2, 3, 4, and 5.
- - (dash). Matches numeric values only. A "half open" range. Specifies values including the minimum and greater or including the maximum and lesser. For example:
"1-" matches 1 and greater, so it would match 1, 2, 6, 345, etc.
"-5" matches 5 and less, so it would match 5, 3, 1, 0, etc.
- > (greater than). Matches numeric values only. Specifies any value "greater than." For example:
">7" would match all values greater than 7.
- < (less than). Matches numeric values only. Specifies any value "less than." For example:
"<12" would match all values less than 12.
- >= (greater than or equal to). Matches numeric values only. Specifies any value "greater than or equal to." For example:
"=>7" would match all values 7 and greater.
- <= (less than or equal to). Matches numeric values only. Specifies any value "less than or equal to." For example:
"=<12" would match all values 12 and less.
- = (equal). Matches numeric values only. For numeric values, allows you to match a negative value. For example:
"=-5 " would match "-5" instead of being evaluated as the "half open range" as described above.
Defining One or More SNMP Credentials for Initial Discovery in the Classic Skylar One User Interface
Before running discovery, you must first define credentials for the devices and applications in the network to be managed. You must either define or note the credentials on the device to be managed, and then you must define matching credentials in Skylar One.
To create credentials for initial discovery, you must first:
- Determine which devices or IP ranges you want to discover.
- Determine which of these devices support SNMP.
- Determine the SNMP community string or SNMP credentials for each device that supports SNMP.
If you do not know which devices in your network support SNMP, consult your system administrator. In some cases, you might also need to consult your system administrator about enabling SNMP, and defining SNMP community strings or SNMP credentials on these devices.
- In Skylar One, define one or more SNMP credentials to use during discovery. These credentials should match those SNMP community strings and SNMP credentials that already exist in your network.
- Initially, discovery uses only SNMP credentials. However, when Skylar One collects data specified in Dynamic Applications, Skylar One can use other types of credentials.
If necessary, a single device can use multiple credentials. If more than one agent or application is running on the device, each agent or application can be associated with its own credential. During discovery, Skylar One will use the appropriate credential for each agent.
Defining Credentials in the Classic Skylar One User Interface
To define a credential in the classic Skylar One user interface:
- Collect the information you need to create each credential (usually username and password).
- Go to the Credential Management page (System > Manage > Credentials).
- In the Credential Management page, click the menu. Select the type of credential you want to create. Your choices are:
- SNMP Credential
- Database Credential
- SOAP/XML Host Credential
- LDAP/AD Credential
- Basic/Snippet Credential
- SSH/Key Credential
- PowerShell Credential
- The Credential Editor modal page appears. In this page, you can define the new credential. The following sections explain how to create each type of credential.
- Click the button to save the new credential.
Defining an SNMP Credential in the Classic Skylar One User Interface
SNMP Credentials allow Skylar One to access SNMP data on a managed device. Skylar One uses SNMP credentials to perform discovery, run auto-discovery, and gather information from SNMP Dynamic Applications.
To create an SNMP credential in the classic user interface:
Go to the Credential Management page (System > Manage > Credentials).
Click the button and select Create SNMP Credential. The Credential Editor page appears.
- Supply values in the following fields:
- Profile Name. Name of the credential. Can be any combination of alphanumeric characters. This field is required.
- SNMP Version. SNMP version. Choices are SNMP V1, SNMP V2, and SNMP V3. The default value is SNMP V2.
- Port. The port Skylar One will use to communicate with the external device or application. The default value is 161. This field is required.
- Timeout (ms). Time, in milliseconds, after which Skylar One will stop trying to communicate with the SNMP device. The default value is 1500.
- Retries. Number of times Skylar One will try to authenticate and communicate with the external device. The default value is 1.
SNMP V1/V2 Settings
These fields appear if you selected SNMP V1 or SNMP V2 in the SNMP Version field. The fields are inactive if you selected SNMP V3.
- SNMP Community (Read-Only). The SNMP community string (password) required for read-only access of SNMP data on the remote device or application. For SNMP V1 and SNMP V2 credentials, you must supply a community string, either in this field or in the SNMP Community (Read/Write) field.
- SNMP Community (Read/Write). The SNMP community string (password) required for read and write access of SNMP data on the remote device or application. For SNMP V1 and SNMP V2 credentials, you must supply a community string, either in this field or in the SNMP Community (Read Only) field.
SNMP V3 Settings
These fields appear if you selected SNMP V3 in the SNMP Version field. These fields are inactive if you selected SNMP V1 or SNMP V2.
- Security Name. Name for SNMP authentication. This field is required.
- Security Passphrase. Password to authenticate the credential. This value must contain at least 8 characters. This value is required if you use a Security Level that includes authentication.
- Authentication Protocol. Select an authentication algorithm for the credential. This field is required. Choices are:
- MD5. This is the default value.
- SHA
- SHA-224
- SHA-256
- SHA-384
- SHA-512
The SHA option is SHA-128.
- Security Level. Specifies the combination of security features for the credentials. This field is required. Choices are:
- No Authentication / No Encryption.
- Authentication Only. This is the default value.
- Authentication and Encryption.
- SNMP v3 Engine ID. The unique engine ID for the SNMP agent you want to communicate with. (SNMPv3 authentication and encryption keys are generated based on the associated passwords and the engine ID.) This field is optional.
- Context Name. A context is a mechanism within SNMPv3 (and AgentX) that allows you to use parallel versions of the same MIB objects. For example, one version of a MIB might be associated with SNMP Version 2 and another version of the same MIB might be associated with SNMP Version 3. For SNMP Version 3, specify the context name in this field. This field is optional.
- Privacy Protocol. The privacy service encryption and decryption algorithm. This field is required. Choices are:
- DES. This is the default value.
- AES-128
- AES-192
- AES-256
- AES-256-C. This option is for discovering Cisco devices only.
- Privacy Protocol Passphrase. Privacy password for the credential. This field is optional.
- Click the button to save the new SNMP credential.
- Repeat steps 1-4 for each SNMP-enabled device in your network that you want to monitor with Skylar One.
NOTE: When you define an SNMP Credential, Skylar One automatically aligns the credential with all organizations of which you are a member.
Defining a Database Credential in the Classic Skylar One User Interface
Database Credentials allow Skylar One to access data on a database on a managed device. Skylar One uses database credentials when collecting data for Database Dynamic Applications.
To define a database credential:
- Collect the information you need to create each credential (usually username and password).
- Go to the Credential Management page (System > Manage > Credentials).
- In the Credential Management page, click the menu. Select Create Database Credential.
- The Credential Editor modal page appears. In this page, you can define the new database credential. To define the new credential, supply values in the following fields:
Basic Settings
- Profile Name. Name of the credential. Can be any combination of alphanumeric characters. This field is required.
- DB Type. Type of database that will be accessed with the credential. Select from a list of databases supported by Skylar One. This field is required.
For information about monitoring Informix databases, see the Monitoring Informix Databases section.
- DB Name. Name of the database that will be accessed with the credential.
- DB User. Username associated with a valid account on the database.
- Password. Password associated with a valid account on the database.
- Hostname/IP. Hostname or IP address where the database resides. This field is required.
- You can an include the variable %D in this field. Skylar One will replace the variable with the IP address of the current device (device that is currently using the credential).
- You can include the variable %N in this field. Skylar One will replace the variable with the hostname of the current device (device that is currently using the credential). If Skylar One cannot determine the hostname, Skylar One will replace the variable with the primary management IP address for the current device.
NOTE: To use the localhost, in the Hostname/IP field, enter the IP address 127.0.0.1. The credential will not work if you enter the string localhost in the Hostname/IP field.
- Port. Port number associated with the database you want to access with this credential. This field is required.
- For DB Type of MySQL, the default value is 3306.
- For DB Type of MS SQL Server, the default value is 1433.
- For DB Type of Oracle and SQLNet, the default value is 1521.
- For DB Type of PostgreSQL, the default value is 5432.
- For DB Type of IBM DB2, the default value is 523.
- For DB Type of Sybase ASE, the default value is 4100.
- For DB Type of Informix, see the 9088 section.
- For DB Type of Ingress, the default value is 1572.
Skylar One's Database Servers include a MySQL database running on port 7706. Data Collectors and Message Collectors include a MySQL database running on port 7707.
Oracle Settings
These fields appear if you selected Oracle & *SQLNet in the DB Type field. Otherwise, these fields are grayed out.
- Oracle Connect Type. Specifies the method Skylar One should use to connect to the Oracle database. The choices are:
- Oracle System Identifier (SID)
- Oracle Real Application Clusters (SERVICE)
- Oracle Server Direct Connection (SERVER)
In Oracle 11g, the "Oracle Server Direct Connection" option is deprecated. If you select this Oracle Connect Type for an Oracle 11g database, you must edit the file listener.ora and add the line "DEFAULT_SERVICE_LISTENER=<SID>", where <SID> is the SID value.
- SID (if required). Enter the value for the Oracle Connect Type (either Oracle SID, Oracle RAC, or Oracle Server) selected in the Oracle Connect Type field.
- Click the button to save the new database credential.
- Repeat steps 1-5 for each database credential in your network.
When you define a Database Credential, the credential will automatically be aligned with the organization(s) you are a member of. To learn more about credentials and organizations, see Aligning One or More Organizations with a Credential.
Defining a SOAP/XML Host Credential in the Classic Skylar One User Interface
SOAP/XML credentials allow Skylar One to access a web server on a managed device. SOAP/XML credentials are used in several places in Skylar One, including:
- With Dynamic Applications of type "SOAP".
- With Dynamic Applications of type "XML".
- With Dynamic Applications of type "XSLT".
- With Dynamic Applications of type "snippet". The snippet code must define the authentication protocol. Dynamic Applications of type "snippet" can use any type of credential.
To define a SOAP/XML credential:
- Collect the information you need to create each credential (usually username and password).
- Go to the Credential Management page (System > Manage > Credentials).
- In the Credential Management page, click the menu. Select Create SOAP/XML Host Credential.
- The Credential Editor modal page appears. In this page, you can define the new SOAP/XML credential. To define the new credential, supply values in the following fields:
Basic Settings
- Profile Name. Name of the credential. Can be any combination of alphanumeric characters. This field is required.
- Content Encoding. Tells the SOAP server or XML data-store how the content is encoded, so the SOAP server or XML data-store knows how to decode the message. Select the encoding that is appropriate for your request and response.
Method. HTTP method to use to exchange credential data from the managed device. Choices are GET or POST.
Typically, Dynamic Applications of type "XML" use GET methods. Dynamic Applications of type "SOAP" and of type "XSLT" use POST methods.
- HTTP Version. Version of HTTP to use. Choices are 1.0 or 1.1.
- URL. Address of the SOAP server, HTML document, or XML document. This field is required and should be of the format:
https://IP address:port/full path to desired SOAP, HTML, or XML document
You can include the variable %D in this field. Skylar One will replace the variable with the IP address of the current device (device that is currently using the credential).
For component devices, Skylar One will replace %D with the IP address of the root device.
- You can include the variable %N in this field. Skylar One will replace the variable with the hostname of the current device (device that is currently using the credential). If Skylar One cannot determine the hostname, Skylar One will replace the variable with the primary management IP address for the current device.
- HTTP Auth User. Username with which to log in to the web server.
- HTTP Auth Password. Password with which to access the web server.
- Timeout (seconds). Time, in seconds, after which Skylar One will stop trying to communicate with the web server.
Proxy Settings
This pane displays optional fields. If you use a proxy server in front of the SOAP server(s) or XML data-store(s) you want to communicate with, enter values in these fields.
- Hostname/IP. The host name or IP address of the proxy server.
- Port. Port on the proxy server to which you will connect.
- User. Username to use to access the proxy server.
- Password. Password to use to access the proxy server.
cURL Options
- You can include the cURL command and various options in your credential. The list of cURL options lists all the options you can include in your credential. To include a cURL option in the credential, select it and then select the right-arrow icon. You can then supply arguments in the field to the left of the option.
- For more information on cURL commands, see the cURL manpage at http://curl.haxx.se/docs/manpage.html.
SOAP Options
These fields are optional. When a SOAP/XML credential is aligned with a SOAP or XSLT Dynamic Application, the requests defined in the Dynamic Application can use the values defined in these fields. To use a value defined in one of these fields, the request must include the substitution character associated with that value. For example, suppose a Dynamic Application request includes the XML tag <high_value=%1>. Suppose you specified "100" in the Embed Value [%1] field in the credential aligned with that Dynamic Application. The request will be sent with the XML tag <high_value=100>.
- Embedded Password [%P]. Specifies a password value to include in a request. The value defined in this field is substituted in to the %P substitution character. The value will be encrypted in the request, will be masked in the Credential Editor, and will be stored in an encrypted form in the database.
- Embed Value %1. The value defined in this field is substituted in to the %1 substitution character.
- Embed Value %2. The value defined in this field is substituted in to the %2 substitution character.
- Embed Value %3. The value defined in this field is substituted in to the %3 substitution character.
- Embed Value %4. The value defined in this field is substituted in to the %4 substitution character.
HTTP Headers
- If you require custom HTTP headers to communicate with the SOAP server, you can build the custom header here.
- Click the button to save the new SOAP/XML credential.
- Repeat steps 1-5 for each SOAP/XML credential in your network.
When you define a SOAP/XML Credential, the credential will automatically be aligned with the organization(s) you are a member of. To learn more about credentials and organizations, see Aligning One or More Organizations with a Credential.
Defining an LDAP/AD Credential in the Classic Skylar One User Interface
LDAP or Active Directory credentials allow Skylar One to access data on an LDAP server or an Active Directory server.
Authentication is the method by which Skylar One determines if a user can access the Skylar One system. For user accounts that are to be authenticated with LDAP or Active Directory, Skylar One uses the LDAP or Active Directory credential to establish communication with the LDAP or Active Directory server. Skylar One will then query the Active Directory or the LDAP server to determine if the username and password are legitimate and accurate.
Additionally, Skylar One can automatically create accounts for one or more LDAP or Active Directory users. Skylar One uses the LDAP or Active Directory credential to communicate with Active Directory or the LDAP server and:
- Determine if the username and password are legitimate and accurate.
- Gather information to populate fields in the user's automatically-created account.
To define an LDAP/AD credential:
- Collect the information you need to create each credential (usually username and password).
- Go to the Credential Management page (System > Manage > Credentials).
- In the Credential Management page, click the menu. Select Create LDAP/AD Credential.
- The Credential Editor modal page appears. In this page, you can define the new LDAP/AD Credential. To define the new credential, supply values in the following fields:
Basic Settings
- Profile Name. Name of the credential. Can be any combination of alphanumeric characters. This field is required.
- LDAP Type. Specifies the "flavor" or LDAP running on the directory server. Choices are LDAP or Active Directory.
- Hostname/IP. Hostname or IP address of the LDAP or Active Directory server. This field is required.
- Port. Port number on the LDAP or Active Directory server to which Skylar One will send requests. This field is required.
- Secure. Specifies whether you are using LDAP over SSL.
- RDN (Bind DN / bind user). Bind DN. The bind DN is a user on the LDAP or Active Directory server who is permitted to search the directory within the specified search base.
- In many LDAP or AD configurations, each user has read-access to his/her own account. Therefore, you might find it most useful to include the %u variable in this field. When an LDAP or AD user logs in to Skylar One, Skylar One stores the username in the %u variable. Skylar One then uses the %u variable to build the bind DN, uses the bind DN to communicate with the LDAP or AD server, and then authenticates the current user.
- An example entry in the RDN field might be:
uid=%u, ou=People, dc=sciencelogic, dc=com
This creates a DN using the current login name as the uid.
- You can also include the %d variable in this field. The %d variable represents the name of the LDAP domain, as specified in the LDAP Domain field.
If you have configured Skylar One to automatically create accounts when a user logs in with an LDAP/AD username, you must include the %u variable in the RDN field.
- LDAP Domain. If your LDAP or Active Directory configuration includes multiple domains, specify the domain components to bind to in this field. For example, you could specify:
dc=reston, dc=sciencelogic, dc=com.
This would bind to the sub-domain "reston", in the domain "sciencelogic", in the domain "com".
- Bind Password. Password that allows access to the LDAP or Active Directory server. In most cases, when you specify a bind password in a credential, you are creating a "write" credential (that is, a credential that allows Skylar One to make changes to the LDAP or AD server).
- User Search Base. In this field, you specify the area in the directory where users to be authenticated reside, using RDN notation. For example, if you want to authenticate five users from the ou called "people", you could specify the RDN that includes that ou.
ou=People, dc=sciencelogic, dc=com.
This would allow Skylar One to authenticate users in the ou called "people." In the User Search Scope field, you can specify whether Skylar One should also authenticate all users in any ou underneath "people".
- User Search Scope. In this field, you specify whether Skylar One should search only the directory specified in User Search Base or whether Skylar One should search the directory specified in User Search Base and all its child branches. Choice are:
- Subtree. Skylar One should search the directory specified in User Search Base and also search all its child branches.
- One Level. Skylar One should search only the directory specified in User Search Base.
- Click the button to save the new LDAP/AD credential.
- Repeat steps 1-5 for each LDAP/AD credential in your network.
When you define an LDAP/AD Credential, the credential will automatically be aligned with the organization(s) you are a member of. To learn more about credentials and organizations, see the section Aligning One or More Organizations with a Credential.
Defining a Basic/Snippet Credential in the Classic Skylar One User Interface
Dynamic Applications of type "snippet" are not required to use only the Basic/Snippet Credential. In Dynamic Applications of type "snippet", the snippet code must define the authentication protocol. Therefore, Dynamic Applications of type "snippet" can use any type of credential.
Basic/Snippet credentials define standard authentication parameters, but are not tied to a specific authentication protocol. Basic/Snippet credentials are used in several places in Skylar One, including:
- With Dynamic Applications of type "snippet". The snippet code must define the authentication protocol.
- With Dynamic Applications of type "WMI" . The authentication protocol is specific to WMI and is specified by Skylar One when the Dynamic Application is executed. To access WMI information on a Windows server, ensure that the Username you specify is allowed access to the server and to the WMI namespace.
- With Dynamic Applications of type "PowerShell". For information about configuring your environment for PowerShell collection, see the
- When defining external backups. The authentication protocol is defined in the Backup Management page (System > Settings > Backup).
To define a Basic/Snippet credential:
- Collect the information you need to create each credential (usually username and password).
- Go to the Credential Management page (System > Manage > Credentials).
- In the Credential Management page, click the menu. Select Create Basic/Snippet Credential.
- The Credential Editor modal page appears. In this page, you can define the new Basic/Snippet credential. To define the new credential, supply values in the following fields:
- Credential Name. Name of the credential. Can be any combination of alphanumeric characters. This field is required.
- Hostname/IP. Hostname or IP address of the device from which you want to retrieve data. This field is required.
- You can include the variable %D in this field. Skylar One will replace the variable with the IP address of the current device (device that is currently using the credential).
- You can include the variable %N in this field. Skylar One will replace the variable with the hostname of the current device (device that is currently using the credential). If Skylar One cannot determine the hostname, Skylar One will replace the variable with the primary management IP address for the current device.
- Port. Port number associated with the data you want to retrieve. This field is required.
- Timeout (ms). Time, in milliseconds, after which Skylar One will stop trying to communicate with the authenticating server.
- Username. Username for a user account on the device.
- Password. Password for a user account on the device.
- Click the button to save the new Basic/Snippet credential.
- Repeat steps 1-5 for each Basic/Snippet credential in your network.
When you define a Basic/Snippet credential, the credential will automatically be aligned with the organization(s) you are a member of. To learn more about credentials and organizations, see the section Aligning One or More Organizations with a Credential.
Defining an SSH/Key Credential in the Classic Skylar One User Interface
Secure Shell (SSH) is a network protocol that enables users to securely access a command-line shell on a remote computer or server over an unsecured network. SSH provides strong encryption and authentication capabilities, making it an ideal method for securely administering commands or transferring data between a client and server.
To make SSH even more secure, you can use SSH keys instead of a simple password to log into a server. SSH keys consist of two long strings of characters, called a public/private key pair, that are much less susceptible than passwords are to brute force attacks. The public key is placed on the server you want to access, while the private key resides on the client. When you use SSH to log into the server from the client, the key pair is used to authenticate the session.
In Skylar One, some Dynamic Applications of type "Snippet" use SSH to communicate with a remote device. To use these Dynamic Applications, you must define an SSH credential. This credential specifies the hostname or IP address of the system you want to monitor, the port number used to access that system, and the private key used for authentication.
Consult the documentation associated with the PowerPack that contains the Dynamic Application of type "Snippet" to find detailed directions on configuring the remote device and generating a private key for Skylar One to use.
To define an SSH/Key credential:
- Collect the information you need to create each credential (usually username and password).
- Go to the Credential Management page (System > Manage > Credentials).
- In the Credential Management page, click the menu. Select Create SSH/Key Credential.
- The Credential Editor modal page appears. In this page, you can define the new SSH/Key credential. To define the new credential, supply values in the following fields:
- Credential Name. Name of the credential. Can be any combination of alphanumeric characters. This field is required.
- Hostname/IP. Hostname or IP address of the device from which you want to retrieve data. This field is required.
- You can include the variable %D in this field. Skylar One will replace the variable with the IP address of the current device (device that is currently using the credential).
- You can include the variable %N in this field. Skylar One will replace the variable with hostname of the current device (device that is currently using the credential). If Skylar One cannot determine the hostname, Skylar One will replace the variable with the primary, management IP address for the current device.
- Port. Port number associated with the data you want to retrieve. This field is required.
The default TCP port for SSH servers is 22.
- Timeout (ms). Time, in milliseconds, after which Skylar One will stop trying to communicate with the authenticating server.
- Username. Username for an SSH or user account on the device to be monitored.
- Password. Password for an SSH user account on the device to be monitored.
- Private Key (PEM Format). Enter the SSH private key that you want Skylar One to use, in PEM format.
The private key can have a maximum of 64 characters per line. Therefore, you cannot use keys in the OpenSSH format, because that format uses 70 characters per line. When you attempt to save the credential, Skylar One will validate that the private key entered is in the correct format. You will be able to save the credential only if the private key is correctly formatted.
- Click the button to save the new SSH/Key credential.
- Repeat steps 1-5 for each SSH/Key credential in your network.
When you define a SSH/Key credential, the credential will automatically be aligned with the organization(s) you are a member of. To learn more about credentials and organizations, see the section Aligning One or More Organizations with a Credential.
Defining a PowerShell Credential in the Classic Skylar One User Interface
Dynamic Applications can include PowerShell commands that collect data from Windows devices. If you want to use Skylar One's built-in transport agent (that is, run "agentless" on the Windows device), you can align a PowerShell credential with those Dynamic Applications.
To define a PowerShell credential in the classic Skylar One user interface:
- Collect the information you need to create the credential:
- The username and password for a user on the Windows device.
- If the user is an Active Directory account, the hostname or IP address of the Active Directory server and the domain.
- Determine if an encrypted connection should be used.
- If you are using a Windows Management Proxy, the hostname or IP address of the proxy server.
- Go to the Credential Management page (System > Manage > Credentials).
- In the Credential Management page, click the menu. Select Create PowerShell Credential.
- The Credential Editor page appears, where you can define the following fields:
- Profile Name. Name of the credential. Can be any combination of alphanumeric characters. This field is required.
- Hostname/IP. Hostname or IP address of the device from which you want to retrieve data. This field is required.
- You can include the variable %D in this field. Skylar One will replace the variable with the IP address of the device that is currently using the credential.
- You can include the variable %N in this field. Skylar One will replace the variable with the hostname of the device that is currently using the credential. If Skylar One cannot determine the hostname, Skylar One will replace the variable with the primary, management IP address for the current device.
- You can include the prefix HOST or WSMAN before the variable %D in this field if the device you want to monitor uses a service principal name (for example, "HOST://%D" or "WSMAN://%D"). Skylar One will use the WinRM service HOST or WSMan instead of HTTP and replace the variable with the IP address of the device that is currently using the credential.
- Username. Type the username for an account on the Windows device to be monitored or on the proxy server. This field is required.
NOTE: The user should not include the domain name prefix in the username for Active Directory accounts. For example, use "em7admin" instead of "MSDOMAIN\em7admin".
- Encrypted. Select whether Skylar One will communicate with the device using an encrypted connection. Choices are:
- yes. When communicating with the Windows server, Skylar One will use a local user account with authentication of type "Basic Auth". You must then use HTTPS and can use a Microsoft Certificate or a self-signed certificate.
- no. When communicating with the Windows server, Skylar One will not encrypt the connection.
- Port. Type the port number used by the WinRM service on the Windows device. This field is automatically populated with the default port based on the value you selected in the Encrypted field. This field is required.
- Account Type. Type of authentication for the username and password in this credential. Choices are:
- Active Directory. On the Windows device, Active Directory will authenticate the username and password in this credential.
- Local. Local security on the Windows device will authenticate the username and password in this credential.
- Timeout (ms). Type the time, in milliseconds, after which Skylar One will stop trying to collect data from the authenticating server. For collection to be successful, Skylar One must connect to the authenticating server, execute the PowerShell command, and receive a response within the amount of time specified in this field.
- Password. Type the password for the account on the Windows device to be monitored or on the proxy server. This field is required.
- PowerShell Proxy Hostname/IP. If you use a proxy server in front of the Windows devices you want to communicate with, type the fully-qualified domain name or the IP address of the proxy server in this field.
- Active Directory Hostname/IP. If you selected Active Directory in the Account Type field, type the hostname or IP address of the Active Directory server that will authenticate the credential.
- Domain. If you selected Active Directory in the Account Type field, type the domain where the monitored Windows device resides.
- To save the credential, click the button. To clear the values you set, click the button.
Specifying Credentials During Initial Classic Discovery
Discovery is the process by which Skylar One discovers what types of hardware and applications exist on the network and then retrieves data from the discovered hardware and applications.
Before running discovery, you must:
- Determine the SNMP credentials for the devices and applications in your network. Define correlating credentials in Skylar One, to allow discovery to retrieve as much information as possible.
- If you want Skylar One to immediately start collecting data from devices using Dynamic Applications, you should also define any additional credentials required for those Dynamic Applications. For example, if you want Skylar One to immediately start monitoring all MySQL databases in your network, you should define credentials that allow Skylar One to communicate with each MySQL database in your network. During discovery, Skylar One will determine which devices can be monitored with a Dynamic Application for MySQL. After discovery, Skylar One will use the database credential to collect data about each MySQL database in your network.
Use the previous sections to define credentials for your network.
When you run discovery, you must specify one or more of these credentials to use. The more credentials you align with a discovery session, the more access Skylar One will have to devices and their data during discovery.
To specify credentials during initial discovery:
- Go to the Discovery Control Panel page (System > Manage > Classic Discovery).
- In the Discovery Control Panel page, click the button.
- In the Discovery Session Editor page, supply values in each field.
- In the SNMP Credentials field and in the Other Credentials field, you can select one or more credentials to use during discovery. In these fields, you should see a list of all credentials in Skylar One.
- When trying to communicate with discovered hardware and applications, Skylar One will look at the list of selected credentials and use the appropriate credential to get permission to access data on the external system.
During discovery, Skylar One tries each SNMP credential specified in the discovery session on each discovered device, to determine if Skylar One can collect SNMP details from the device. Later in the discovery session, during alignment of Dynamic Applications, discovery again tries each SNMP credential specified in the discovery session. If one of the SNMP credentials times out three times without any response, discovery will stop trying to use that SNMP credential to align SNMP Dynamic Applications. Note that "no response" means that a device did not respond at all. Note that if a device reports that "no OID was found" or "the end of the OID tree was reached", these are considered a legitimate response and would not cause Skylar One to abandon the credential.
Defining the Primary and Secondary Credentials for a Single Device in the Classic Skylar One User Interface
You can define multiple credentials for a single device. This allows Skylar One to align multiple agents and applications for a single device. For example, Skylar One might use an SNMP credential to discover hardware information about a device and a database credential to retrieve information about the database on the same device.
To define primary and secondary credentials for a single device:
When defining primary and secondary credentials for a device, you will see only the credentials aligned to organizations you are a member of. If a primary or secondary credential has already been defined on the device, and is aligned to an organization you are not a member of, the credential will be restricted.
- Go to the Device Manager page (Devices > Classic Devices, or Registry > Devices > Device Manager in the classic user interface).
- In the Device Manager page, find the device you want to edit. Click its wrench icon (
 ). The Device Properties page is displayed.
 - In the Device Properties page, you can select two SNMP credentials in the fields SNMP Read and SNMP Write.
- To select a second credential (either of type SNMP or of another type), click the [Actions] menu. Select Secondary Credentials.
- The Secondary Credentials modal page appears. In the Secondary Credentials modal page, you can select one or more credentials to associate with the device. To add a secondary credential to a device, highlight an entry in the list of credentials. To select multiple credentials, hold down the <CTRL> key and select the entries by left-clicking with your mouse.
- During discovery (either nightly, manual, or associated with device policies), Skylar One will first try the primary credentials for the device and then will try the secondary credentials.
- Click the button to save the change to the device.
Defining the Credentials for a Specific Device/Dynamic Application Pair in the Classic Skylar One User Interface
After a device has been discovered by Skylar One and one or more Dynamic Applications have been aligned with the device, you can manually assign the credential to use for each Dynamic Application.
The manually assigned credential will be used by Skylar One only for this specific Dynamic Application associated with this specific device. For all other devices, Skylar One will use the default credential associated with each device, or will use the credential defined in the Dynamic Application Collections page for each device.
To manually associate a credential with a Dynamic Application aligned to a device:
- Go to the Device Manager page (Devices > Classic Devices, or Registry > Devices > Device Manager in the classic user interface).
- In the Device Manager page, find the device for which you want to define a credential. Click its wrench icon ().
- In the Device Administration panel, click the tab.
- In the Dynamic Application Collections page, find the Dynamic Application you want to define a credential for. Select its checkbox. To apply a credential to multiple Dynamic Applications, select the checkbox for each Dynamic Application.
- From the Select Action drop-down list, select the credential from the list of all credentials that you are allowed to use, and then click the [Go] button.
- The selected Dynamic Applications will now use the manually selected credential when collecting data from this device. You should see your change reflected in the Credential column in the Dynamic Application Collections page.
Your organization membership(s) might affect the list of credentials you can see in the Select Action drop-down list.
If this Dynamic Application has already been aligned with a credential to which you do not have access, the Credential column will display the value Restricted Credential. If you align the Dynamic Application with a different credential, you will not be able to re-align the device with the Restricted Credential.
Specifying Credentials in a Device Template in the Classic Skylar One User Interface
You can specify the primary SNMP credentials in a device template. Then, when you use the device template to create a new device or when you apply the device template to a device group, the primary credentials are automatically applied to each device and appear in the Device Properties page, in the SNMP Read field.
If you include a device template during discovery or re-discovery, Skylar One will discover devices first and then apply the device template to each discovered device. During discovery, Skylar One automatically assigns a default SNMP credential to each discovered device (that is not a pingable device) and then applies the device template.
If you include a primary SNMP credential in a device template and then apply that device template during discovery, you might overwrite the default SNMP credential assigned by Skylar One. In some cases, this could prevent Skylar One from communicating further with the device.
How Skylar One Uses Credentials During Classic Discovery
During initial discovery, nightly discovery, discovery associated with device policies, and any manually triggered discovery, Skylar One uses credentials in the following order:
- For devices that have not yet been discovered, Skylar One uses the credentials supplied in the Discovery Session Editor page to collect both SNMP data and Dynamic Application data.
- For devices that have already been discovered at least once, Skylar One uses the SNMP credentials specified in the Device Properties page.
- For devices that have already been discovered at least once, Skylar One uses the secondary credentials defined in the Device Properties page if the primary credentials don't work.
- For devices that have already been discovered at least once, Skylar One will use the credentials defined in the Dynamic Application Collections page for specific Dynamic Applications.
Aligning One or More Organizations With a Credential in the Classic Skylar One User Interface
To support multi-tenancy, Skylar One allows you to align each credential with one, multiple or all organizations in Skylar One. You can also align a credential with no organizations.
When you align an organization with a credential, you control who can view details about the credential, who can view the name of the credential, and who can apply the credential in Skylar One.
NOTE: When you align an organization with a credential, you are restricting only the users who can view and assign the credential. You are not restricting the devices and actions that can be associated with the credential. For example, you can align a credential only with the organization "Operations" but assign the credential to a device in the "Finance" organization.
If you have an account of type "User" and are a member of only one organization, the Organization column will not appear in the Credential Management page. The Credential Management page will display only credentials that are aligned with your organization.
Credentials that are aligned with an organization have the following behavior:
- For each credential that is aligned with an organization, only administrators and users who are members of the aligned organization will be able to see the credential in the Credential Management page.
- When aligning credentials to devices or Dynamic Applications, non-administrator users can view and align only those credentials that are assigned to organizations common to both the user and the device’s collector group, plus those credentials that are assigned to all organizations or otherwise required for that collector group.
- Users can change the organization setting of only those credentials that are not currently aligned to any devices.
- In Skylar One, in any field or column that displays the name of the credential, users who are not members of the aligned organization will not see the credential name. Instead, these users will see either a dash character (-) or the text "Restricted Credential".
- In Skylar One, in any list from which users can select a credential, users who are not members of the aligned organization will not see the credential as an entry in the list.
- In Skylar One, in any page where the credential has already been assigned, users who are not members of the aligned organization will see only the name "Restricted Credential".
- In Skylar One, in any page where the credential has already been assigned, users who are not members of the aligned organization can save the page and maintain the credential. The credential will still appear to that user as "Restricted Credential".
- In Skylar One, in any page where the credential has already been assigned, users who are not members of the aligned organization can change the credential to a credential aligned with their organization(s). However, those users cannot change the credential again and re-assign the "Restricted Credential". The entry for "Restricted Credential" is removed from the list of possible credentials.
To understand the behavior of a credential aligned with an organization, consider the following example:
- Suppose you have a user account of type "Administrator". Suppose you create an SNMP credential called "ops_cred". Suppose you align that credential with the organization "Operations".
- In the Credential Management page, only administrators and users who are members of the organization "Operations" will be able to see the credential "ops_cred" in Skylar One.
- In Skylar One, in any field or column that displays the name of the credential (for example, in the SNMP Credential column in the Device Manager page), users who are not members of the organization "Operations" will not see the "ops_cred" name displayed. Instead, these users will see either a dash character (-) or the text "Restricted Credential".
- In Skylar One, in any list from which users can select a credential (for example, in the SNMP Read field, in the Device Properties page), users who are not members of the organization "Operations" will not see the "ops_cred" credential as an entry in the field.
- In Skylar One, in any page where the credential "ops_cred" has already been assigned, users who are not members of the organization "Operations" will see only the name "Restricted Credential".
- In Skylar One, in any page where the credential "ops_cred" has already been assigned (for example, in the SNMP Read field, in the Device Properties page), users who are not members of the organization "Operations" can save the page and maintain the "ops_cred" credential. The credential will still appear to that user as "Restricted Credential".
- In Skylar One, in any page where the credential "ops_cred" has already been assigned, (for example, in the SNMP Read field, in the Device Properties page), users who are not members of the organization "Operations" can change the credential to a credential aligned with their organization. However, that user cannot change the credential again and re-assign the "Restricted Credential". The entry for "Restricted Credential" is removed from the list of possible credentials.
Default Organizations Aligned with a Credential
When you create a new credential, Skylar One automatically aligns the credential with all your organizations. For example:
Account Type | Organization(s) Aligned with the ScienceLogic Account | Default Organizations Aligned with Credential |
|---|---|---|
Administrator | All | All |
User | Primary Organization = NOC Additional Organization Memberships = All organizations | All |
User | Primary Organization = NOC Additional Organization Memberships = Sales | NOC, Sales |
| User | Primary Organization = NOC Additional Organization Memberships = None | NOC |
After you save the credential, you can edit the organization(s) aligned with the credential.
Editing the Organizations Aligned with a Credential
After a credential has been created, you change the default organizations aligned with a credential.
To edit the organization alignment on a credential:
- Go to the Credential Management page (System > Manage > Credentials).
- In the Credential Management page, find the credential for which you want to edit the organization. In the Organization column, click its organization icon (
 ).
). - The Align Organizations modal page appears. In this page, provide values in the following fields:
- Credential Availability. Specifies whether you want to align all organizations with the credentials or manually select one, multiple, or no organizations to align with the credential. Choices are:
- Aligned Organizations Only. Selecting this option will make the Aligned Organizations pane available. You can select one or multiple organizations to be aligned with the credential.
- System (All Organizations). This option is only available if you are a system administrator or a member of all organizations in Skylar One. All organizations will be aligned with the credential. If another organization is created, it will be aligned to the credential, by default.
NOTE: The Credential Availability field appears only for users who are Administrators and users who are members of all organizations.
- Aligned Organizations. Displays a list of all organizations to which you belong. Select one, multiple, or no organizations to align with the credential.
- To select a single organization, highlight it and left-click.
- To unselect a single organization, highlight it and left-click.
- To select multiple organizations, hold down the CTRL key and select the entries by left-clicking.
- To unselect multiple organizations, hold down the CTRL key and select the entries by left-clicking.
NOTE: Only users who are Administrators and users who are members of all organizations can unselect all organizations in the Aligned Organizations list.
- To save the new organization alignment, click the button.
Restricted Credentials in the Discovery Session Editor Page
The Discovery Session Editor page allows you to select multiple credentials to align with a discovery session.
In the SNMP Credentials field and the Other Credentials field, the Discovery Session Editor page might include credentials that have been aligned with one or more organizations. If one of these credentials has been previously selected, users who are not members of the aligned organization(s) will see "Restricted Credential" appear in the SNMP Credentials field or the Other Credentials field.
If multiple aligned credentials have been previously selected for a discovery session, users who are not members of the aligned organization(s) will see only a single "Restricted Credential entry appear in the SNMP Credentials field or the Other Credentials field. This single entry of Restricted Credential represents all restricted credentials. If a user who is not a member of the aligned organization(s) removes the entry Restricted Credential from the discovery session, all restricted credentials are removed. That user cannot change the credential again and re-assign Restricted Credential. The entry for Restricted Credential is removed from the list of possible credentials.
Editing a Credential in the Classic Skylar One User Interface
The Credential Management page allows you to edit credentials from Skylar One. To do so:
- Go to the Credential Management page (System > Manage > Credentials).
- In the Credential Management page, click the wrench icon () for the credential you want to edit.
- The Credential Editor modal appears.
- After editing the fields in the Credential Editor, click the button. If you want to save your changes as a new credential, click the button.
Deleting a Credential in the Classic Skylar One User Interface
The Credential Management page allows you to delete one or more credentials from Skylar One. To do so:
You cannot delete a credential until all aligned devices, Dynamic Applications, backup settings, LDAP/AD settings, and discovery sessions that use the credential are aligned with another credential.
- Go to the Credential Management page (System > Manage > Credentials).
- In the Credential Management page, select the checkbox for each credential you want to delete.
- Go to the Select Actions menu (in the lower right). Select DELETE Credential Policy. Click the button.
- The selected credentials will be deleted.