
Skylar Advisor is an AI‑powered application within the Skylar AI ecosystem that provides proactive, tailored guidance based on real‑time data sent from your Skylar One system to Skylar AI. You can interact with Skylar Advisor by reviewing and following its proactive suggestions, called "Advisories." Additionally, you can query Skylar Advisor for advice and use it to perform deeper investigations of the issues and events in your environment.
For an overview of the Skylar AI platform, see Introduction to Skylar AI.
To view the latest release notes, see the Skylar AI Release Notes.
What is Skylar Advisor?
Skylar Advisor is an AI-powered application that offers tailored guidance based on real-time data sent to Skylar AI from Skylar One, which lets you make informed decisions quickly and efficiently.
What Skylar Advisor is not is a "chatbot" or "assistant" that you have to query to get answers. Skylar Advisor uses its gathered knowledge to give you the potential answers before you get around to typing a question. Skylar Advisor can also forecast for issues that might occur, and create requests for upgrades.
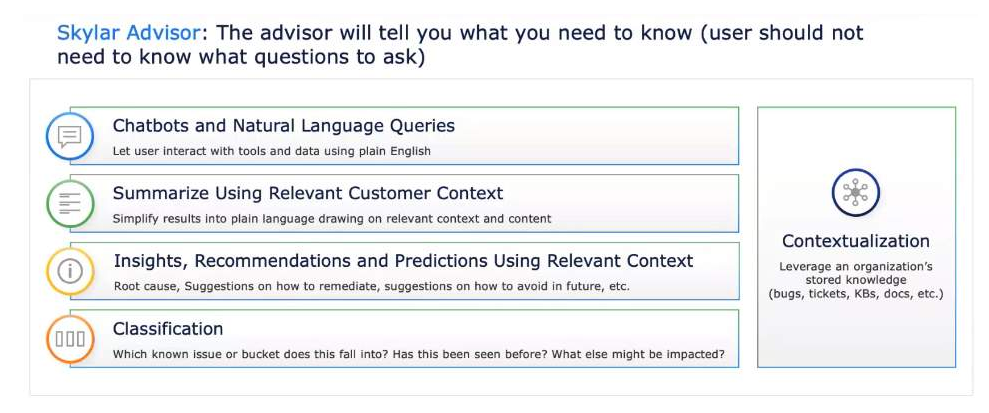
Similar to large-language models (LLMs) like ChatGPT or Microsoft Copilot, you can also use the Ask Skylar feature in Skylar Advisor to start a conversion with Skylar AI to get more information.
Logging In to the Skylar AI User Interface
If you know the URL of your Skylar AI system, you can go directly to that location. You can also access Skylar AI components from a link in Skylar One.
The login process might vary slightly, depending on the versions of Skylar AI, Skylar One, and the Skylar One AP2 user interface currently running in your environment.
To log in to Skylar AI from Skylar One:
-
From Skylar One, go to the Skylar AI page (
 ) and click the button for the Skylar AI component you want to use, such as Skylar Analytics or Skylar Advisor. If you are not currently logged in to Skylar AI, the Skylar AI sign-in page appears.
 -
If you need to log in to Skylar AI, type your email address and password and click . The Skylar AI landing page appears.
-
If your Skylar AI site requires multi-factor authentication, but you have not set it up, you will need to scan the QR code that displays or enter the "secret key". This is a one-time-only step.
-
Click the name of the Skylar AI component you want to use, such as Advisor, Analytics, or Skylar Settings.
The Skylar Advisor User Interface
The Skylar Advisor user interface includes the following main pages and features:
-
The Ask Skylar feature lets you query Skylar Advisor for customized guidance based on real-time data sent from Skylar One, which empowers you to make informed decisions quickly and efficiently. You interact with the Ask Skylar feature in much the same way as you would with ChatGPT, Claude, and other LLMs. For more information, see Using the Ask Skylar Feature.
-
The Dashboards page is the default page that displays when you open Skylar Advisor. This page contains a list of your work and all of your interactions with Skylar Advisor. This page also lets you work with events imported from Skylar One, organized by business service, device group, issue type, or organization. For more information, see Managing Activities on the Dashboards Page.
-
The tab on the Dashboards page lets you set up and schedule reports in Skylar Advisor. Available reports include "Corpus Health", "Handoff", "Business Services", "Trends", and "Spend Value". For more information, see Scheduling Reports for Skylar Advisor.
-
For more information about the process of moving from an unclaimed Advisory to a closed one, see Working with an Advisory.
-
If you are a NOC supervisor or shift lead holding Owner-level permissions, you can use Skylar Advisor to keep up with your team's work on Advisories. For more information, see Supervising with Skylar Advisor.
-
-
The Knowledge Center page lets you upload your own documents to the Corpus to train Skylar Advisor on your company's specific workflows, policies, and processes. For more information, see Managing Documents and Data on the Knowledge Center Page.
-
The Data Lens page lets you view details about the Skylar One events and event groups ("signals") that have been received by Skylar Advisor so that you can perform further investigations on them. For more information, see Managing Signals on the Data Lens Page.
-
The Preview Features page (
 > Account Settings > Preview Features) lets users toggle on and experiment with new features. For more information, see Experimenting with New Features on the Preview Features Page.
Use the following buttons and icons to help you navigate the Skylar Advisor user interface:
-
The Skylar AI menu (
) at top left gives you access to all of the Skylar Advisor pages, along with User Settings (your user information), Account Settings (information specific to this account), and the Persona page. The User Settings link takes you to the same Profile page that displays when you select Skylar Settings from the login page. -
Click the "Skylar" product icon at top left to return to the Skylar AI landing page, where you can switch between Skylar AI applications as needed.
-
If you have multiple instances of Skylar Advisor running, you can switch between those instances by clicking the drop-down next to Instance at the top right.
-
The user icon (
 ) at top right displays the email address and role for the current user in the user interface. You can click the button to sign out of this session.
 -
Most Skylar Advisor pages and tabs have a button at top right or a Help Center icon (
 ) in the small navigation bar on the left. The Help Center pane contains links to short videos that explain the latest features for this version of Skylar Advisor, and it also has a link to the Skylar AI product documentation site. The Help Center pane displays a yellow button for new content, and the smaller Help Center icon on the left also displays a small yellow circle for new content.
 -
If a page contains a list, the enter selection mode icon (
 ) adds check boxes to items in the list so that you can perform bulk actions to multiple items at once, such as bookmarking or archiving an item. Click the icon again to hide the check boxes.
 -
The notifications icon (
 ) at the bottom left of the window lets you view all your recent notifications related to activities and warnings for that page. You can click to delete all past reminders. When you move to another page or tab, the list of notifications is updated for the new page.
 -
The Versions link in the footer of any page displays the version numbers for Skylar Advisor and other applications. From the footer, you can also click links to view the Terms of Service and to view information about licenses and open-source packages.
Defining Your Persona Information
One of the first tasks you should work on when you get started with Skylar Advisor is to set up your Persona information on the Skylar Persona page ( > Persona).
Your persona information lets Skylar Advisor know what your role is in your company, the language you will use for interacting with Skylar Advisor, and how you want Skylar Advisor to structure your feedback, including the level of detail and the tone of the feedback.
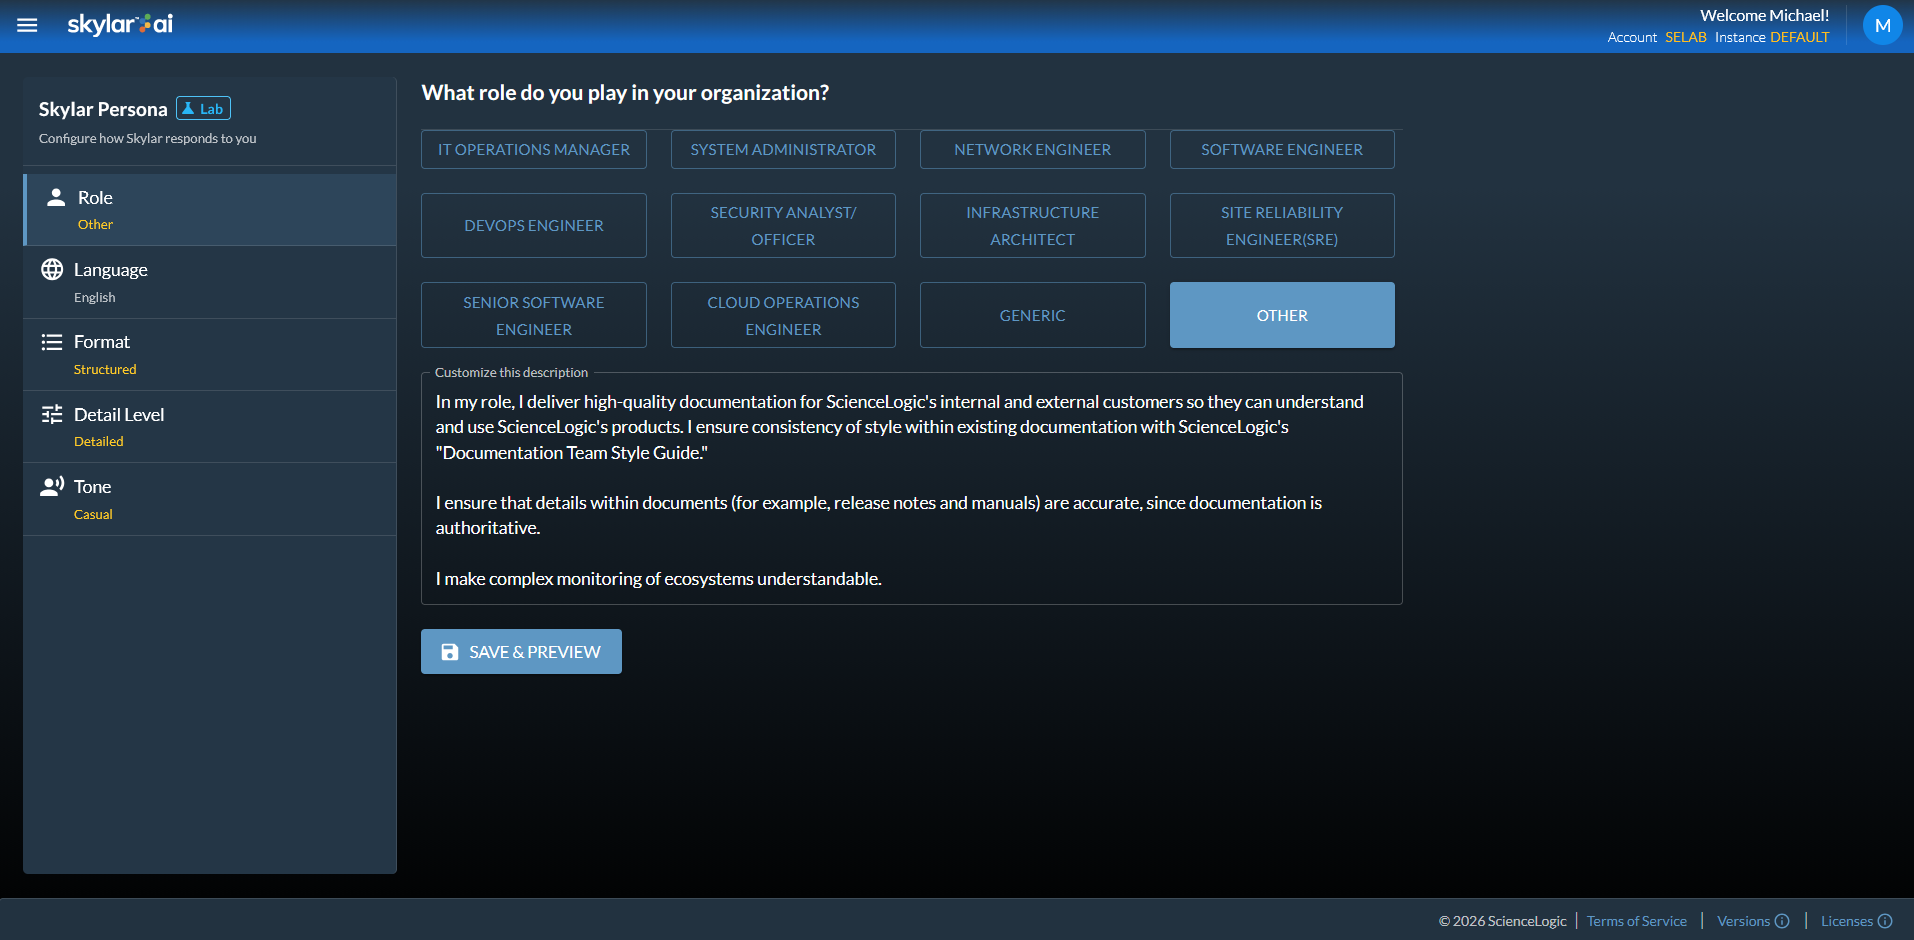
To define your Skylar Persona:
- Log in to Skylar Advisor and click the Skylar AI menu ().
- Click the button at bottom right. The Skylar Persona page appears:
- On the tab, select a role that best matches what you do. A basic description of your role appears in the Customize this description text box, which you can edit to better fit your role. If you do not find a good match, click .
- You can add more information about your role or edit the existing description in the Customize this description text box.
- Click . Based on your feedback on this tab, Skylar Advisor displays a sample response using your current settings. You can toggle between the and tabs to see the difference.
- On the tab, select a language for your responses from Skylar Advisor, and if needed, add more language information to the Customize Language Preference text box. Click to see a sample response based on your choice.
- On the tab, select how you want Skylar Advisor to format your responses. You can let Skylar Advisor choose the format for you, or have Skylar Advisor format responses in paragraph format or in a structured format like bulleted or numbered lists. Click to see a sample response based on your choice.
- On the tab, select the depth of detail you want for your responses. You can let Skylar Advisor choose the depth or granularity, or have Skylar Advisor give either detailed or brief responses. Click to see a sample response based on your choice.
- On the tab, select the tone, or how formal you want the responses to be. You can let Skylar Advisor choose the tone, or have Skylar Advisor give either more formal or casual responses. Click to see a sample response based on your choice.
- To return to the Skylar Advisor user interface, click the Skylar AI menu () and select the page you want from the Advisor section.
You can return to this page at any time to update your persona information if you are not satisfied with the responses you are currently getting from Skylar Advisor.